


WHAT TO DO IN THE FOLLOWING
CIRCUMSTANCES
Lost Keys
Use your spare key to have another
one made by an authorized Can-Am
roadster dealer as soon as possible.
If
both keys are lost
, the ignition switch
and the fuel cap will need to be re-
placed at the expense of the vehicle
owner.
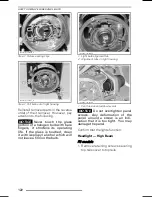
Flat Tire
If a tire has a
major
puncture or cut in
the tread and is completely deflated,
have the vehicle transported to the
nearest Can-Am Spyder dealer. Refer
to
TRANSPORTING THE VEHICLE
in
this section for transporting instruc-
tions.
If a tire has a
minor
nail or stone punc-
ture and is not completely deflated,
the tire can be temporarily repaired. To
temporarily repair a tire, a self-inflating
tire sealer or tire plug repair kit can
be used. Follow the manufacturer's
instructions that come with the tire
sealer or repair kit and have the tire
repaired or replaced by an authorized
Can-Am roadster dealer
as soon as
possible
.
When a tire is temporarily repaired,
ride slowly and carefully, and fre-
quently check tire pressure until it is
replaced or permanently repaired.
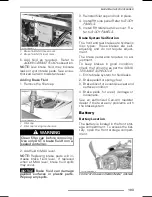
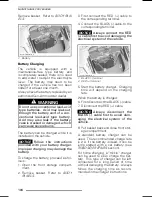
Dead Battery
If the battery is dead or too low to crank
the engine, it can be jump started.
WARNING
Connect the jumper cables as
specified in the jump start proce-
dure.
Batteries can emit explosive gas
that can ignite if jumper cables are
not properly connected.
To jump start the battery, proceed as
follows:
1. If using another vehicle to jump start
the battery, move the other vehi-
cle as close as possible and prefer-
ably to the front of the Spyder road-
ster. Make sure the vehicles are not
touching.
2. Shift the Spyder roadster into NEU-
TRAL (N) and engage the parking
brake.
NOTE:
If battery voltage is below 11 V,
parking brake cannot be activated.
3. Turn off the engine of the other vehi-
cle and all electrical accessories.
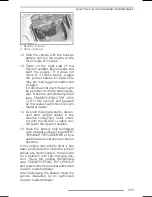
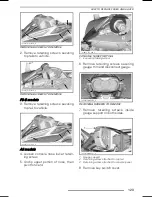
4. Open the hood of the other vehicle.
5. Open the front storage compart-
ment of the Spyder roadster.
6. Make sure the ignition switch is set
to OFF.
7. Remove basket. Refer to
BODY
PANELS
.
8. Connect one end of the RED (+)
jumper cable to the POSITIVE (+)
terminal of the Spyder roadster.
9. Connect the other end of the RED
(+) jumper cable to the POSITIVE (+)
terminal of the booster battery.
10. Connect one end of the BLACK (-)
jumper cable to the NEGATIVE (-)
terminal of the booster battery.
11. Connect the other end of the
BLACK (-) jumper cable to the
NEGATIVE (-) terminal of the
Spyder roadster.
116
______________
Summary of Contents for SPYDER F3TM 2016
Page 10: ...GENERAL PRECAUTIONS This page is intentionally blank 8 _______________ ...
Page 11: ...VEHICLE INFORMATION _______________ 9 ...
Page 39: ...SAFE OPERATING INSTRUCTIONS ______ SAFE OPERATING INSTRUCTIONS ______ 37 ...
Page 87: ...PRE RIDE INSPECTION _______________ 85 ...
Page 90: ...PRE RIDE CHECKLIST This page is intentionally blank 88 ______________ ...
Page 91: ...MAINTENANCE _______________ 89 ...
Page 113: ...ROAD SIDE REPAIRS ______________ 111 ...
Page 133: ...TECHNICAL INFORMATION ______________ 131 ...
Page 144: ...SPECIFICATIONS This page is intentionally blank 142 ______________ ...
Page 145: ...WARRANTY ______________ 143 ...
Page 160: ...This page is intentionally blank 158 ______________ ...
Page 161: ...CUSTOMER INFORMATION ______________ 159 ...
Page 164: ...CHANGE OF ADDRESS OWNERSHIP This page is intentionally blank 162 ______________ ...
Page 165: ...CHANGE OF ADDRESS OWNERSHIP ______________ 163 ...
Page 166: ...CHANGE OF ADDRESS OWNERSHIP This page is intentionally blank 164 ______________ ...
Page 167: ...CHANGE OF ADDRESS OWNERSHIP ______________ 165 ...
Page 168: ...CHANGE OF ADDRESS OWNERSHIP This page is intentionally blank 166 ______________ ...
Page 169: ...CHANGE OF ADDRESS OWNERSHIP NOTES ______________ 167 ...
Page 170: ...CHANGE OF ADDRESS OWNERSHIP NOTES 168 ______________ ...


