8
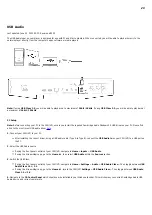
Rear Panel Connections
Last updated: June 30, 2022 02:21. Revision #4999
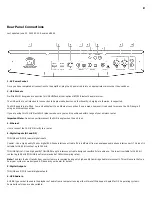
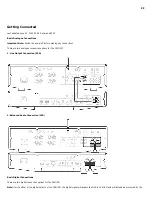
1. AC Power Socket
Once you have completed all connections to the amplifier, plug the AC power cable into an appropriate mains socket then switch on.
2. USB Sockets
Pre-fitted Wi-Fi dongle and connection for USB HD/flash disk or optional BT100 Bluetooth audio receiver.
The USB ports are not intended for connection to Apple mobile devices, no functionality, charging or otherwise, is supported.
The Wi-fi dongle is pre-fitted. Your unit will default to an Ethernet connection if one is made, however it is advised to remove the Wi-Fi dongle if
using an Ethernet connection.
If you are using this CXN (V2) with Wi-Fi please make sure your unit is positioned within range of your wireless router.
Important Note: Do not connect/disconnect the Wi-Fi dongle when the unit is on.
3. Ethernet
Use to connect the CXN (V2) directly to a router.
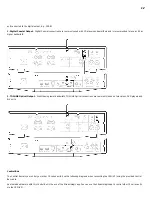
4. Digital Inputs (D1 and D2)
TOSLINK and S/P DIF coaxial digital inputs.
Coaxial – Use a high quality 75 ohm digital RCA Phono interconnect cable (This is different from an analogue audio phono interconnect). This input is
suitable for 16-24 bit content up to 192kHz.
TOSLINK Optical – Use a high quality TOSLINK fibre optic interconnect cable designed specifically for audio use. This input is suitable for 16-24 bit
content up to 96kHz (TOSLINK is not recommended at 192kHz sampling rates).
Note: To obtain the best results from your system we recommend using only high-quality Cambridge Audio interconnects. This will ensure that you
hear your system as we designed it. Please ask your dealer for details.
5. Digital Outputs
TOSLINK and S/P DIF coaxial digital outputs.
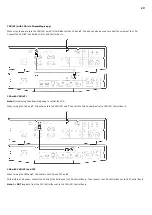
6. USB Audio In
A USB B type socket to enable the playback of audio from a computer running either Microsoft Windows or Apple Mac OS X operating systems.
Some builds of Linux are also suitable.


