background image

19

20

11 Commissioning

Commissioning must be carried out according to the regulations in force by qualified personnel. 
Check that the cold water supply pressures are within the operating limits of the device.
Check that the temperature of the hot drain water has a value complying with the regulations in force.

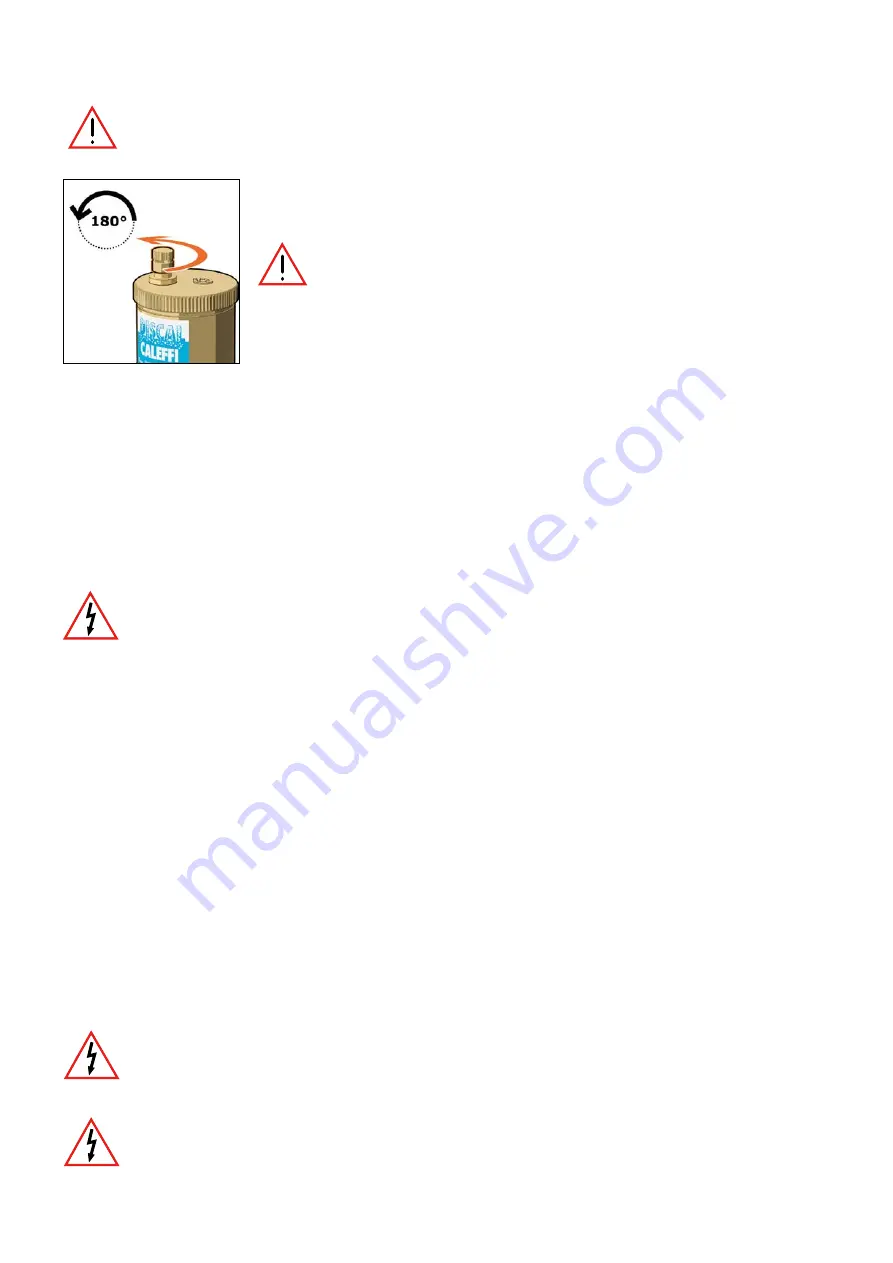
NOTE. To ensure the strainer correct operation, check that the air vent cap is sufficiently loose (1/2 turn from 
completely closed).

Attention

: the device performs a check during the filling phase from V2 at the end of the wash and 

if the drain cocks is left closed, an alarm is generated. The device checks the correct opening of the 
air vent to avoid injecting air into the system after each cleaning with filling from the domestic line.

For all information regarding the strainer digital regulator management, refer to the programming manual H0005275 

At the first start-up, a careful analysis must be carried out to check that there are no leaks and the assembly is correct: the filling must be carried out 
gradually in order to allow the correct expulsion of air by the vent valve. 
Once the seals have been checked, the device can be electrically supplied: once the system is electrically supplied, it performs a series of checking 
operations before starting the filtering function. After providing electric supply or after a reset, the system closes the inlet and drain valve and opens 
again the inlet valve after carrying out a filling operation: these steps allow to limit the amount of water in the system drained and return the system 
to the correct operating conditions.

Check that the pressure in the domestic water mains is in the strainer operating range (minimum 3 bar) to guarantee an effective cleaning of the 
filtering discs.

11.1 Filling and hydraulic test under pressure

Important! Do not supply electricity to the controller until it is indicated.

1.  Check that the inlet valve is in the open position and if necessary move it manually until it reaches the complete valve opening.

2.  Check that the drain valve is in the closed position and if necessary move it manually until it reaches the closed position.

3.  Check that the controller is not electrically supplied.

4.  Check that the air vent cap opens.

5.  Slowly open the shut-off valve upstream of the device inlet and pressurize the system.

6.  Wait for the device to fill.

7.  Check for leaks: if leaks or seepage are found, close the shut-off valve upstream of the device and correct the anomalies found. Now it is possible 

to wait until the qualified personnel arrive to make the electrical connections for the device electric supply.

8.  With pressurised device, power the controller: if it was previously electrically supplied or if an alarm was present, perform a "Device reset".

9.  After a few seconds the yellow light will turn on to indicate that the device is carrying out some operations (filling and internal checks).

10. Wait for the yellow light to go off: in the meantime it is still possible to access the internal device configuration menus to set the date and time 

and the type of cleaning to be performed.

11.2 First start-up

When the filtering system is started up for the first time, the "initial cleaning" function can be activated in the regulator menu. This function can be used 
to wash the system using the medium contained in the system. This avoids to drain large quantities of medium and avoids the need for complicated 
venting operations. When the set differential is reached, a washing cycle is immediately started. The system stops the initial cleaning function when the 

set time is reached or when the 

D

P is lower than the set one.


Depending on the type of installation it may be necessary to close the by-pass valve.

Check that the flow rates are compatible with the characteristics of the strainer and with other elements of the system

System stop procedure

Before turning off the regulator it is necessary to stop the flow of liquid to be filtered closing the system input motorised valve (V1). Turn 
off the electric supply to the regulator and manually close the inlet valve (V1).

System prolonged closing

If the system is closed, remove the electric supply to the regulator, manually close the inlet valve (V1).

Summary of Contents for DIRTMAGCLEAN

Page 1: ...agnetic dirt separator strainer Code 579000 USE AND MAINTENANCE MANUAL Copyright 2018 Caleffi H0006359 ORIGINAL INSTRUCTIONS DATE 01 07 2018 REVISION 00 Caleffi S p A S R 229 no 25 28010 Fontaneto d A...

Page 2: ...acking 11 8 2 Storage 11 8 3 Reception 11 8 4 Handling 12 8 5 Disposal of packaging 12 9 Installation 12 9 1 Hydraulic installation 13 9 2 Installation in by pass 13 9 3 Device reset 15 9 4 Electrical...

Page 3: ...facilitate consultation and better detail the topics the manual is divided into chapters Before carrying out any installation use or maintenance operation it is absolutely essential to read this manua...

Page 4: ...tion Manufacturer s company name and address CALEFFI S p A S R 229 N 25 I 28010 FONTANETO D AGOGNA NO Tel 39 03228491 info caleffi com www caleffi com Designation of the machine DIRTMAGCLEAN Art 57900...

Page 5: ...r mesh size 30 m Particle separation rating down to 2 m DHW inlet minimum dynamic pressure for 3 bar wash Motor noise 60 dB Volume of water drained during washing about 100 litres with p 3 bar Connect...

Page 6: ...appropriately arranged inside the body The specific filtering mesh allows the removal of impurities that are deposited on the external surface of the strainers The very selective mesh filters particl...

Page 7: ...y controlling the medium pressure drop between internal pressure and pressure detected after the filtering elements The choice of the type of operation is carried out by the regulator During the first...

Page 8: ...Italy 579 series Supply 230V ac 10 Power xxx VA PMAX 10 bar 1 MPa TMAX 90 C TMIN 5 C TROOM 5 50 C IP 42 H0004833 4 V1 M1 V3 V2 V2 Filling with system water Filling with mains water 4 4 Circuit filling...

Page 9: ...244 5 528 978 1028 1078 1128 360 450 500 550 600 IMPORTANT The product is already configured according to the specifications indicated in the technical documentation IS CASE OF NEED or for technical i...

Page 10: ...evice must be assembled on the boiler return with a suitably sized and calibrated bypass The drawing below shows the operator s stop zones for the machine operation and control Provide a passage area...

Page 11: ...oes work gloves hard hat goggles The movement must take place slowly under suitable lighting conditions with suitable free space in the installation area Important It is forbidden to handle the strain...

Page 12: ...ust be installed in a closed and dry place protected from atmospheric agents It must be positioned in a stable manner The floor must be solid and well levelled The installer must take care of the posi...

Page 13: ...oad the connections and the legs of the device and in way to guarantee a fixed position of the pipes also during installation and commissioning The device must be installed according to the diagrams g...

Page 14: ...nstall a hydraulic backflow preventer and a suitable strainer upstream of the strainer cleaning solenoid valve Limit as much as possible the length of the domestic pipes used for cleaning use water ha...

Page 15: ...tion suitable for the place of installation and suitable pipes or protection pipes 9 5 Cables wiring and positioning To access inside the controller use a flat screwdriver insert it into the side slot...

Page 16: ...OUT1 contact closed the 24V relay to be inserted separately removes electric supply from the pump B stopping it until the end of cleaning MAX10 IN1 OUT1 ALARM IN1 OUT1 ALARM 1 2 3 4 5 6 1 2 3 4 5 6 1...

Page 17: ...ee the controller operation chapter 10 1 Front panel Caleffi S p A S R 229 n 25 28010 Fontaneto d Agogna Italy Series 579 Supply 230V ac 10 Power 225VA TAMB 5 50 C IP 42 H0004833 1 2 3 1 4 5 6 7 8 www...

Page 18: ...ied out a forced cleaning cycle with a view to reducing as much as possible the use of the water in the network taking advantage of the tank emptying During the waiting phase it is possible to insert...

Page 19: ...ning 2 Check that the drain valve is in the closed position and if necessary move it manually until it reaches the closed position 3 Check that the controller is not electrically supplied 4 Check that...

Page 20: ...and the drain check the operation of the various parts by means of manual forcing Check the actuators and the motor and the sensors pressure reading Cables visual check Check that the electric supply...

Page 21: ...nt and health deriving from inappropriate disposal and enables the constituent materials to be recovered to obtain significant savings in energy and resources As a reminder of the need to dispose of e...

Page 22: ...lange spare part F0000956 17 1 4 gas nozzle with o ring spare part F0000957 15 Spare parts Consult the drawing of the spare parts with the relative table where the code and description of the individu...

Page 23: ...evice all necessary measures must be taken to ensure safety of the device and of all its parts This safety condition must be guaranteed until the device is put back into service and must take into con...

Page 24: ...24 LEAVE THIS MANUAL AS A REFERENCE GUIDE FOR THE USER DATE INTERVENTION 18 Table of interventions...

Reviews: