


Cadi.
Sense
User Manual
T-S1-800.900-I10-C01
7
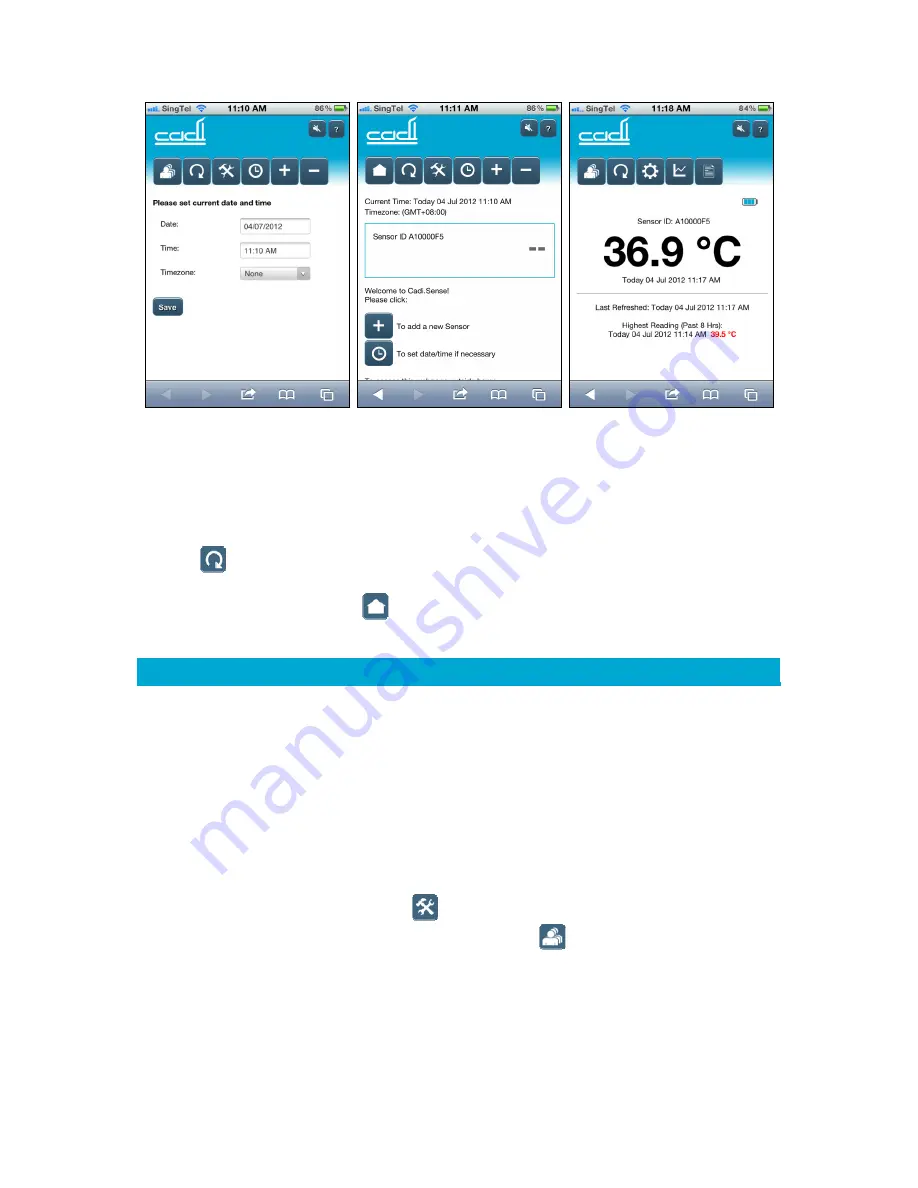
Figure 1.
Setting date, time, and
timezone.
Figure 2.
Main page
(sensor details).
Figure 3.
Home page
(temperature monitoring).
Note: After you have set the date, time, and timezone, Figure 2 will appear. The sensor ID
will be shown and the temperature will be displayed as “--” or “Lo”. If the sensor is still in its
storage case, the reading will be displayed as “--”. If the sensor has been taken out from
its storage case for more than 30 seconds, you may see “Lo” after clicking the “Refresh”
icon
. If you warm up the sensor by rubbing it in your hands for more than 1 minute
and then click the “Refresh” icon, you may see a numerical temperature value. If you
click the “Home page” icon
,
Figure 3 will appear.
2.3
Setup II – Setting up to access Cadi.Sense from outside your home
This setup enables you to connect your mobile device to the Internet, so that you can access
temperature readings from outside your home via the Internet.
Requirements:
1.
You must first complete Setup I in Section 2.2.
2.
You will need to have a WiFi router that is already set up and connected to the
Internet, and you will need to be physically at the place where your WiFi router is. You
will also need to know
your WiFi router’s SSID and password
. Check with your Internet
service provider if you do not remember the SSID and/or password.
Step 1:
Click the “Advanced Settings” icon
and Figure 4 will appear (if you cannot see the
“Advanced Settings” icon, click the “Main Page” icon
first). Click the “Connect to
WiFi Router” icon. When a screen (see Figure 5) appears and asks “Please select your WiFi
router”, look for your router’s SSID. If your router’s SSID does not show up on the screen,
click “Refresh” repeatedly until it appears. Then click your router’s SSID, type in your
router’s password, and then click “Apply”. Be patient as the SmartNode needs about 1
minute to connect to your WiFi router and about 1 minute to reboot.
Summary of Contents for Cadi.Sense
Page 1: ...Cadi Sense Wireless Thermometer User Manual v3 21 3 T S1 800 900 I10 C01...
Page 24: ...Cadi Sense User Manual T S1 800 900 I10 C01 24 3 2WIRE 2701HGV E 4 Linksys E2000...
Page 25: ...Cadi Sense User Manual T S1 800 900 I10 C01 25 5 Dlink DIR 655 6 ZyXel...
Page 26: ...Cadi Sense User Manual T S1 800 900 I10 C01 26 7 ASUS RTN16 8 EnGenius ESR9850...
Page 30: ...Cadi Sense User Manual T S1 800 900 I10 C01 30...


