


Cadi.
Sense
User Manual
T-S1-800.900-I10-C01
15
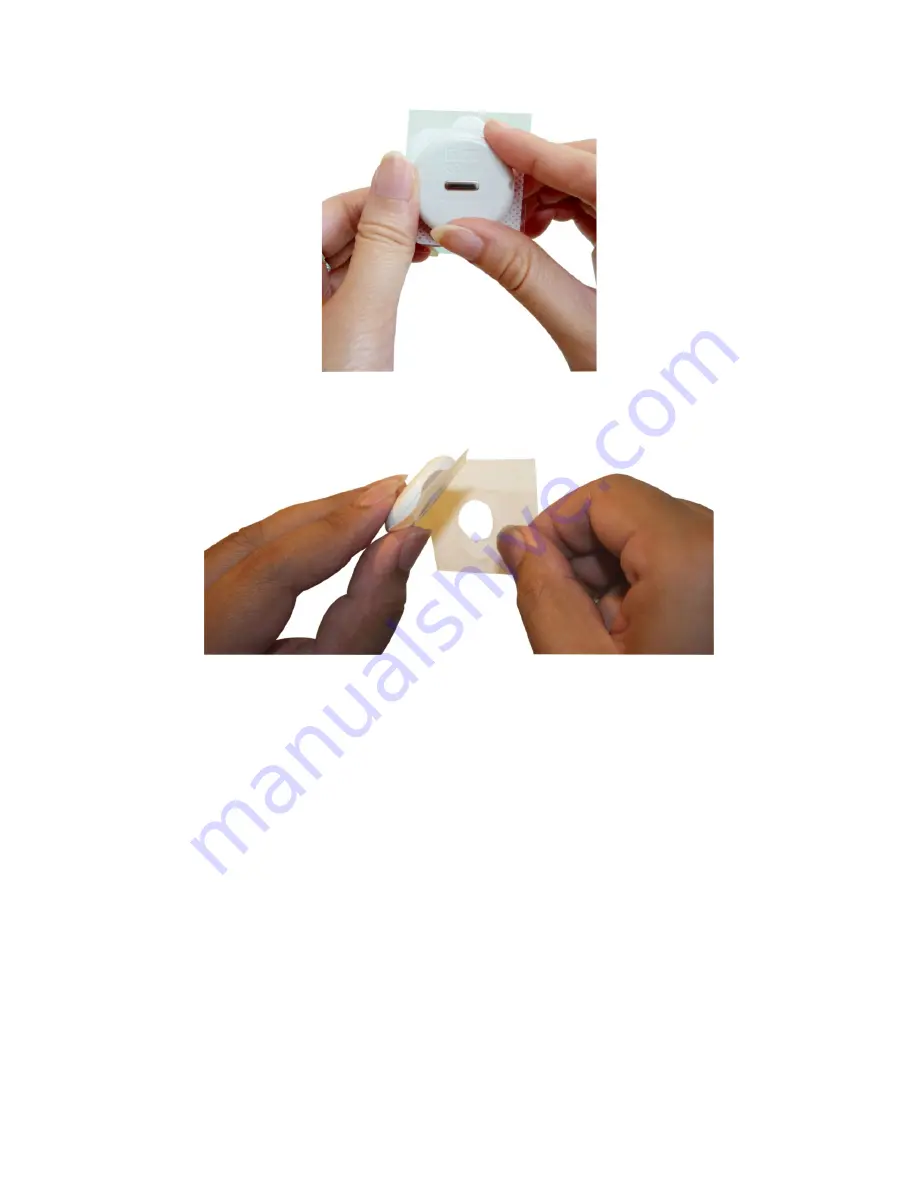
Step 4
:
Remove the rectangular backing liner to expose the adhesive.
Step 5
:
Stick the exposed adhesive to the inside of the diaper/undergarment in such a position
that the sensor's metal part will touch the lower abdomen (left or right) when the
diaper/undergarment is properly worn.
Note: For accurate temperature readings, the sensor must touch the left or right side of
the lower abdomen at all times during monitoring.
Summary of Contents for Cadi.Sense
Page 1: ...Cadi Sense Wireless Thermometer User Manual v3 21 3 T S1 800 900 I10 C01...
Page 24: ...Cadi Sense User Manual T S1 800 900 I10 C01 24 3 2WIRE 2701HGV E 4 Linksys E2000...
Page 25: ...Cadi Sense User Manual T S1 800 900 I10 C01 25 5 Dlink DIR 655 6 ZyXel...
Page 26: ...Cadi Sense User Manual T S1 800 900 I10 C01 26 7 ASUS RTN16 8 EnGenius ESR9850...
Page 30: ...Cadi Sense User Manual T S1 800 900 I10 C01 30...


