19/36
2021/03 - Version: B Code : 37371
HOTLINE
WOODEN POOLS
BWT myPOOL
POOL’N BOX
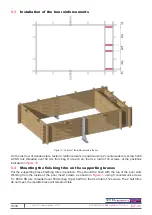
Figure 11 –
Mounting the supporting brace finishing trim
5.5
Mounting the coping brackets
Working from inside the pool, fasten the 8 wooden coping corbels in position using a SS torx countersunk
screws 5 × 80 threaded over 50 mm (bag H), as shown in
Figure 12
. Ensure that the top of the corbels
are flush with the top of the wall. Check that the corbels are perfectly level to facilitate the subsequent
installation of the coping.
Figure 12 – Location of the coping brackets
5.6
Installation of the metallic coping brackets
The metallic coping brackets are intended to support the coping and allow their attachment. Make sure that
they are correctly located. Position them such that they are flush with the top of the wall and make sure
that they are aligned with each other and with the wooden corbels.
Fasten 4 metallic coping brackets from the fastening element kit (2 righthand and 2 lefthand) to the top of
each supporting brace.
Their locations are shown in
Figure 13
. Use 6 A2 SS torx hinge screws (bag G) per bracket, that is a total
of 24 screws.


