Media Playback via USB Input
You can connect 2.5” and 3.5” inch (hdd with external
power supply) external hard disk drives or USB memory
stick to your TV by using the USB inputs of the TV.
IMPORTANT!
Back up the files on your storage devices
before connecting them to the TV. Manufacturer will not
be responsible for any file damage or data loss. Certain
types of USB devices (e.g. MP3 Players) or USB hard disk
drives/memory sticks may not be compatible with this
TV. The TV supports FAT32 and NTFS disk formatting.
Wait a little while before each plugging and unplugging as
the player may still be reading files. Failure to do so may
cause physical damage to the USB player and the USB
device itself. Do not pull out your drive while playing a file.
You can use USB hubs with your TV’s USB inputs. External
power supplied USB hubs are recommended in such a
case.
It is recommended to use the TV’s USB input(s) directly,
if you are going to connect a USB hard disk.
Note:
When viewing image files the
Media Browser
menu can only display 1000 image files stored on the
connected USB device.
Media Browser Menu
You can play photo, music and movie files stored on a
USB disk by connecting it to your TV. Connect a USB disk
to one of the USB inputs located on the side of the TV.
Pressing the
Menu
button while in the
Media Browser
mode will access the
Picture
,
Sound
and
Settings
menu
options. Pressing the
Menu
button again will exit from this
screen.
You can set your
Media Browser
preferences by
using the
Settings
menu.
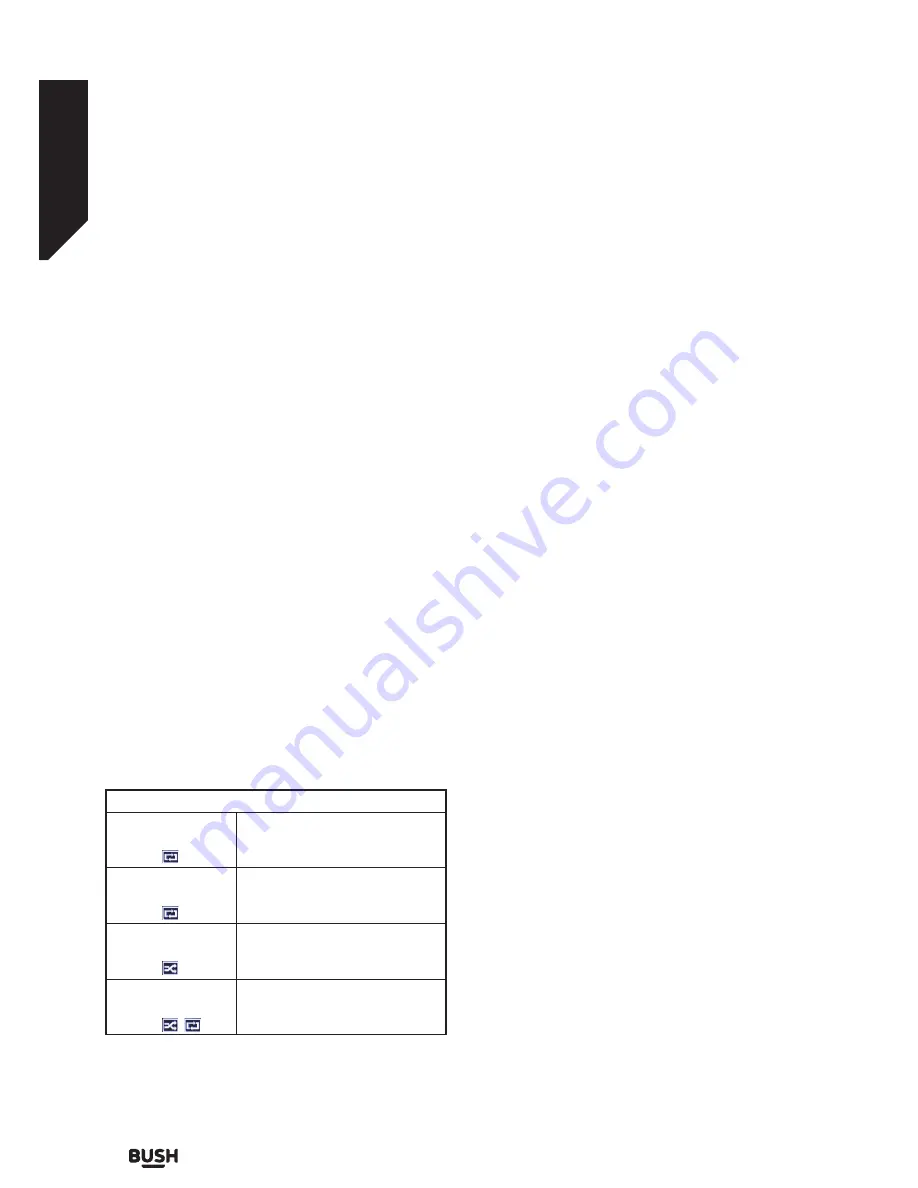
Loop/Shuffle Mode Operation
Start playback with
the
Play
button and
activate
All files in the list will be
continuously played in original
order
Start playback with
the
OK
button and
activate
The same file will be played
continuously (repeat)
Start playback with
the
Play
button and
activate
All files in the list will be played
once in random order
Start playback with
the
Play
button and
activate
,
All files in the list will be
continuously played in the same
random order.
Custom Boot Up Logo
You can personalize your TV and see your favorite image
or photo on the screen each time your TV boots up. To
do this, copy your favorite image files into a USB disk and
open them from the
Media Browser
menu. When you
have chosen the desired image, highlight it and press
OK
to view it in full screen. Press
OK
again to choose the
image as custom logo. A confirmation message will be
displayed. Select
Yes
and press
OK
again. If the image is
suitable
(*)
you will see it on the screen during the TV’s
next boot up.
Note:
If you perform a First Time Installation the TV will
return to using the default logo, if any.
(*)
Images should have an aspect ratio of 16:9 and they
should be in .jpg, .jpeg or .jpe file formats. Only files with
sizes no greater then 300KB are supported. The image
cannot be set as boot logo, which’s resolution doesn’t
appear on the info banner.
CEC and CEC RC Passthrough
This function allows to control the CEC-enabled devices,
that are connected through HDMI ports by using the
remote control of the TV.
The
CEC
option in the
System>Settings>More
menu
should be set as
Enabled
at first. Press the
Source
button
and select the HDMI input of the connected CEC device
from the
Sources List
menu. When new CEC source
device is connected, it will be listed in source menu with
its own name instead of the connected HDMI ports
name(such as DVD Player, Recorder 1 etc.).
The TV remote is automatically able to perform the main
functions after the connected HDMI source has been
selected.
To terminate this operation and control the TV via the
remote again, press
Quick Menu
button on the remote,
highlight the
CEC RC Passthrough
and set as
Off
by
pressing Left or Right button. This feature can also be
enabled or disabled under the
System>Settings>More
menu.
The TV supports also ARC(Audio Return Channel) feature.
This feature is an audio link meant to replace other cables
between the TV and the audio system (A/V receiver or
speaker system).
When ARC is active, TV does not mute its other audio
outputs automatically. So you need to decrease TV
volume to zero manually, if you want to hear audio from
connected audio device only (same as other optical or
co-axial digital audio outputs). If you want to change
connected device’s volume level, you should select that
Advanced features
Getting the most from your TV
Advanced features
20
If you require any technical guidance or find that your TV is not operating as intended, a simple solution can often be found in the
Troubleshooting
section of these instructions,
Summary of Contents for DLED49287HDCNTDFVP
Page 1: ...Instruction manual DLED49287HDCNTDFVP ...
Page 3: ......
Page 4: ...Safety information 1 ...
Page 10: ...Getting to know your TV 2 ...
Page 14: ...Connections 3 ...
Page 17: ......
Page 18: ...Standard features 4 ...
Page 20: ...Advanced features 5 ...
Page 38: ...Other information 6 ...
Page 49: ......
Page 50: ...Product support 7 ...
Page 55: ...Contact www argos support co uk Helpline 0345 604 0105 50363982 ...


