


3
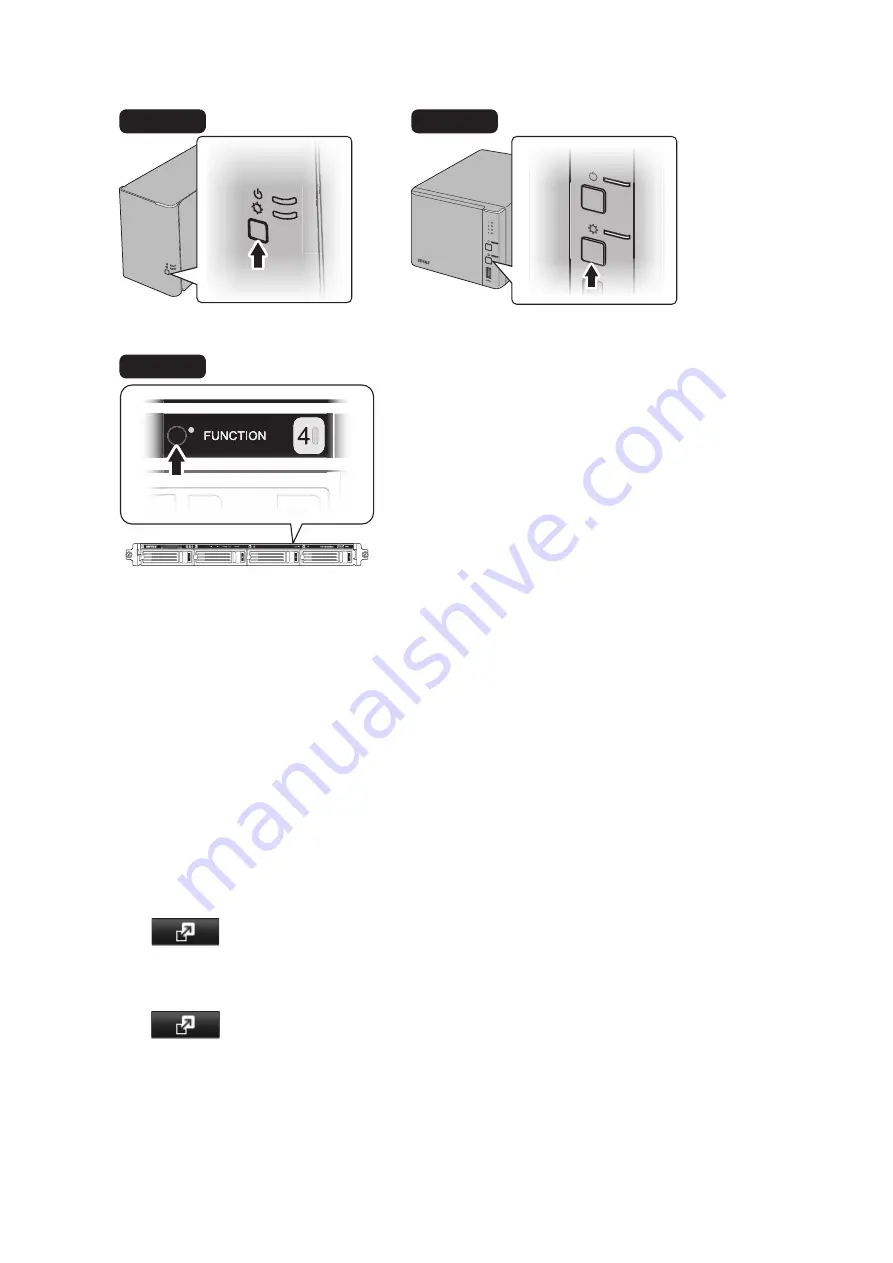
Hold down the function button on the front of the TeraStation for 3 seconds.
TS1200D
TS1400D
TS1400R
4
The drive will be formatted as an individual drive. Create a shared folder on the drive before use.
Using RAID 0
Drives in a RAID 0 array do not automatically turn off in the event of a malfunction. Before replacing the failed drive,
either dismount the drive from Settings, or shut down the TeraStation.
This section describes the process of recreating a RAID 0 array with
the TeraStation on
.
1
Follow the drive replacement procedure described above and replace a failed drive with a new drive.
2
When the replacement drive is recognized, the I32 message will be displayed in NAS Navigator2.
3
In Settings, navigate to
Drives
-
RAID
.
4
Select the RAID array and click
Delete RAID Array
.
5
Click
to the right of "Drives".
6
Click
Format Disk
to format the new drive.
7
Click
to the right of "RAID".
8
Choose a RAID array.
9
Select a RAID 0 in the RAID mode drop-down menu and the drives to be used, then click
Create RAID Array
.
10
The "Confirm Operation" screen will open. Enter the confirmation number, then click
OK
.
54
Summary of Contents for TeraStation 1000
Page 23: ...2 Click to the right of Users 3 Click Create User 4 Click Create Sequential Users 22...
Page 56: ...Once RAID 0 array is configured create a shared folder before use 55...
Page 63: ...2 Click to the right of Backup 3 Click List of LinkStations and TeraStations 62...
Page 65: ...3 Click Create New Job Note Up to 8 backup jobs can be configured 64...
Page 75: ...19Click Select Backup Disk 20Select the TeraStation then click Use Disk 74...
Page 108: ...4 Select the desired Ethernet frame size and click OK 107...


