background image

WRITING

VALUE

INDEX

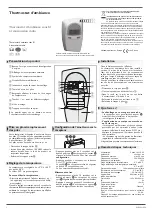
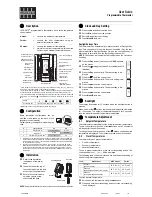
Every configuration parameter having preset settings is identified
on the display by an index and by a writing. To change the values
of a parameter, use keys  

 [key 1] and 

 [key 2];  to scroll

parameters, use  

 [key 4].

3

Chronothermostat configuration

Please note:

 The configuration must be carried out by qualified personnel only.

The chronothermostat configuration allows you to customize the operation parameters of the device. To access the configuration program,
do the following:

1.

Press SET / PROG [key 6]. The operation mode being used will be temporarily stopped and will start
again automatically at the end of the programming process.

2. 

Hold down the SUMMER / WINTER switchover key for about 5 seconds [key 7].

The L/N/NT4450 Chronothermostat device is fully compliant with the CEI EN 60730-1 standards and with its secondary parts.
BTicino S.p.A. reserves the right to change equipment or accessory specifications without prior notice.

To return to the initial page of the programming menu, press ENTER [key 5]; this will save the changes.
If no keys are pressed for 3 minutes, the chronothermostat exits the configuration program and returns to the previously used operation
mode without saving anything.
To eliminate the changes that have been made and reset the preset configuration parameters, press  

 [key 1] and   

  [key 2] at the same

time and hold them down for about 4 seconds.

Type of card connected 

Index: 1

Writing: 

COn

The chronothermostat can verify if the base is connected. Assuming that it is not, the lines will be displayed whereas if it is connected, rEL
will be displayed.

Temperature scale 

Index: 2

Writing: 

CELS o FHAr

Selects the scale, Celsius (centigrade) or Fahrenheit degrees, whereby all temperatures will be displayed.  If the Fahrenheit scale is used,
temperatures may vary from 0.0 to 99.9 

°

F.

Type of adjustment


Index: 3

Writing: 

Std o ProP

Selects the temperature adjustment mode: with differential (Std) or proportional (ProP). This parameter is
used only for heating.

Thermal differential


Index: 3A

Writing: 

DIFF

Sets the thermal differential value to be used when you choose the temperature adjustment mode with differential. When the differential is
suitably chosen, according to the heating system heat inertia, continuous switching ON and OFF will be avoided. It is recommended to use
the low thermal differential (LO) for heating systems with radiators and a high one (HI) for systems with Fan-Coil.

Adjustment band

Index: 3A

Writing: 

bAnd

Select an appropriate value according to the temperature gradient of the system (broadband for high gradients – narrow
band for low gradients).

Adjustment period

Index: 3B

Writing: 

PEr

Sets the duration of the adjustment cycle (ON OFF period) when you choose the proportional temperature adjustment mode. Select
5 minutes for low inertia systems (fan coil-type), 10 minutes for medium inertia systems (aluminium radiator type), 20 minutes for high inertia
systems (cast iron radiator type).

Configuration of the separate temperature probe

Index: 4

Writing: 

SEct

It is possible to connect a separate temperature probe to the chronothermostat, whose operation is determined by this parameter.

Excluded probe (---): 

 the value of temperature detected by the probe is not used, even if connected.

Floor probe (FLO): 

 when the temperature detected by the probe reaches the value set in the parameter 

Floor temperature Limit,

 the

system turns off, regardless of the temperature detected by the chronothermostat.

Room probe (In): 

 the adjustment of the system is based on the value of the temperature detected by the separate probe.  This temperature

is shown on the display instead of the one detected by the internal probe of the chronothermostat.  The separate room probe is used when
the chronothermostat is necessarily located in a room which is different from the one you want to control the temperature of.

Outside probe (Out): 

it does not affect the adjustment of the system and is simply used to get a second temperature, for example the

outside temperature.

Floor temperature limit

Index: 4A

Writing: 

tFLO

Sets the temperature limit value read by the separate probe which turns off the system when the floor probe is used (for floor heating systems).

Optimization

Index: 6

Writing: 

OPt

Calculates the advance switch-on needed to reach the temperature required at a specific time, considering the heat inertia of the system.
The optimization occurs only when it is switched on the first time of the day, in other words when initially programmed from one temperature
to a higher one.

Correction of room temperature

Index: 5

Writing: 

Corr

Enables you to add/subtract an offset to/from a temperature value measured by the chronothermostat.

Maximum Duration of the optimization

Index: 6A

Writing: 

OPtH

Sets the maximum duration, expressed in hours, of the preactivation calculated by the optimization.

Turns on the system for 1 minute a day (h 23.58), thus operating the water circulation pump so as to prevent it from seizing. This occurs
only if the system has never been switched on during the day.

Pump antigalling

Index: 7

Writing: 

Pu

1    2     3    4    5    6

7

Summary of Contents for L4450 Polyx Clima

Page 1: ...tilo AA alcaline di lunga durata da 1 5 V sul retro del cronotermostato rispettando la polarità indicata Dopo l inserimento delle pile il cronotermostato si accende automaticamente Fissaggio del cronotermostato sullo zoccolo Applicare mediante pressione manuale il cronotermostato allo zoccolo accertandosi che il connettore multipolare si inserisca correttamente L aggancio del cronotermostato è a s...

Page 2: ...con radiatori quello alto HI per impianti con Fan Coil Banda di regolazione Indice 3A Scritta bAnd Scegliere un valore opportuno in funzione del gradiente termico dell impianto banda larga per gradienti elevati banda stretta per gradienti bassi Periodo di regolazione Indice 3B Scritta PEr Imposta la durata del ciclo di regolazione periodo di accensione periodo di spegnimento quando viene scelta la...

Page 3: ... Zeitthermostat auf Sommer oder Winter umschalten Heizen und Kühlen Separate Temperatursonde anschließen Batterien einsetzen Die beiden Alkali Batterien AA zu 1 5 V mit langer Lebensdauer an der Rückseite des Zeitthermostats einsetzen und dabei die Polen beachten Nachdem die Batterien eingesetzt worden sind schaltet der Zeitthermostat automatisch ein Befestigung des Zeitthermostats an den Sockel D...

Page 4: ...eten Wert je nach Wärmegefälle der Anlage wählen breiter Einstellungsbereich für breite Gefälle schmaler Einstellungsbereich für schmale Gefälle Einstellungsdauer Index 3B Schrift PEr Stellt die Einstellungsdauer ein Zeitspanne vom Einschalten bis zum Ausschalten wenn der Einstellungsmodus proportionale Temperatur gewählt wird 5 Minuten für Anlagen mit niedriger Wärmeträgheit Typ Fan Coil 10 Minut...

Page 5: ... Chauffage et rafraîchissement Branchement de la sonde de température séparée Mise en place des piles Mettre en place deux piles de type AA alcalines longue durée de vie de 1 5 V dans le logement situé au dos du chronothermostat en veillant à respecter les polarités indiquées Après mise en place des piles le chronothermostat s allume automatiquement Fixation du chronothermostat à la base Appliquer...

Page 6: ...hermique bas LO pour les systèmes de chauffage à radiateurs et le différentiel haut HI pour les systèmes à ventilo convecteurs Bande de réglage Réf 3A Indication bAnd Permet de sélectionner une valeur appropriée en fonction du gradient thermique du système bande large pour gradients élevés bande étroite pour gradients bas Période de réglage Réf 3B Indication PEr Permet de programmer la durée du cy...

Page 7: ...ronothermostat Heating and cooling Connecting the separate temperature probe Putting in the batteries Put in two long lasting alkaline AA 1 5 V pen batteries at the back of the chronothermostat thus observing the polarity shown The chronothermostat will switch on automatically after putting in the batteries Fixing the chronothermostat on the base Press the chronothermostat onto the base manually m...

Page 8: ...Index 3A Writing bAnd Select an appropriate value according to the temperature gradient of the system broadband for high gradients narrow band for low gradients Adjustment period Index 3B Writing PEr Sets the duration of the adjustment cycle ON period OFF period when you choose the proportional temperature adjustment mode Select 5 minutes for low inertia systems fan coil type 10 minutes for medium...

Page 9: ...otermostato Calefacción y refrigeración Conexión de la sonda de temperatura separada Introducción de las pilas Inserte dos pilas AA alcalinas de larga duración de 1 5 V en la parte posterior del cronotermostato respetando la polaridad indicada Después de la introducción de las pilas el cronotermostato se enciende automáticamente Fijación del cronotermostato sobre el zócalo Aplique presionando manu...

Page 10: ...alto HI para sistemas con Fan Coil Banda de ajuste Índice 3A Inscripción bAnd Seleccione un valor correcto en función del gradiente térmico del sistema banda ancha para gradientes altos banda estrecha para gradientes bajos Periodo de ajuste Índice 3B Inscripción PEr Establezca la duración del ciclo de ajuste periodo de encendido periodo de apagado cuando se selecciona el modo de ajuste de la tempe...

Page 11: ...op de desbetreffende Verwarming en koeling Verbinding van de gescheiden sonde van temperatuur Invoer van de batterijen Twee alkaline stylobatterijen AA met een lange tijdsduur van 1 5 V invoeren op de achterkant van de chronothermostaat met respect voor de aangeduide polariteit Na de invoer van de batterijen gaat de chronothermostaat automatisch aan Vasthechting van de chronothermostaat op de sokk...

Page 12: ...an de installatie brede band voor hoge gradiënten smalle band voor lage gradiënten Periode van regeling Index 3B Opschrift PEr Stelt de tijdsduur van de cyclus van regeling in periode van aanschakeling periode van uitschakeling wanneer de modaliteit van proportionele regeling van de temperatuur wordt gekozen 5 minuten kiezen voor installaties met lage inertie type fan coil 10 minuten voor installa...

Page 13: ... tecla apropriada no cronotermostato Aquecimento e Arrefecimento Conexão da sonda de temperatura separada Introdução das pilhas Inserir duas pilhas alcalinas palito tipo AA de longa duração de 1 5 V atrás do cronotermostato respeitando a polaridade indicada Depois de ter inserido as pilhas o cronotermostato se acende automaticamente Fixação do cronotermostato na base Aplicar com pressão manual o c...

Page 14: ...ixo LO para instalações de aquecimento com radiadores recomenda se o diferencial alto H para instalações com FAn Coil Banda de regulação Índice 3A Escrita bAnd Escolher um valor apropriado em função do gradiente térmico da instalação banda larga para gradientes elevados banda estreita para gradientes baixos Período de regulação Índice 3B Escrita PEr Programa a duração do ciclo de regulação período...

Reviews: