16
5
Record Search
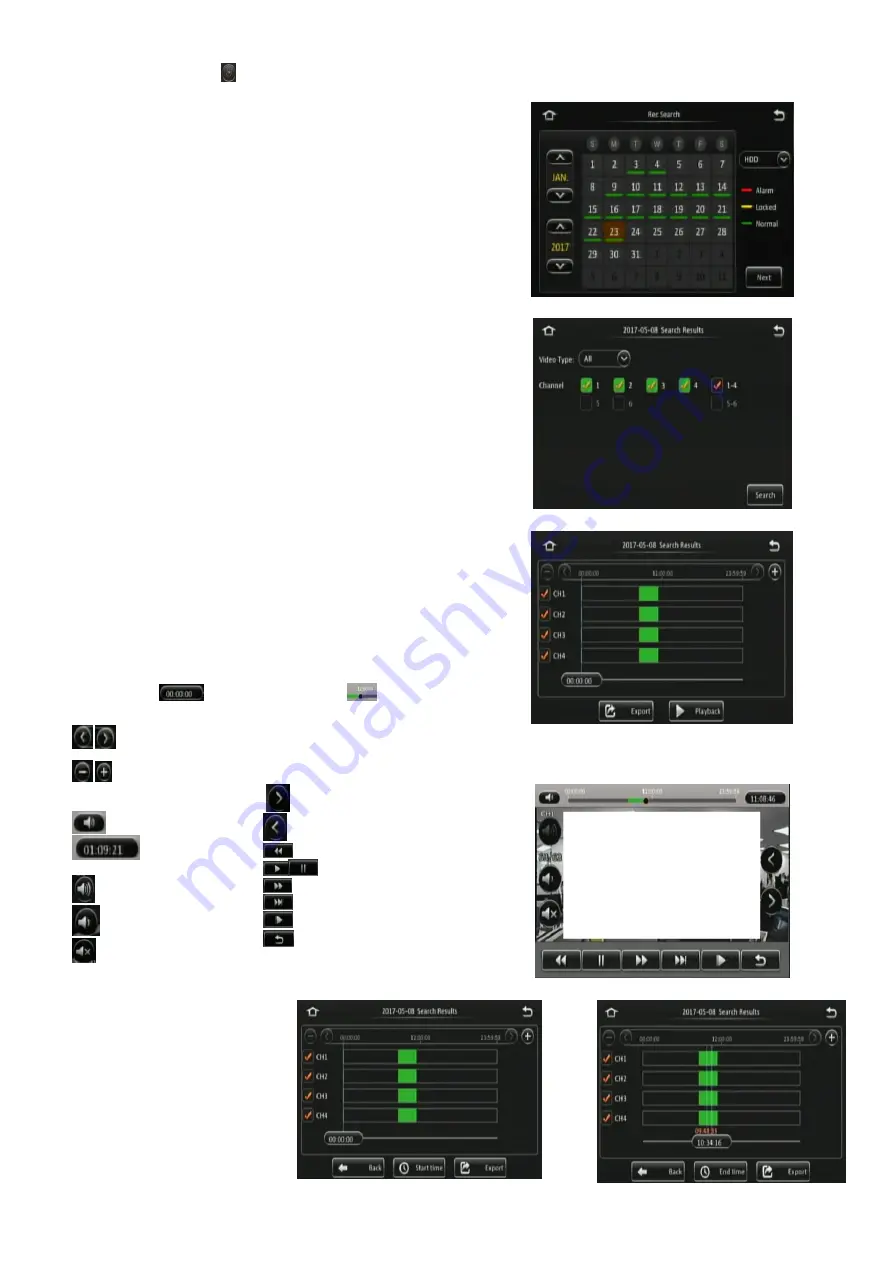
Rec Search
allows you to search based on source, type, channel, date,
month, year and time.
Source
can be selected to retrieve the data. This can be HDD, Sub-
stream SD or Main Stream SD. By default, HDD is selected. HDD
recording represents higher quality recordings found on the HDD. This is
usually set to a better resolution than Sub-stream SD data. Sub-stream
represents a lower resolution recording that is found on the SD card. SD
data types will contain frame information only.
Once you have chosen the date, click
Next
.
Rec Search Figure 25
Now the search results are shown, see
Video
type
options are All, Normal or Alarm. If you are not certain of the type,
choose All.
Channel
lets you choose which channel video you would like to view.
Each channel will be displayed in full screen.
Once you click
Search
the Video results are displayed. See
Search Results Figure 26
In this window, you will be able to choose a channel and time. Ticked
channel boxes will load this data during playback.
If you click
Playback
it will automatically start playing Channel 1 when
the video data starts for that day.
Note: If playback of a video recording is in a different video format from
the current settings (example NTSC or PAL), it cannot be played. Please,
switch the video format. You do this by navigating to Setup -> Surveillance
-> Record -> General -> Video Format.
You can click on the timeline to a desired time or choose the time using
the number pad
. You can move the button
to your chosen
time, by clicking and dragging while left clicking.
is used to navigate earlier or later in that day.
is used to zoom in and out on the timeline.
Video Results Figure 27
During Playback, the following
functions are available:
Show/Hide Volume menu
Choose time using
number pad
Volume Increase
Volume Decrease
Mute Volume
Next Channel
Previous Channel
Rewind x2 x4 x8 x16
Play / Pause
Fast Forward x2 x4 x8 x16
Slow Forward 1/2 1/4 1/8 1/16
Step
Back
Playback Figure 28
Once you click
Export
in
, then
displayed.
By default, the timeline for one
whole day (24 hours) is
displayed. Enter the start time of
your export, once you are happy
with the time, then click
Start
time
. See
Enter the end time of your export
and click
End time
. See
Start Time Export Figure 29
End Time Export Figure 30
Summary of Contents for MDR-504-500
Page 9: ...9 3 5 MDR 504xx 500 Connection Diagram MDR 504xx 500 Connection Diagram Figure 8...
Page 10: ...10 3 6 MDR 508xx 1000 Connection Diagram MDR 508xx 1000 Connection Diagram Figure 9...
Page 89: ...89...
Page 90: ...90...
Page 91: ...91...
Page 92: ...92 18 10 2017 10 52 00 MDR 500 Series Installation Operation Guide v2 0 ENG 5145A docx...


