background image

LabelMark 3 User Guide 

26 


Basic LabelMark Techniques 

To copy text and labels:


1.  Select the data (see 

Selecting Text and Labels

2. Click 

the 

Copy

 icon 

 on the 

Standard

 toolbar 

To paste text and labels:


1.  Select the label you want to paste the data on 

Note:

 To paste the copied data to more than one label, select a range of labels 

2. Click 

the 

Paste

 icon 

 on the 

Standard

 toolbar 

Note:

 You can also copy text from other 

Windows

® applications and paste it into 

LabelMark

Making Data Fit on a Label 

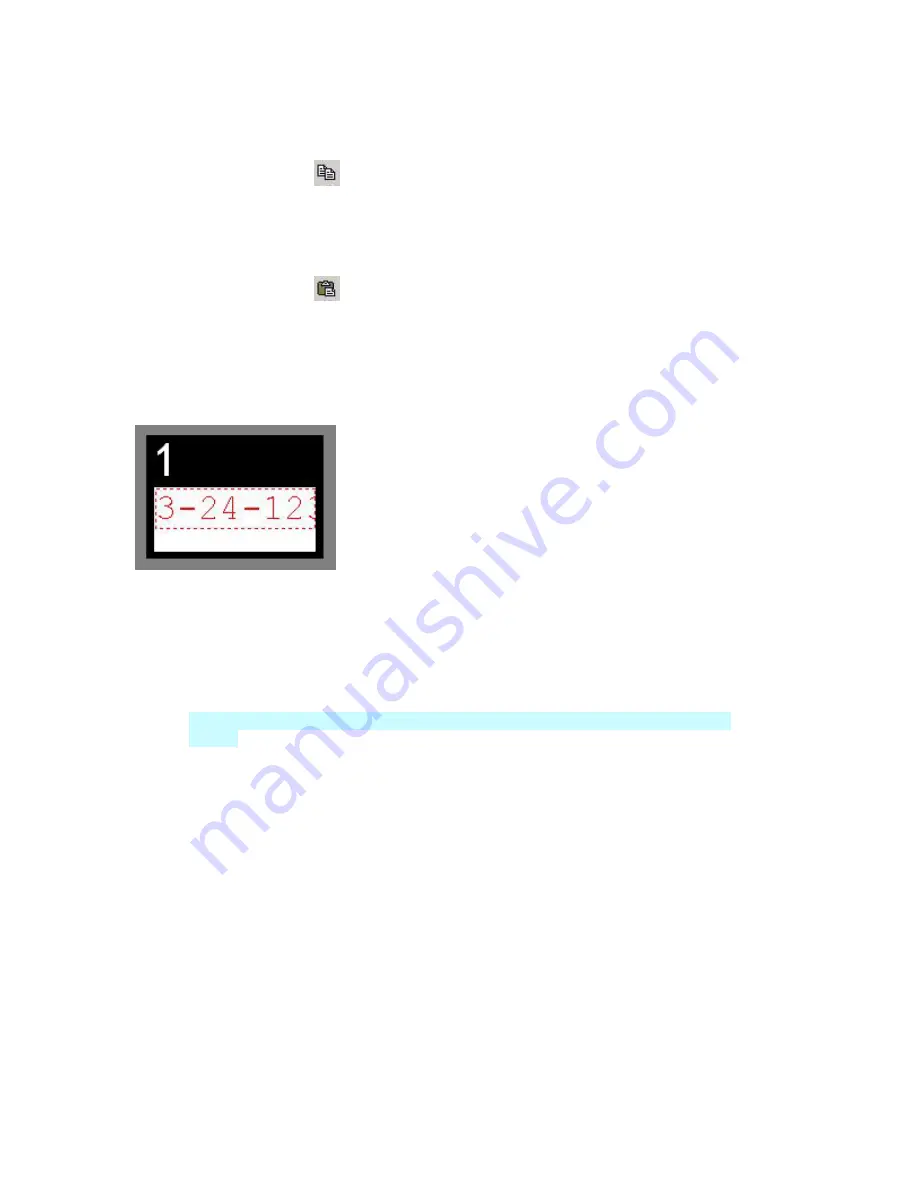
If your data does not fit on a label, 

LabelMark

 displays it in red and it will not print properly until you 

make it fit. 


To make an oversized item fit, you can do one of the following:


• 

For text (see 

Format Toolbar

): 


Reduce the font size. 


Condense the text. 

• 

Change to a larger label part (see 

Selecting a Different Label Part

). 

• 

Move the object to left and towards the top of the label in 

LabelMark Plus

 (see 

Moving an 

Object

). 

If you are importing data, serializing or inserting date/time information and the data does not fit:


• 

Click on one of the imported data elements, select 

Edit


Select All


Linked Objects

 and 

change the font attributes until the data fits. 

Repeating Common Commands 

The Command Multiplier repeats certain commands the specified number of times. It’s useful when 
inserting or deleting a large number of labels or when copying a number of labels or objects. 

To use the Command Multiplier:


1.  If you are copying a labels or objects, select them now. 

Note:

 If you are copying objects, the objects you select must be on one label. 

Summary of Contents for LabelMark 3

Page 1: ...LabelMark 3 User Guide...

Page 2: ......

Page 3: ...ar 14 Using Views 14 Label Navigation Toolbar 16 Two Sided Sleeve Toolbar 16 Changing User Defaults 17 Basic LabelMark Techniques 19 Creating a New Label File 19 Adding Text to a Label 19 Formatting T...

Page 4: ...ptions 50 Selecting a Printer 50 Troubleshooting Printer and Part Problems 51 Creating and Using Templates 53 Creating a Template 53 Template Toolbar 54 Editing an Existing Template 54 Creating a Labe...

Page 5: ...us 72 Selecting Objects in LabelMark Plus 75 Object Toolbar 76 Moving an Object 76 Resizing an Object 77 Deleting an Object 77 Cutting Copying and Pasting Objects 78 Templates Guide 79 Stock Label Tem...

Page 6: ......

Page 7: ...system described herein nor any liability for incidental or consequential damages arising from the use of this document Brady disclaims all warranties of merchantability of fitness for a particular p...

Page 8: ...a 46 85 90 057 33 tscandinavia bradycorp com Spain 33 437 245 234 tsspain bradycorp com United Kingdom 44 1295 228 231 tsuk bradycorp com Other Countries 32 52 457 937 tsbelgium bradycorp com Latin Am...

Page 9: ...ve 1 Insert the LabelMark CD into your CD drive The install screen appears If the install does not start automatically select Start Run type D setup exe and click OK replace D with your CD drive 2 Cli...

Page 10: ...select Add Printer 3 Follow the prompts to install a new printer When prompted select Local Printer and Have Disk 4 Insert the LabelMark CD into the CD drive usually D on your PC 5 In the Install fro...

Page 11: ...ng LabelMark and LabelMark Plus Online User s Guide A full featured electronic reference system installed with the application select Help User s Guide User s Guide PDF File A printable version of the...

Page 12: ...information so you can display more of the user guide text Click Contents Index or Search tab at the top of the screen to redisplay the navigation information Quick Start Guide Creating a Basic Text L...

Page 13: ...ell Select the Printer type from the list DotMatrix InkJet Laser Thermal TLS2200 TLS PC Link or Wraptor Wire ID Printer Applicator Select the Part family from the list The part family names are Part F...

Page 14: ...avorite Label Part List o If you created custom parts they appear in the list along with the master Brady parts If you selected a continuous part set the Repeat Length Click OK to create your label fi...

Page 15: ...int 5 Save Label File Click File Save or click the Save icon on the toolbar The Save As dialog box appears Type the file name and click Save LabelMark displays the default file location You may change...

Page 16: ......

Page 17: ...the screen lists application status and useful information such as the current printer label part etc Note The editor described above is for the LabelMark application which allows you to create text o...

Page 18: ...ject or label and paste it in a new location menu equivalents Edit Cut Copy or Paste Label Part Setup Allows you to switch to a different part after you have created your file or to modify the label p...

Page 19: ...Horizontal Justification Aligns text to the left center or right of the label menu equivalent Format Horizontal Justification Note LabelMark Plus justifies within the selected text block rather than...

Page 20: ...or Copy Object copies the selected item into the next label menu equivalent Edit Copy Line or Copy Object Copy Label copies the active label and inserts a duplicate label into the label file menu equi...

Page 21: ...in the file that will fit on your screen Select the last label in the file and press Tab to create a new label Two Sided Sleeve When working with a two sided sleeve you can display either side or both...

Page 22: ...label When the last label is active Next creates a new label Go to Label jumps to a specific label number that you enter You can also press F7 or select Edit Go To Label to access the go to function T...

Page 23: ...fer not to see it each time you start LabelMark Select the 6 9 Underline box if you want all 6 and 9 characters underlined Unselect the appropriate Use wizard for option if you would prefer to enter i...

Page 24: ...nate a default part Format tab options the initial settings when you add text Note These changes take effect for new label files not for existing files Select your desired default text font size and s...

Page 25: ...t the line level Any formatting is applied to the entire selected line s of text To format text click the line of text to select it or use Ctrl click to select multiple lines and use the Format Toolba...

Page 26: ...sed on the values entered in the Serialization Attributes dialog The process described below is for simple serialization For more complex serialization options see Serializing Labels Advanced To acces...

Page 27: ...e number of times to repeat each serial number For example 2 copies of a 1 3 serialization would result in 1 1 2 2 3 3 You must multiply the Number of labels by Copies to get the total number of label...

Page 28: ...tly Specify the number of labels and which labels the date time should appear on with the Options tab See Serializing Labels Simple for an explanation of the options 4 Specify the data and copy option...

Page 29: ...tem displays the appropriate multi tab dialog box with the linked object attributes Note Even if you used a wizard to create the linked objects you will not see the wizard when you edit a linked objec...

Page 30: ...LabelMark Techniques To format linked objects 1 Click one of the linked objects Note You can select and format one linked object without affecting the others 2 Select Edit Select All Linked Objects 3...

Page 31: ...Text is white on a black background when selected No To copy formatting in LabelMark refer to Repeating Common Commands A single label click on the label header the area immediately above the label Us...

Page 32: ...the following For text see Format Toolbar Reduce the font size Condense the text Change to a larger label part see Selecting a Different Label Part Move the object to left and towards the top of the l...

Page 33: ...er of times specified in the Copies field Existing labels are bumped to accommodate the new label s Note If more than one label is selected the active label is the one with darker highlighting Insert...

Page 34: ...ct the Direction for the search Click Find Next and click Replace to replace each occurrence or click Replace All to immediately replace all occurrences of the text Note You can search for text in lin...

Page 35: ...art Note If the new part is smaller than the original your data may no longer fit see Making Data Fit on a Label 4 Click Close when finished Note The other tabs on the Label Part Setup dialog box are...

Page 36: ...Mark select File Exit Opening an Existing Label File To open an existing label file 1 From the Welcome screen select Open saved file and click OK If you are already in the application select File Open...

Page 37: ...at any time to bring back the original settings and refresh the label file if you applied the changes to the file Labels per page the number of labels on the page for a sheet or roll of labels Across...

Page 38: ...Top margin B Left margin C Horizontal gap D Vertical gap E Label width F Label height G Printable width H Printable height I X Offset J Y Offset Note A clear overlaminate extends past the label on eac...

Page 39: ...d toolbar 2 Click the Create New Part tab LabelMark displays the settings for the active part irrelevant settings for the displayed part are disabled 3 Select the desired Printer type and Part family...

Page 40: ...th H Printable height K Overlaminate Note X and Y Offset are zero for this example 6 Click Save Part to Database to create a new custom label part that you can use in other label files LabelMark promp...

Page 41: ...the Printer type and Part family options for the part you want to delete 4 Click the custom label part in the list use Ctrl click or Shift click to select more than one part 5 Click Delete Note Exist...

Page 42: ...s added to your favorite part list remain in the master part list 5 To remove a part from your favorites list select the part from the Favorite parts list grid and click Remove 6 When you are finished...

Page 43: ...nents that increment or decrement separately To perform a multi string serialization 1 Select the label you would like to start on 2 Select Tools Serialization Advanced The Advanced Serialization Wiza...

Page 44: ...Note If you only enter one component in the Advanced Serialization dialog you will actually create a simple serialization When you edit it the simple serialization dialog box will appear Click Next 4...

Page 45: ...ant the entire sequence Enter a larger number if you want the sequence to complete and start over again Add constant text before or after the serialization with Prefix or Suffix if desired Click Next...

Page 46: ...7 8 9 A B C D E F 10 11 12 13 14 15 16 17 18 19 1A 1B 1C 1D 1E 1F etc Octal Octal Base 8 0 7 numeric serialization 0 1 2 3 4 5 6 7 10 11 12 13 14 15 16 17 etc Custom User enters a custom serialization...

Page 47: ...ock LAT 178 5 Pair BIX Block LAT 178 Blank BIX Block Patch Panel Laser Dot Matrix LAT 43 4 Port Patch Panel LAT 43 Blank Patch Panel LAT 44 6 Port Patch Panel LAT 44 Blank Patch Panel DAT 191 4 Port P...

Page 48: ...l serialization and lines as it would print out on 110 strip labels 001 002 003 004 005 006 007 008 009 010 011 012 013 014 015 016 017 018 019 020 021 022 023 024 To perform a 110 BIX Block backbone...

Page 49: ...Flip Flop Feature The flip flop feature allows you to transpose text around a flip point For example 123 456 would flip flop to 456 123 You designate the flip point by placing the flip character in a...

Page 50: ...e Flip Character Deletes the flip character from the selected label s after you have performed your left to right flip flop Top to Bottom Transposes text above the centerline to below the centerline a...

Page 51: ...Advanced LabelMark Techniques Advanced LabelMark Techniques 45 Top to Bottom Insert All Inserts a flipped version next to the original This option doubles the number of labels Before After...

Page 52: ......

Page 53: ...d toolbar o Click Next and Prev to scroll through the pages in your file o Click Zoom In and Zoom Out to look at varying levels of detail o Click Print to continue 2 From the Print dialog click Print...

Page 54: ...belMark fills in the from and to fields for you Set the number of copies To set the number of copies to print for this range change the Range Copies For example if you set Range Copies to 2 for the ra...

Page 55: ...Total Labels field Repeat this process to add up to 10 ranges to a file Note Ranges print in the order they were added To delete a range Click the range you want to delete in the Range Selection tabl...

Page 56: ...ect the Side to Print Side 1 prints only the first side of the labels Side 2 prints only the second side of the labels Both prints the first and second side of the labels Note LabelMark prompts you to...

Page 57: ...ettings on your printer may not be set correctly Refer to the user s guide for your printer The label part used to design the LabelMark file does not match the labels loaded in the printer Change to t...

Page 58: ......

Page 59: ...the label and fill them with placeholder text The placeholder text allows you to properly size and format the text and it will be replaced by your data when you create a file based on the template Not...

Page 60: ...ears on the bottom of the screen when you are creating or modifying a template Icon Description Non Printable Makes the selected item appear on the computer screen but not in the printed label Non pri...

Page 61: ...e 4 Select File Save to save the updated template 5 Select File Close to close the template Creating a Label File from a Template To create a new label file based on a template 1 Prepare to create the...

Page 62: ...e following in mind when importing data into a label file based on a template Data only imports into unlocked text or barcode fields In LabelMark imported data fills unlocked text fields in labels fro...

Page 63: ...it as a WK1 WK3 or WK4 file Lotus 1 2 3 versions after WK4 are not recognized If you cannot save to an earlier version save your data as a delimited ASCII text file and import it as text The data impo...

Page 64: ...Guide 58 Importing Files 4 Select the type of data to import and click Next See Data Import Types for details 5 Select the data file and click Next Text file o Click Browse o Select the ASCII text fil...

Page 65: ...Importing Files Importing Files 59 o Select the delimiter Excel or Lotus 123 spreadsheet file o Click Browse o Select the spreadsheet file and click Open...

Page 66: ...fields to include and click Next Select the desired Table spreadsheet worksheet or database table Select the fields to include in the import o Fields are column headings in the import data o Select an...

Page 67: ...s Importing Files 61 7 Filter the data if desired and click Next See Filtering Import Data for details 8 Sort the data if desired and click Next Select the fields you want to sort by and the direction...

Page 68: ...ide 62 Importing Files 9 Manually edit the SQL statement if desired and click Next Refrain from editing the query string unless you are skilled with SQL Warning You cannot filter sort etc after editin...

Page 69: ...o the second side To import data into a two sided sleeve label file 1 Complete the first 5 steps of the Importing Data into Label Files process 2 When the Fields dialog appears Select the desired Tabl...

Page 70: ...ecognized If you cannot save to an earlier version save your data as a delimited ASCII text file and import it as text Other data source The Other data source option allows you to import data from vir...

Page 71: ...Server database o Select the server name o Enter logon and password information o Select the database on the server o Click Test Connection to confirm the provider server logon information and databas...

Page 72: ...your condition details Select the Field you want to filter from the list Fields are column headings in a spreadsheet or field names in a database Select the Operator from the list The field is the sa...

Page 73: ...he list Click a condition statement in the list and click Delete to remove it from the list Repeat these bullet points to add other conditions 3 When you have entered all of your conditions click Next...

Page 74: ...LabelMark 3 User Guide 68 Importing Files Formatting Import Data To format imported data see Working with Linked Objects...

Page 75: ...ects in LabelMark Plus Icon Description Select Selects object for moving or sizing Text Creates text objects Barcode Creates barcode objects Images Imports image files bitmap only Rectangle Creates re...

Page 76: ...y allowed to type the characters valid for the symbology you are using 4 See Modifying Barcode for details on changing a barcode object Note At any time during this process you may change the barcode...

Page 77: ...the top left corner of the label the top left corner of a label is 0 0 Size The height and width of the image Notes You can also resize an image by dragging its selection handles LabelMark Plus mainta...

Page 78: ...lows you to import text and barcode data and it allows you to better control which data fills each object in the label file To map your import data to label objects 1 Create or open a label file 2 Sel...

Page 79: ...xt 6 Select the data file and click Next Select the ASCII text file or Excel or Lotus 1 2 3 spreadsheet file to import and click Open or If you are importing from a database enter the necessary Other...

Page 80: ...field fills which object on the label If you select Manual as the Sort order for importing data LabelMark Plus adds an Object column to the Included list Note The Manual option is disabled if the act...

Page 81: ...text barcodes images lines and rectangles To select an object Use the Select tool to click the object you wish to edit To select more than one object hold down the Ctrl key and click on the objects y...

Page 82: ...objects are selected Center Horizontally Moves the selected object s to the middle side to side of the label menu equivalent Object Align Note This is a one time action If you resize add text etc you...

Page 83: ...based on their data There are two ways to resize the selected object in LabelMark Plus Click the Properties icon type your desired Width and Height and click OK With the Select tool grab one of the s...

Page 84: ...elMark Plus 1 Select the object s using the Select tool Use Ctrl click to select multiple objects even from different labels 2 Cut or copy the object s Click the Cut icon on the toolbar removes the or...

Page 85: ...d to the C Program Files Brady LabelMark 3 Templates folder for use with LabelMark Plus These templates were created to help you easily place your data on specialized label formats We recommend using...

Page 86: ......

Page 87: ...mages were installed to the C Program Files Brady LabelMark 3 Images folder for use with LabelMark Plus These images were provided solely for your convenience and you are responsible for their use If...

Page 88: ...LabelMark 3 User Guide 82 Symbols Guide...

Page 89: ...Symbols Guide Symbols Guide 83...

Page 90: ......

Page 91: ...import data types 70 what s new 4 import overview 61 contact information import process 61 customer support 1 autosize object e mail address 1 create a template 55 facsimile number 1 template toolbar...

Page 92: ...rror messages 53 D Excel spreadsheet data import import data types 70 import overview 61 format data 74 import process 61 import data into a label file 61 extension import data into file based on temp...

Page 93: ...image 77 width 15 format labels with command multiplier 30 line 77 import data 74 new label 16 make data fit on label 30 rectangle 77 text 15 23 free form mode 75 text in LabelMark 23 G text in LabelM...

Page 94: ...7 change part for existing file 32 modify serialization 25 create custom part 37 working with 27 delete custom part 38 list label part setup icon 14 create favorite parts list 39 modify a label part 3...

Page 95: ...at s new in LabelMark 4 create favorite parts list 39 next label go to 18 designate default 19 non printable object modify 35 create a template 55 troubleshooting problems 53 parts database template t...

Page 96: ...label file 33 barcode 76 save icon 14 icon 81 template file 33 image 77 select line 77 all labels 16 object 82 text and labels 28 rectangle 77 toolbar icon 75 text 23 serialization 110 BIX block R 11...

Page 97: ...tosize object 56 designate COM port 19 create 55 toolbars create label file from 57 action toolbar 16 edit existing 56 draw toolbar 75 enter data into 57 format toolbar 15 file location 19 label navig...

Page 98: ...r defaults change 19 user guide 5 V views multiple label view icon 14 single label toolbar 18 single label view icon 14 two sided sleeve toolbar 19 use views 17 zoom icon 14 W WebHelp how to use onlin...

Reviews: