i
Notice!
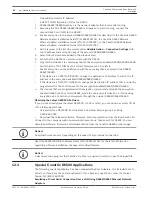
Disabling the telnet and port 77FE prevents you from accessing the set-up menu for future
changes.
6.
At the Disable Web Server prompt, press Enter to accept the default (N).
7.
At the Disable ECHO ports prompt, press Enter to accept the default (Y).
8.
At the Enable Encryption prompt, type y and press Enter.
9.
At the Change keys prompt, type y and press Enter.
10. Type the key and press Enter.
The key is 16 bytes (32 characters) long. Enter the key using the
01-02-03-04-05-06-07-08-09-10-11-12-13-14-15-16 format.
11. At the Enable Enhanced Password prompt, press Enter to accept the default (N).
12. Type 9 and press Enter to save changes and exit from the telnet session.
To confirm that the IP address is configured properly, use the ping utility:
13. At the C:\> prompt, type ping <IP Address> and press Enter.
Four reply messages are received, confirming the D6100i is communicating on the
network
Configuration of the D6100i is complete.
Configuring for Network Communication
The following steps allow the D6100i to communicate with the host PC running the D6200
Programming Software.
i
Notice!
For the network communication to function, install a properly configured D6100i. Refer to the
previous sections. If network communications are not installed, further D6200 software pro-
gramming using the network is not possible.
1.
On the D6100i keypad, press Menu and enter the default passcode of [6][1][0][0] to
enter the programming mode. Press Menu again.
i
Notice!
To change any programming parameter, follow this syntax:
Press Enter.
Enter the desired value.
Press Enter again to store the value.
2.
Press Down to view the 6 NETWORK CONFIGURATION then press Enter.
3.
Press Down to view the 6.2 Network adapter and press Enter.
4.
Set 6.2.5 Network Adapter Enabled to a value of 1 and press Enter. If the value is not 1,
press Enter>[1]>Enter.
5.
If the D6100i has encryption enabled, Set 6.2.6 Network Encryption Enabled to 1.
6.
Press Cancel and press Down to view 6.3 Network Automation Connection.
7.
Press Enter.
8.
Press Down to view 6.3.6 Network Automation Output Format.
9.
Type 1 for 6500 mode or 2 for SIA mode and press Enter to enter the selection.
10. Press Cancel and press the Down button to view 6.3.7 Device.
11. Press Enter.
12. Press [1] for automation communication through a network, or [2] for automation
communication through the RS-232 COM3 port.
13. Press Cancel and press the Down button to view 6.4 D6200 Network Connections.
12.5.6
70
en | Network Communications
Conettix Communications Receiver/
Gateway
2012.11 | 08 | 4998122704
Installation and Operation Guide
Bosch Security Systems, Inc.
Summary of Contents for Conettix D6100IPv6
Page 1: ...Conettix Communications Receiver Gate way D6600 D6100IPv6 en Installation and Operation Guide ...
Page 2: ......
Page 86: ......
Page 87: ......


