15
Obtain Video Signal
The camera can simultaneously have HDMI and Dante AV IP video output.
HDMI Video signal
1. Connect the camera to a UHD Monitor/TV using HDMI cable.
2. Turn on the camera, video will display on the monitor after initialization.
3. Information of the camera
’s initial setting status will display for about 5 seconds.
4. You can set the video format of the camera to the one you want to display.
Dante AV IP Video Signal
1. You need a Dante AV decoder to obtain the Dante AV IP video stream
2. Use Cat6 network cable to connect Dante AV decoder and Dante AV camera to the same POE
network switch.
3. Connect Dante AV decoder to the HDMI display device.
4. Use Cat6 network cable to connect the PC with Dante Controller Software to the same network switch.
5. Running the Dante Controller, check to subscribe the video TX (camera HDMI video) to RX (decoder
HDMI video) connection.
6. Dante video will be displayed on the HDMI monitor via the Dante AV decoder.
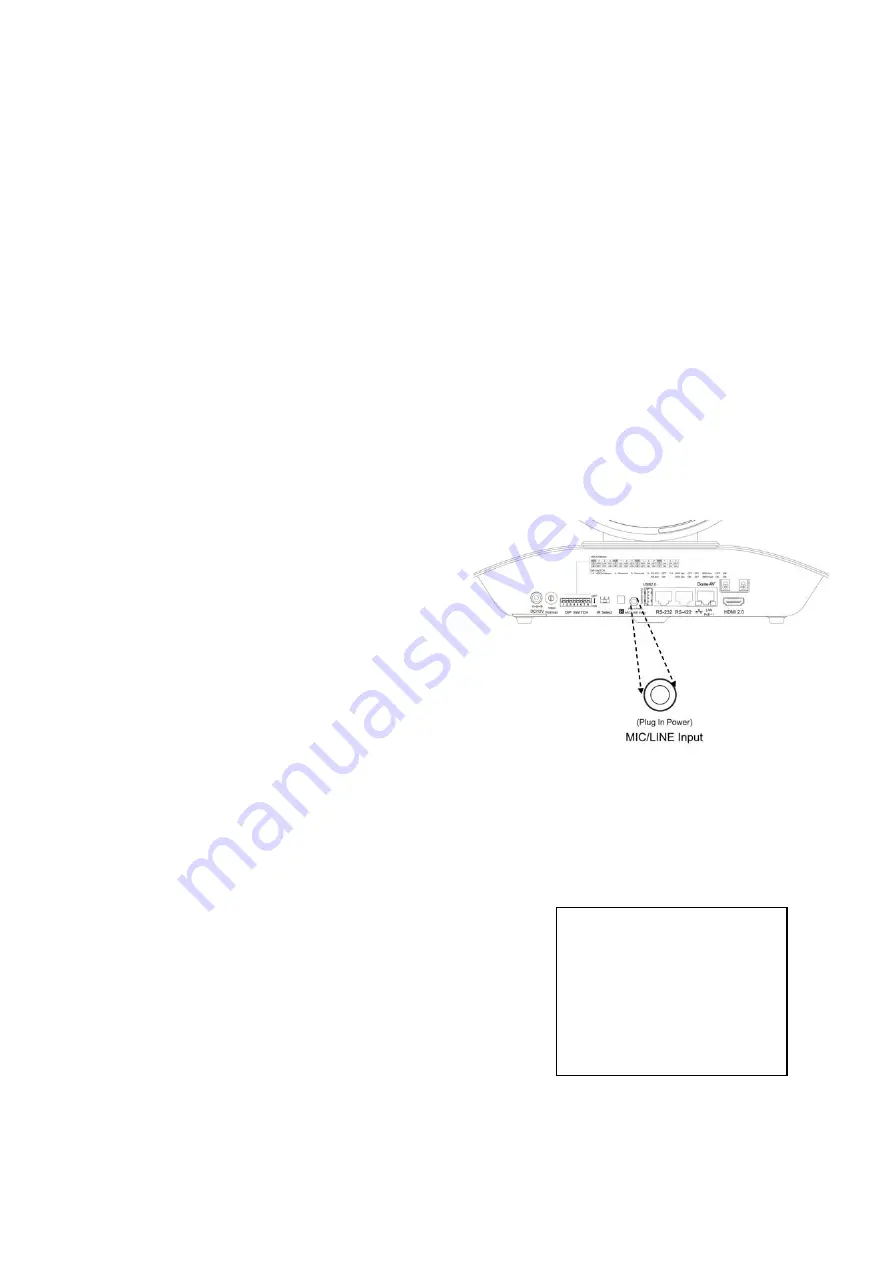
Audio IN
•
The camera is equipped with a 3.5mm audio
input interface, supports Line in or Mic audio
signal input.
•
On rear panel, a microphone or audio source
can be connected to the
MIC/LINE Input
port,
which feeds audio into the camera
•
User can select the audio input type to be LINE
or MIC via the HDMI OSD menu, to adapt the
input audio signal.
NOTE: If the audio Input Type is selected as MIC,
user can also set Plugin Power to ON, so that the
camera can supply power to the connected
microphone. The power supply voltage is 2.5V.
•
Audio is embedded with Camera HDMI and Dante AV video signal.
Camera Initial setting status Information
Information of the camera initial setting status will display for 5
seconds.
1. Camera PELCO ID for RS-485 control
2. Camera ID for IR Remote Controller
3. Baud Rate setting
4. COM Port setting
5. Video format setting
6. HDMI setting
7. Model Type
8. MCU firmware version
PELCO ID
001
IR ID
1
BAUD RATE
9600
COMM TYPE
232
FORMAT
2160P29.97
HDMI OUT
YUV422
MODEL TYPE
----
MCU FW: V0C260B40040AA008
Camera Status Info Display
Summary of Contents for D Series
Page 3: ...3 MENU CONFIGURATION 41 TROUBLESHOOTING 43 WARRANTY 44 SUPPORT CONTACT INFO 45 DIMENSIONS 46 ...
Page 7: ...7 WHAT S IN THE BOX Accessories Optional ...
Page 42: ...42 ...
Page 46: ...46 Dimensions Unit mm ...
Page 47: ...47 www bolintechnology com 2082 TECHNOLOGY LLC dba BOLIN TECHNOLOGY ...


