35
DuraSweeper
®
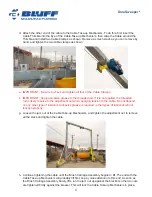
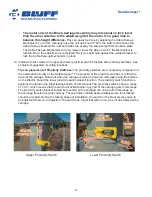
Upper Proximity Switch
1. Turn the key switch to MANUAL.
2. To proceed, the Brush Carriage Assembly needs to be located approximately midway between the
Upper and Lower Proximity Switches. If it is, proceed to Step 3. If it’s not, turn the key switch to
MANUAL and push the UP or DOWN button to position the Brush Carriage Assembly approximately
midway between the Upper and Lower Proximity Switches.
3. Push the UP button. The Brush Carriage Assembly should rise.
4. Continue raising the Brush Carriage Assembly until it nears the Upper Proximity Switch. The unit
should stop when it gets detected by the Proximity Switch. If it stops, move to the Lower Proximity
Test.
5. If the Brush Carriage Assembly doesn’t stop, the Proximity Switch may not be positioned properly, or
it may have a wiring problem. The switch has a light on the back of it that turns on when it detects the
carriage. If the light doesn’t turn on when the carriage passes within 1-1/2” of the switch, adjust the
position of the switch. If it still doesn’t turn on, check the Proximity Switch wiring and connectors.
Lower Proximity Switch
1. Turn the key switch to MANUAL.
2. To proceed, the Brush Carriage Assembly needs to be located approximately midway between the
Upper and Lower Proximity Switches. If it is, proceed to Step 3. If it’s not, turn the key switch to
MANUAL and push the UP or DOWN button to position the Brush Carriage Assembly approximately
midway between the Upper and Lower Proximity Switches.
3. Lower the Brush Carriage Assembly by pushing the DOWN Button until it approaches the Lower
Proximity Switch. Release the button when the Carriage gets within 1-1/2” of the switch. Check to
make sure the indicator light on the back of the Proximity Switch lights up when the Carriage gets
within 1-1/2” of the switch. If the light turns on, move to the Automation Test.
Caution: When in MANUAL Mode, the Control Circuitry ignores the signal from the Lower Proximity
Switch. The Circuitry will not stop the unit. If the operator were to hold the DOWN Button as the
Carriage gets to the bottom limit, the unit would start rising because of the manner the cable is
threaded through the Hoist Spool. So Approach the lower limit slowly. The goal here is to observe
the indicator light on the back of the Lower Proximity Switch. It should turn on when it detects the
carriage.
4. If the indicator light on the back of the Lower Proximity Switch doesn’t turn on when the carriage
gets within 1-1/2” of the switch, adjust the position of the switch. If it still doesn’t turn on, check the
Proximity Switch wiring and connectors. The unit is now ready for the Automation Test.
Automation Test
First Test
1. Turn the key switch to AUTO.
2. Push the Activation Bar. The Brush Carriage Assembly should rise to the upper limit. Once at the
upper limit, the Brush should begin turning and the Carriage should start lowering. It will continue

