

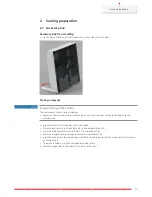


Sewing preparation
47
Changing the stitch plate
The stitch plate is marked with vertical, horizontal and diagonal lines in millimeters (mm) and inches (inch).
These lines help to guide the fabric when sewing seams and precise topstitching.
Prerequisite:
• The feed dog is lowered.
• The machine is switched off and disconnected from the power supply system.
• Needle and presser foot are removed.
> Press the stitch plate down at the mark back right until it flips up.
> Remove the stitch plate.
> Place the openings of the new stitch plate above the corresponding guide pins and press down until it
clicks into place.
Selecting the stitch plate in the User Interface
After having changed the stitch plate, it can be checked whether or not it is suitable to be used together
with the selected needle.
> Touch the icon «Stitch plate selection».
> Select the previously attached the stitch plate.
– If the selected stitch plate is suitable in combination with the needle, sewing can be started.
– If the selected stitch plate is not suitable in combination with the needle, starting the machine is
automatically blocked.
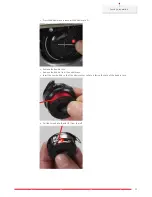
2.11 Threading
Threading the upper thread
Prerequisite:
• The needle and the foot are raised.
• The machine is switched off and disconnected from the power supply system.
> Place the foam pad on the spool holder.


