Creative embroidering
178
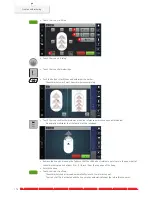
> Touch the icon «Grid».
– The embroidery motif is given a grid with nine different location/positioning points.
> Select the desired positioning point to which the embroidery motif is to be adjusted.
– The point changes its color.
> Turn the «Upper Multifunctional knob» or the «Lower Multifunctional knob» to the left or to the right to
position the needle above the respective mark on the fabric.
> Touch the icon «SET» to confirm the altered position.
– The point changes its color and is defined.
> Select the second positioning point of the embroidery motif.
> Turn the «Upper Multifunctional knob» or the «Lower Multifunctional knob» to the left or to the right to
position the needle above the respective mark on the fabric.
> Touch the icon «SET» to confirm the altered position.
– The point changes its color and is defined. The embroidery motif is adjusted accordingly.
> Touch the icon «Reset Pinpoint placement» to reset the alterations to default setting.
Free point positioning
This function allows exact positioning of embroidery motifs on the fabric in an easy way. The points can be
defined as you like within the embroidery motif.
Prerequisite:
• Any two points of the embroidery motif are marked with chalk or a water-soluble pen on the fabric. The
place or the location where the embroidery motif is to be positioned is clearly visible.
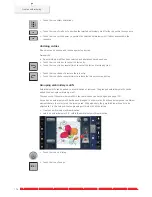
> Select an embroidery motif.
> Touch the icon «i»-Dialog.
> Touch the icon «Pinpoint placement».
> Touch the icon «Place points as desired».
> Define a desired point within the embroidery motif.
– The positioning point is displayed.
> Turn the «Upper Multifunctional knob» or the «Lower Multifunctional knob» to the left or to the right to
position the needle above the respective mark on the fabric.
SET
SET
SET
SET
SET
SET
SET
SET


