


7
8
9
1
W
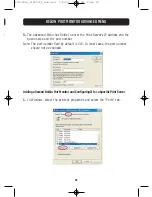
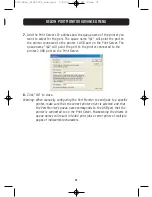
3.
In the “Enter New Port” window, enter a unique name for the port and click “OK”.
4.
Click “Close” on the “Printer Ports” window.
5.
On the “Ports” tab, select the newly created port; click “Configure Port”.
6.
On the next window (Belkin Port 2: Properties), click the “Locate
Servers” button.
26
PRINTING TO MULTIPLE PRINT SERVERS
P74390ea_F1UP0001_man.qxd 1/6/04 3:09 PM Page 26