b
e
P
6.
Verify that the computer is in the same subnet as the Print Server (The
first three octets of the IP addresses are the same).
7.
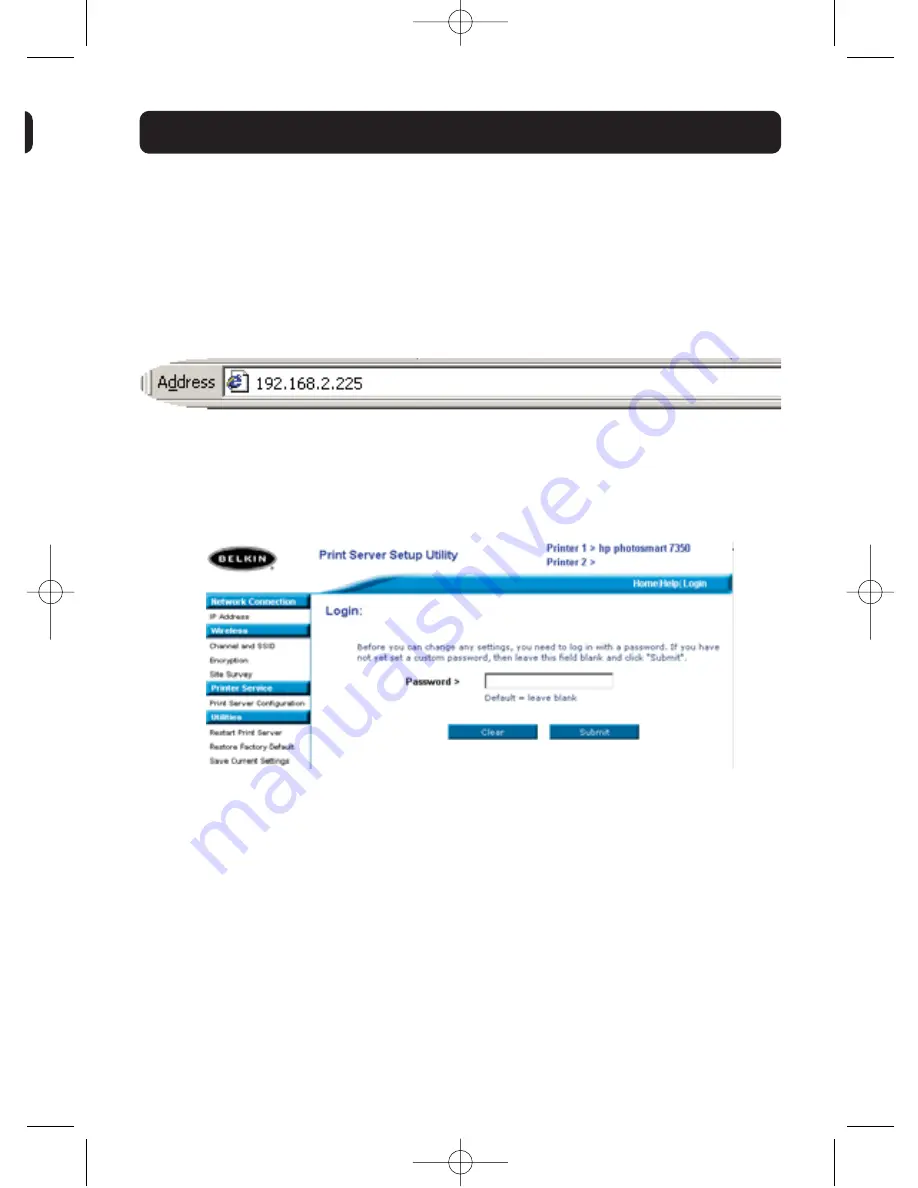
Type the Print Server’s IP address into your Internet browser from any
computer. For example, if your IP address is 192.168.2.225, type
“192.168.2.225” (do not type in anything else such as “http://” or
“www”). Then press the “Enter” key.
8.
Clicking the “Login” button or clicking on any one of the links on the home
page will take you to the login screen. The Print Server ships with no
password entered. In the login screen, leave the password blank and click
“Submit” to log in.
9.
Set the SSID of your wireless network by clicking “Channel and SSID” (see
“Web Interface – Channel and SSID” for more info).
10.
Set the IP address for the Print Server by clicking “IP Address” (see “Web
Interface – IP Address” for more info).
11.
Set encryption for the Print Server (if desired) by clicking “Encryption”.
12.
Cycle power on the Print Server to reboot it to the new configurations.
9
SETUP FOR ADVANCED USERS
P74390ea_F1UP0001_man.qxd 1/6/04 3:09 PM Page 9

