STARTUP
The machine is started by turning the EMERGENCY BUTTON clockwise until it pops out. Now
the machine has power. The display provides some information at startup. If the display is not lit,
the machine may be incorrectly connected to the battery. Check the cables on the battery!
INSTALL FISHINGLINE
Reduce Drag to minimum value. To do this…
1. Press the
[4]
key until the display bar disappears.
2. Press the
[U]
p button. The motor starts but without traction on the wheel. Note the direction
of rotation of the motor.
3. Press
[S]
top. If the desired direction of rotation of the motor is correct, jump to step 7. If not,
proceed to item 4.
4. Press the
[E]
button when
LINE OUT
is displayed . The display now shows the MENU.
5. Press
[4]
for
WHEEL
.
6. Press
[3]
for
COUNTER
and then once on the
[P]
rog button. Display shows “Direction”
Change the "Normal" or "Reverse" selection to the opposite using the button
[3]
and
[6]
.
Jump to point 2.
7. Attach the line to the wheel.
8. Press
[U]
p so the motor starts.
9. Increase Drag by pressing button
[1]
until tight traction is obtained on the wheel. Reduce
power with button
[4]
if desired.
10. When all the line is mounted on the wheel press the
[S]
top.
Now all line is mounted. In order for the machine to count correctly, some settings need to
be made. This is described in Chapter [E41], E [42], E [42P] and E [43].
Installation - 2
INSTALLATION
Continuing
…ELECTRIC INSTALLATION
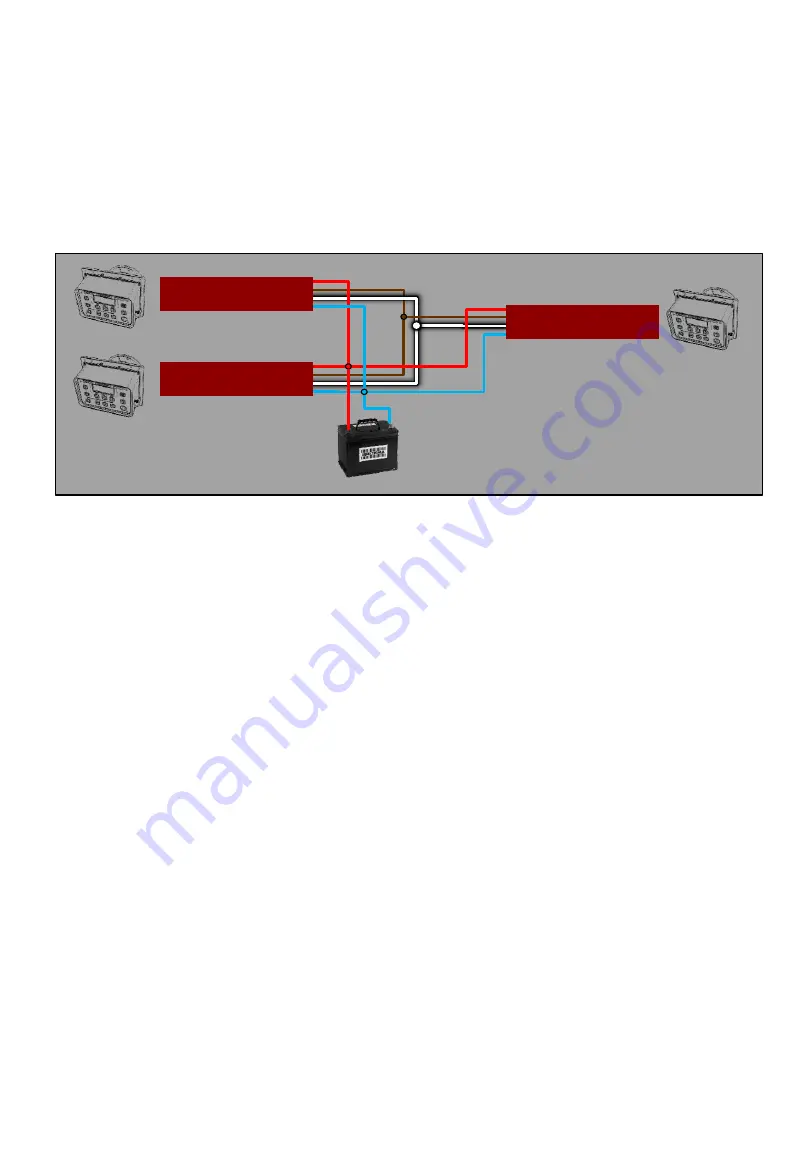
Communication between machines.
Ex can communicate with other Ex
’s and share information about where the fish are, or to prevent all
machines pulling the line to the surface at the same time. For this, two wires are used in the power
cable. The Brown and the White. The installation is done so that all white cables of the machine (one
from each Ex) are connected together, in the easiest way is twisted together or with a screw terminal.
Connect the Brown in the same way. DO NOT connect Brown and White together. Note that all of the
machines in the network must be powered from same battery system (at least the battery minus pole).
Now the machines are mechanically prepared. What remains is to set up the values for the
communication in the display menu. Take a look at the Communication-1 and special sections. To
easily get started, step-by-step instructions are given. Machines with software older than 1.1834
must be upgraded with new software for this to be available.
An example with 3 Ex connected in network


