Instruction Manual
J325I-IM-7
®
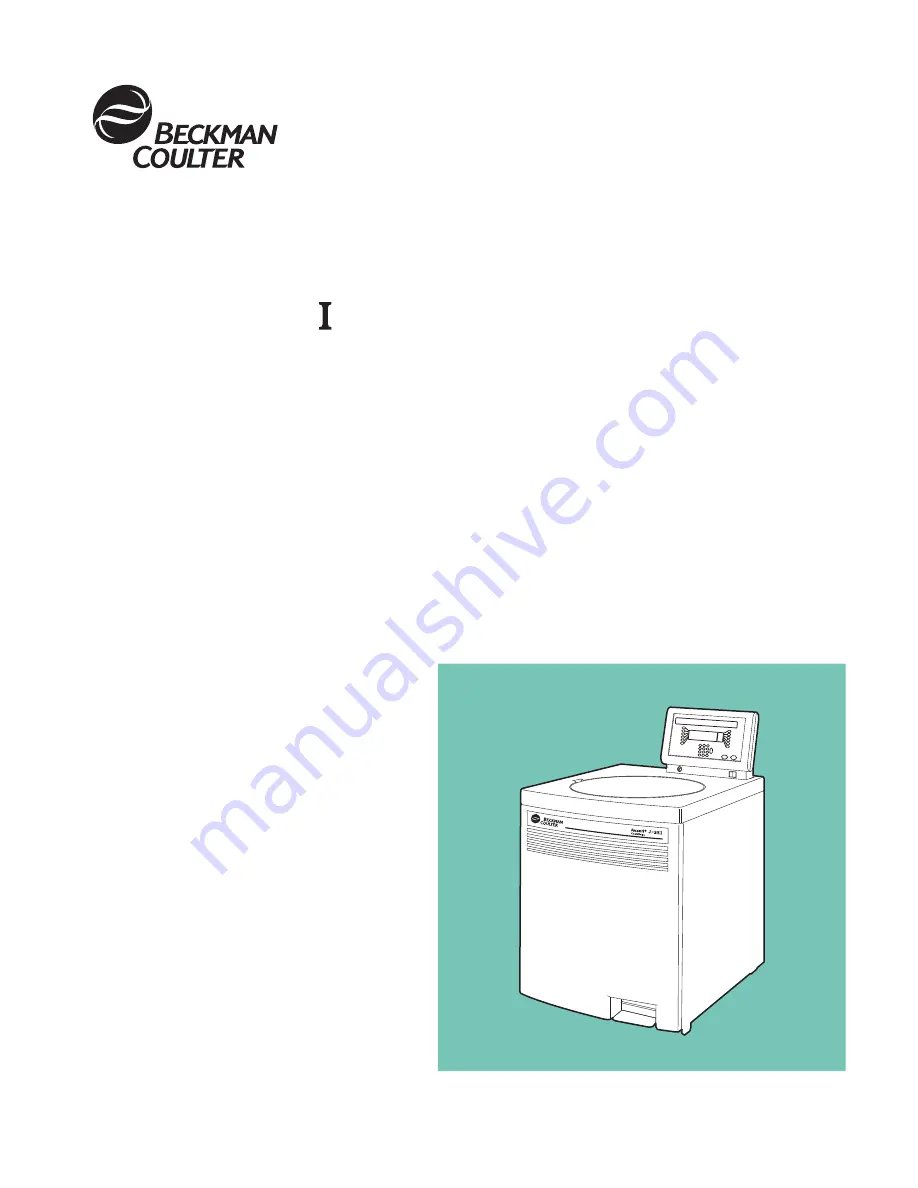
High-Performance Centrifuge
Avanti
J-25
Page 1: ...Instruction Manual J325I IM 7 High Performance Centrifuge Avanti J 25...
Page 2: ...lter les documents joints Atenci n consulte los documentos adjuntos Attenzione consultare le informazioni allegate On power Ein Netzverbindung Marche mise sous tension Encendido Acceso sotto tensione...
Page 3: ...e and refer such servicing to qualified personnel Be sure to use the anchoring system to secure the centrifuge in place The anchoring system is designed to reduce the possibility of injury or damage w...
Page 4: ...ecause they can transmit disease No known test offers complete assurance that these fluids are free of micro organisms Some of the most virulent Hepatitis B and C viruses and HIV I V atypical mycobact...
Page 5: ...J325I IM 7 January 2007 Instruction Manual High Performance Centrifuge 2007 Beckman Coulter Inc Printed in the U S A JUC 0107 PDF Avanti J 25...
Page 6: ......
Page 7: ...s 1 10 Securing the Centrifuge to the Floor 1 12 Using J2 Series Rotors in the Avanti J 1 12 Checking for Rotor Drive Pins 1 13 Using the JA 18 Rotor 1 14 Using the JCF Z Continuous Flow Zonal Rotor 1...
Page 8: ...14 Creating a New Program 3 14 Modifying a Program 3 16 Running a Program 3 17 Setting Up a Zonal Run 3 17 Setting Up an Elutriation Run 3 19 SECTION 4 TROUBLESHOOTING User Messages 4 1 Accessing the...
Page 9: ...ey Switches 2 5 Figure 2 2 The Control Panel 2 7 Figure 2 3 The Actual Value Display 2 7 Figure 2 4 The Setup Screen 2 8 Figure 3 1 Elutriation Controls 3 19 Figure 4 1 Emergency Door Release Latch Ac...
Page 10: ...e recommend that you read this entire manual especially the SAFETY NOTICE and all safety related information before operating the instrument or performing instru ment maintenance Section 1 contains sy...
Page 11: ...Certain symbols are used in this manual to call out safety related and other important information These international symbols may also be displayed on the centrifuge and are reproduced and described...
Page 12: ...ue display names and setup screen field names for example TEMP C and Rotor appear in bold type RADIO INTERFERENCE This instrument has been tested and found to comply with the limits for a Class A digi...
Page 13: ...ectronic Equipment WEEE Directive of the European Union The presence of this marking on the product indicates 1 the device was put on the European market after August 23 2005 and 2 the device is not t...
Page 14: ...g range up to 9 99 1014 radians squared per second 2t actual display indicates accumulated centrifugal effect to 3 significant digits in exponential notation Temperature Setting range 20 to 40 C in 1...
Page 15: ...ht door closed 86 cm 34 in Height to top of control head 116 cm 45 5 in Height to top of open door 141 cm 55 5 in Weight 264 kg 583 lb Clearances for adequate ventilation Sides 7 6 cm 3 in Back place...
Page 16: ...mum speed for the JS 24 38 and JS 24 15 rotors is 10 000 rpm in the Avanti J 25I centrifuge and 24 000 rpm in the Avanti J 30I centrifuge Rotor Profile and Description Max RPMa Max RCF g Max Capacity...
Page 17: ...is 10 000 rpm in the Avanti J 25I centrifuge and 24 000 rpm in the Avanti J 30I centrifuge Rotor Profile and Description Max RPMa Max RCF g Max Capacity Rotor Manual Number JA 20 Fixed Angle 34 8 pla...
Page 18: ...38 and JS 24 15 rotors is 10 000 rpm in the Avanti J 25I centrifuge and 24 000 rpm in the Avanti J 30I centrifuge Rotor Profile and Description Max RPMa Max RCF g Max Capacity Rotor Manual Number JA...
Page 19: ...d 24 000 rpm in the Avanti J 30I centrifuge Rotor Profile and Description Max RPMa Max RCF g Max Capacity Rotor Manual Number JS 24 15 Swinging Bucket 6 place rmax 171 3 mm 10 000c 19 200 6 15 mL J TB...
Page 20: ...GE TO THE FLOOR later in this section A 9 5 mm 3 8 inch drill is required for concrete floors A 6 4 mm 1 4 inch drill is required for wood floors ELECTRICAL REQUIREMENTS Power to the centrifuge should...
Page 21: ...circuit breakers Figure 1 2 shows the power connection for three phase centrifuges including earth ground and three power leads with minimum 16 ampere circuit breakers and common neutral connec tion...
Page 22: ...ant 96 30 FR or Equivalent NEMA 6 30 R Earth Ground 30 ampere Circuit Breaker 30 ampere Circuit Breaker Measured Line Voltage Phase to Phase Earth Ground 16 ampere Circuit Breaker 16 ampere Circuit Br...
Page 23: ...start delay type The centrifuge can tolerate a drop of 15 volts during the start period at low line voltage see Figure 1 3 for the acceptable voltage ranges The mains power for the centrifuge must be...
Page 24: ...ring centrifugation operation Position the centrifuge so that the air diverter shown in Figure 1 4 touches the wall behind the centrifuge Place the power cord to one side of the air diverter To avoid...
Page 25: ...vent the centrifuge from moving in the unlikely event of a rotor mishap Complete instructions for installing the anchoring kit are packaged with the hardware which is shipped with the centrifuge The i...
Page 26: ...ly manufactured without drive pins because pins were not needed when these rotors were used in older model centrifuges Figure 1 5 Checking the Rotor for Drive Pins The rotor pins are positioned parall...
Page 27: ...FLOW ZONAL ROTOR Zonal Bracket Kits A special bracket and mounting hardware are required when the JCF Z Continuous Flow Zonal Rotor is used These parts are contained in the Zonal Bracket Kit part num...
Page 28: ...se of several Beckman Coulter fixed angle rotors If rotor misidentification occurs when your JCF Z rotor is used first perform three runs from 0 to 5000 rpm and back to 0 rpm If rotor misidentificatio...
Page 29: ...l forces required for a wide variety of applications Together with the Beckman Coulter rotors designed for use in this centrifuge applications include Routine processing such as sample preparations pe...
Page 30: ...save sets of run parame ters To perform a run you recall and start a previously saved program enabling quick and accurate run duplication Up to thirty programs can be saved each containing one or two...
Page 31: ...e instrument control housing is made of aluminum and molded structural foam The door and structural foam cover panels are finished with polyurethane enamel The control panel is covered by a protective...
Page 32: ...d vacuum level is reached the pump turns off Vacuum in the chamber is vented during rotor deceleration TEMPERATURE SENSING AND CONTROL The temperature control system cooled by circulation of a non CFC...
Page 33: ...erature goes above 45 C NAME RATING PLATE The name rating plate is affixed to the rear of the centrifuge Always mention the model number and serial number when corresponding with Beckman Coulter regar...
Page 34: ...e the rotor is spinning PROG RAM LOCK mode disables the function that saves parameters to stored programs to prevent overwriting of previ ously stored programs RUN LOCK mode disables all user inputs e...
Page 35: ...displays the rotor name SPEED Indicates rotor speed in revolutions per minute rpm or in relative centrifugal field a term describing the ratio of the centrifugal acceler ation at a specified radius a...
Page 36: ...rature after temperature equilibrium is reached Setup Screen The setup screen Figure 2 4 contains editable fields for parameter entry The six function keys to the left of the screen are for selecting...
Page 37: ...fy the rotor and reduce the speed setting to the maximum for that rotor A message will alert you to the change TIME Pressed to enter run time using the keypad When TIME is pressed the last digit on th...
Page 38: ...on while protecting samples When A D is pressed the Accel field flashes prompting you to enter an acceleration setting Pressing A D once more moves the cursor to the Decel field Available acceleration...
Page 39: ...g The red light on the STOP key flashes while the rotor decelerates An audible tone sounds when the rotor comes to a complete stop Deceleration can be terminated and the centrifuge restarted by pressi...
Page 40: ...in systemic fungi further emphasize the need for aerosol protection Handle other infectious samples according to good laboratory procedures and methods to prevent spread of disease Because spills may...
Page 41: ...y to select a time mode HH MM Hold or 2t then use the keypad to enter the run time or 2t value No entry is made in Hold mode 7 Press TEMP then use the keypad to enter the required run temperature 8 Pr...
Page 42: ...o open the door The door opens 1 Press the POWER switch to on I 2 Depress the foot pedal to open the chamber door 3 Install the rotor according to instructions in the applicable rotor manual then firm...
Page 43: ...it slightly and lower it onto the hub again Tighten the knob 5 Close the chamber door CAUTION If you leave the rotor in the centrifuge between runs make sure the rotor is seated on the drive hub and...
Page 44: ...otors are displayed below Press the MORE soft key to display additional fixed angle rotor names 3 Select the rotor name by pressing the appropriate soft key Press ENTER The selected rotor name appears...
Page 45: ...digit of the rpm entry if necessary and calculates and displays the g force applied to the rotor at that speed Entering RCF Action Result 1 Press SPEED The Speed field flashes and the RPM and RCF soft...
Page 46: ...s at the calculated rpm If you enter an rcf value that is unachievable for the installed rotor a message will appear telling you the rotor s achievable rcf range ENTERING RUN TIME Run time can be ente...
Page 47: ...unted down to 0 During deceleration End flashes in the TIME display and the red indicator light on the STOP key flashes Entering an 2t Run Action Result 1 Press TIME HH MM W2T and HOLD soft keys appea...
Page 48: ...different at the end of the run Entering a Continuous HOLD Run Action Result 1 Press TIME The HH MM W2T and HOLD soft keys appear 2 Press the HOLD soft key to select the hold mode HOLD appears in the...
Page 49: ...mp field 3 Press the TEMP key again to move the cursor to the Max Temp field Entered temperature plus 4 C appears in the Max Temp field and YES and NO soft keys appear The default maximum temperature...
Page 50: ...Slow acceleration Approximately 2 minutes from 0 to 500 rpm The exact time depends on the mass of the rotor in use larger rotors take longer Above 500 rpm full torque is used until set speed is reach...
Page 51: ...ft key If you choose MAX or SLOW your selection appears in the Accel field If you choose TIME enter an acceleration time from 1 to 10 minutes and press A D again or accept the 10 minute default settin...
Page 52: ...a run is in progress run parameters speed time temperature and acceleration and deceleration settings can be changed without stopping the run by entering the new setting and pressing ENTER ENDING A RU...
Page 53: ...1 Press OPT Default system parameters appear the Prog ram Recall field flashes and the message line says Enter program number 1 30 2 Press OPT again to move the cursor to the Setup field Use the keypa...
Page 54: ...m that contains user entered settings in step 2 those values are retained until you change them To check step 2 settings press the STEP2 soft key 5 To add a second step to program 1 press the STEP2 so...
Page 55: ...program number appears in the Setup field A message appears asking if you want to overwrite the program YES and NO soft keys appear 3 Press the YES soft key The step 1 parameters appear 4 To see step...
Page 56: ...3000 rpm is permitted to allow loading and unloading of the rotor while it is spinning The JCF Z continuous flow zonal rotor is the only rotor that can be used while the key switch is in the ZONAL po...
Page 57: ...mulating 5 Load the rotor 6 Close the door The rotor accelerates to the set speed If you entered a loading speed other than 2000 rpm re enter the run speed after you close the door 7 End the run When...
Page 58: ...have elutriation controls as shown in Figure 3 1 as well as a view port in the door and an elutriation power box mounted to the back of the control panel See the JE 6B rotor manual JE6B IM for complet...
Page 59: ...Press the JE soft key JE 6B appears in the Rotor field 4 Enter the remaining run parameters 5 Press ENTER then START The rotor accelerates to set speed 6 When the rotor reaches set speed turn on the...
Page 60: ...s Sample can now be injected into the lines See the rotor instruction manual for detailed instructions NOTE At the end of the run after disassembling the liquid and power lines be sure to replace the...
Page 61: ...nforma tion about the instrument or to alert you to abnormal conditions that need attention Help messages caused by incorrect input or certain operating conditions can be cleared by pressing CE and fo...
Page 62: ...esumes Press CE to clear message L2 Door not latched reclose door L5 Door not latched call Beckman service Door not closed firmly enough or debris in latch area may be preventing latches from closing...
Page 63: ...Service Drive system problem for example over current over under voltage components over temperature Run stops usually with no brake Door may not unlock for up to an hour Call Beckman Coulter Field S...
Page 64: ...ill turn off then press CE to clear the diagnostic Set the new run speed and then press ENTER START to begin a new run I1 Imbalance error Rotor load is severely out of balance Run shuts down with maxi...
Page 65: ...oise coming from the chamber Proceed only if the instrument is quiet Never attempt to override the door interlock system while the rotor is spinning If the facility power fails momentarily the centrif...
Page 66: ...s 3 Repeat step 2 inserting the wrench through the other hole After the second latch disengages the front panel will fall forward about an inch from the top The bottom of the front panel is held in pl...
Page 67: ...edal Depending on the level of vacuum in the chamber at the time of the power failure the door may or may not open If it opens go to step 6 If it doesn t open you will need to manually vent the vacuum...
Page 68: ...TE Several tubing lines are tied to the red hose As you grasp the hose place your hand over these lines Make sure that they stay connected as you pull CAUTION Do not twist the hose to the left counter...
Page 69: ...Troubleshooting Figure 4 3 Venting the Chamber Vacuum Vacuum Pump Grasp red hose and pull up Do not disconnect the tubing lines tied to the red hose Red hose removed from fitting Replace red hose 1 2...
Page 70: ...d insert the allen wrench through the hole Turn to the right clockwise about one half turn until you reach a stop The first latch engages 3 Repeat step 2 on the right side The second latch engages JCF...
Page 71: ...the bearings in the rotating seal assembly reducing drag In older JCF Z rotors with bearings that have not been replaced recently follow the same procedure as for a new JCF Z rotor perform three runs...
Page 72: ...ment as well as any rotors and accessories before requesting service by a Beckman Coulter Field Service representative WARNING Any maintenance procedure or servicing of this equipment that requires re...
Page 73: ...for 20 minutes These are suggested settings which may be adjusted as appropriate for your laboratory conditions CLEANING Clean the centrifuge frequently Always clean up spills when they occur to preve...
Page 74: ...genic solutions perform appropriate decontamination proce dures Refer to Appendix A in Rotors and Tubes or publication IN 175 to be sure the decontamination method will not damage any part of the cent...
Page 75: ...filter with this arrow pointing toward the centrifuge Holding the filter by the side edges insert the top half behind the frame edge and lift up until the bottom half clears the retaining strip Then...
Page 76: ...orization form must be obtained from Beckman Coulter Inc Contact your local Beckman Coulter office to obtain the RGA form and for packaging and shipping instructions To protect our personnel it is the...
Page 77: ...screw stainless steel M4 threads 19 mm qty 2 893412 Thumbscrew stainless steel M4 threads 12 mm qty 2 893411 Cable Clamp nylon 6 4 mm 1 4 in I D qty 10 000499 Zonal Tubing Adapter for Cole Parmer size...
Page 78: ...trifuge tempera ture setting to bring your sample as close as possible to the required temperature 1 Precool the rotor in a refrigerator to the required temperature The length of precooling time depen...
Page 79: ...or thermocouple 6 If the measured and set temperatures are different note how many degrees different the measurements are and adjust the set tempera ture up or down that number of degrees For example...
Page 80: ...ned to Buyer with the trans portation charges collect unless the product is found to be defective in which case Beckman Coulter will pay all trans portation charges Beckman Coulter makes no warranty c...
Page 81: ...South Road Section 2 Taipei 106 Taiwan Republic of China Telephone 886 2 2378 3456 Fax 886 2 2377 0408 TURKEY Beckman Coulter Ltd E 5 Yanyol Faith Cad 81410 Soganlik Kartal Istanbul Turkey Telephone...