Decomissioning
7
Decomissioning
7.1
Removal and disposal
A CX10x0 hardware configuration is dismantled in 2 stages:
0. Switching off and disconnecting the power supply
Before a CX10x0 system can be dismantled, the system should be switched off, and the power supply
should be disconnected.
1. Removing from the top-hat rail:
Before the individual CX10x0 modules are disconnected, the whole CX10x0 hardware block should be
removed from the top-hat rail. Proceed as follows:
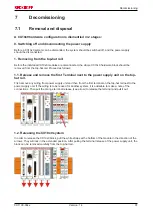
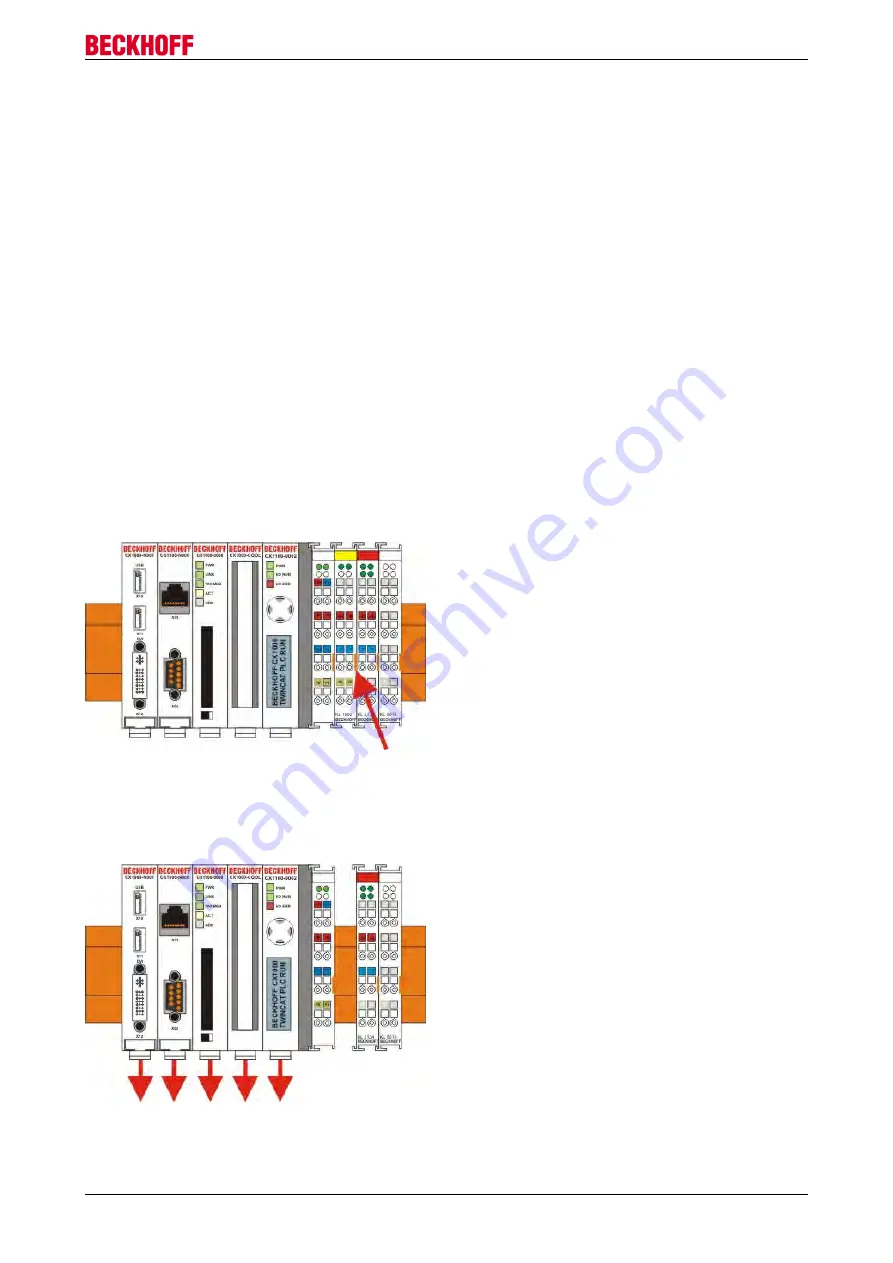
1.1. Release and remove the first Terminal next to the power supply unit on the top-
hat rail.
First remove any wiring from power supply unit
and
then from the first terminal on the top-hat rail next to the
power supply unit. If the wiring is to be reused for another system, it is advisable to make a note of the
connections. Then pull the orange terminal release (see arrow) to release the terminal and pull it out.
1.2. Releasing the CX10x0 system
In order to release the CX10x0 block, pull the white straps at the bottom of the module in the direction of the
arrows. They will lock in the extended position. After pulling the terminal release of the power supply unit, the
block can be removed
carefully
from the top-hat rail.
CX1100-09xx
37
Version: 1.4
Summary of Contents for CX1100-09 Series
Page 1: ...Hardware Documentation CX1100 09xx UPS for Embedded PCs CX10x0 1 4 2015 07 02 Version Date...
Page 2: ......
Page 15: ...Fitting and wiring CX1100 0910 UPS Module CX1100 0920 UPS Module CX1100 09xx 15 Version 1 4...
Page 24: ...Commissioning The retention times are CX1100 09xx 24 Version 1 4...

