


53
R5914712 /00
SP2K-C
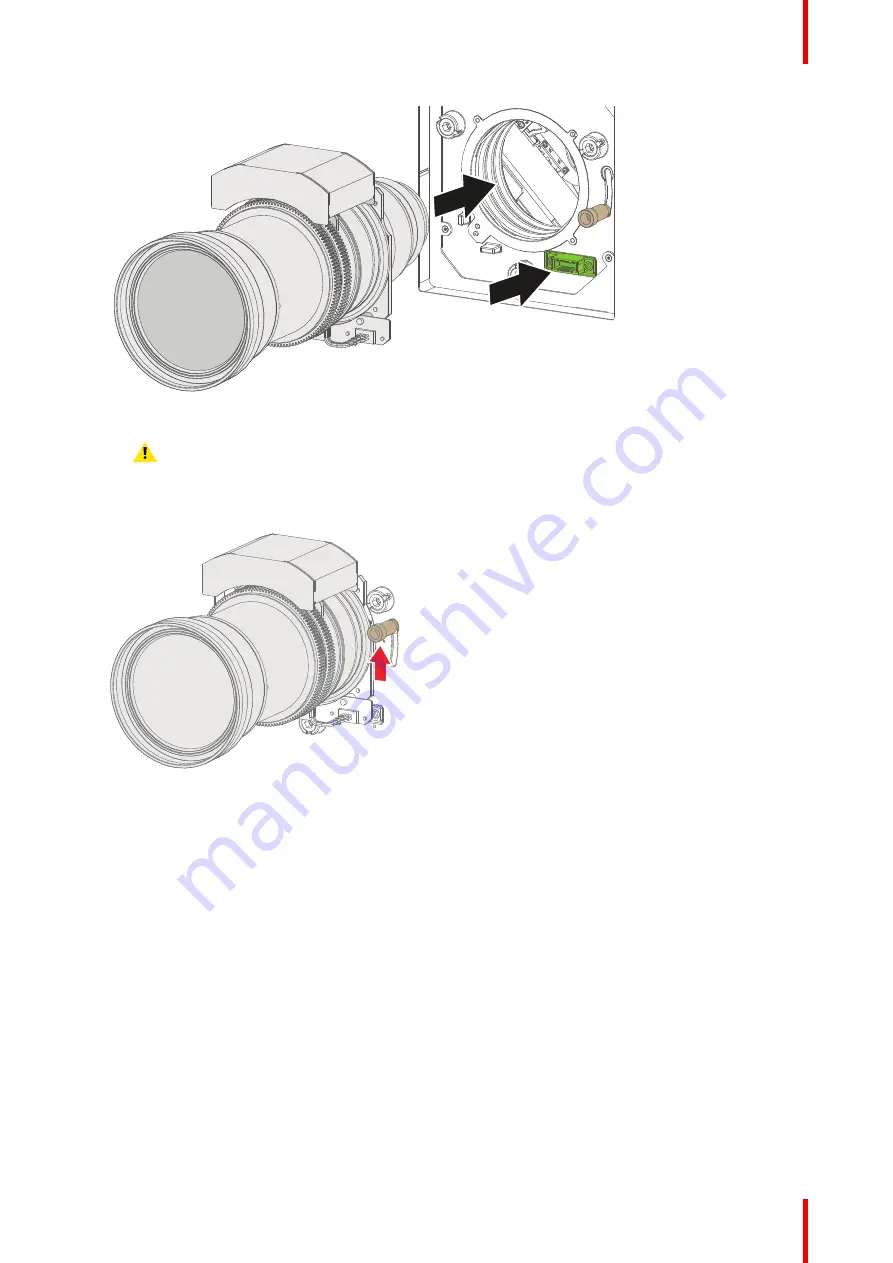
Image 5–4 Lens installation
5.
Insert the lens until the connector seats into the socket.
Warning:
Do not release the lens yet, as the lens may fall out of the lens holder.
6.
Secure the lens in the lens holder by sliding the primary lens lock handle into the “locked” position (to the
top of the projector). Ensure the lens touches the front plate of the lens holder.
Image 5–5 Lock lens
7.
Check if the lens is really secured by trying to pull the lens out of the lens holder.
Summary of Contents for SP2K-C
Page 1: ...ENABLING BRIGHT OUTCOMES Installation manual SP2K C...
Page 4: ......
Page 8: ...R5914712 00 SP2K C 8...
Page 48: ...R5914712 00 SP2K C 48 Physical installation projector...
Page 62: ...R5914712 00 SP2K C 62 Lenses Lens holder...
Page 70: ...R5914712 00 SP2K C 70 ICMP X...
Page 90: ...R5914712 00 SP2K C 90 ICMP X...
Page 98: ...R5914712 00 SP2K C 98 Projector Power Cycle...
Page 104: ...R5914712 00 SP2K C 104 Connectivity...
Page 107: ...107 R5914712 00 SP2K C Image 10 3 Sealed top cover remove Convergence...
Page 109: ...109 R5914712 00 SP2K C 1 1 Image 10 6 Sealed cover fixation Convergence...
Page 116: ...R5914712 00 SP2K C 116 Convergence...
Page 132: ...R5914712 00 SP2K C 132 Image 12 13 Tightening the screws of the side cover Projector covers...
Page 140: ...R5914712 00 SP2K C 140 Dimensions...
Page 146: ...R5914712 00 SP2K C 146 Restriction Zone clarification and use cases...
Page 150: ...R5914712 00 SP2K C 150 List of tools...
Page 154: ...R5914712 00 SP2K C 154 Index...
Page 155: ......


