601
–
0445 /05
Loki
119
4.
Enter the menu
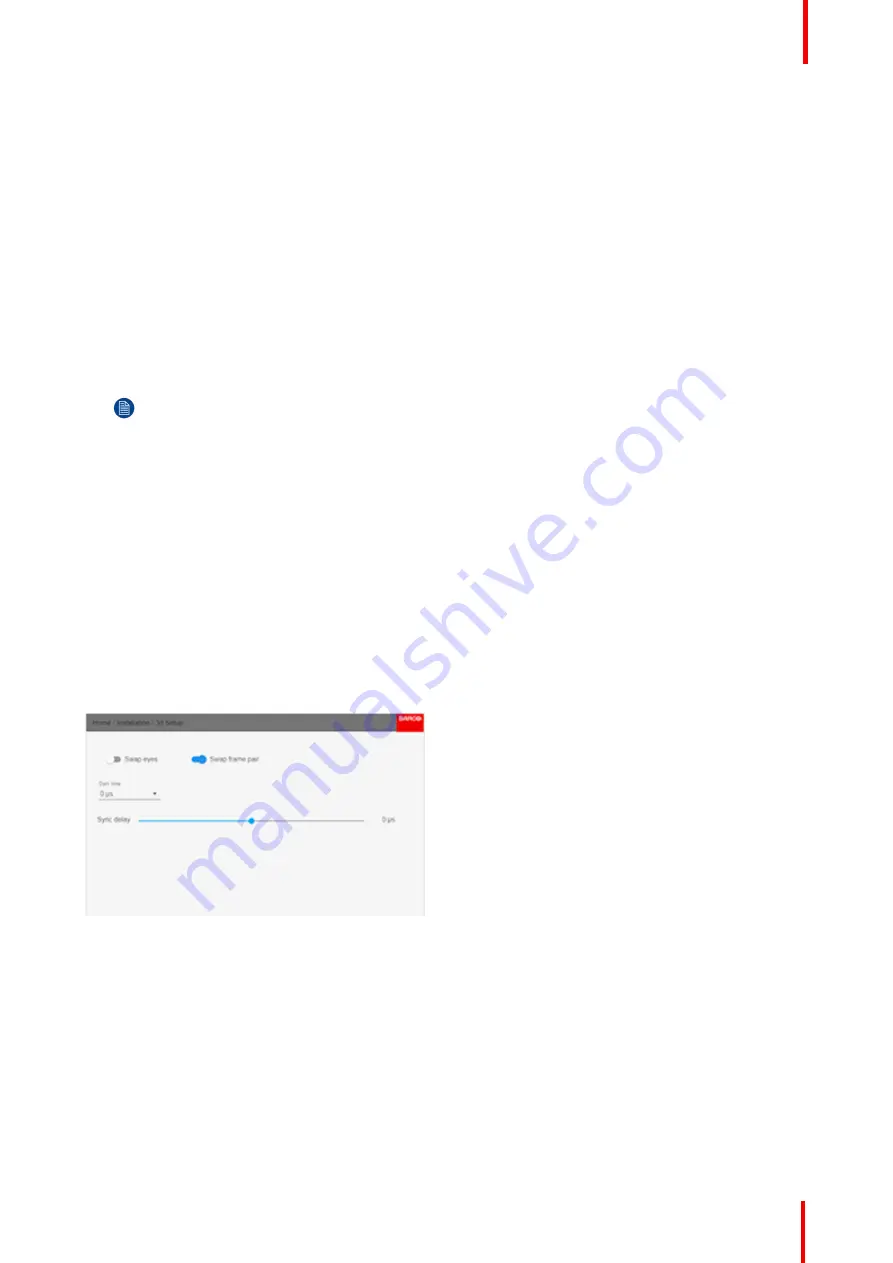
Home/Installation/3D Setup
, and select the dark time that shows up when the Dark time drop
down menu is selected. The projector detect the color wheel, and only one option is available, depending on
the color wheel.
Available color wheels with their respective dark times are :
•
DCI: 1600us
•
High Brightness: 1660us
•
Color: 1850us
5.
Run a 3D image or movie from the source.
Put on the 3D goggles, and verify by looking through the goggles with one eye at the time that only one image
is visible in each eye. A double picture or a shade of the picture from the other side shall not be observed.
Repeat for both sides, and adjust the Sync Delay slider until a
“
clean
”
picture is visible in each eye.
If the 3D picture looks a bit
“
strange
”
through the 3D goggles, the solution is to swap eyes by enabling the
Swap eyes button in the menu.
Note:
There is also a 3D test pattern available. Go to the menu
Home/Test Patterns/Internal
Select the
3DSTEREO pattern.
The test pattern menu also have a shortcut key on the remote control and the keypad.
Why change the 3D setup?
While Barco can provide a 3D emitter and active shutter glasses as options to this projector, you are also free
to use a 3D emitter and active shutter glasses of your own choice. Since glasses and emitter can have various
specifications compared to the ones Barco can provide, the 3D setup menu allows you to configure the output
image to the specifications of your glasses and emitter. The following can be configured:
•
Swap Eye
: You can choose to invert the stereo Sync output signal ( depending on the chosen 3D emitter
and glasses).
•
Swap frame pair
: You can choose to invert the stereo input signal (depending on the chosen source
input).
•
Dark time
: Pre defined, dependent on the color wheel installed. See item 11.1.4 above.
•
Stereo glasses
: Active 3D glasses must be used.
•
Sync Delay
: You can increase or decrease the sync delay. The scale goes from
–
10 000 µs to +10 000 µs
with a step of 100 µs.
Image 11-4
Summary of Contents for Loki
Page 1: ...ENABLING BRIGHT OUTCOMES Installation Manual Loki...
Page 8: ...601 0445 05 Loki 8...
Page 20: ...601 0445 05 Loki 20 Safety...
Page 26: ...601 0445 05 Loki 26 Image 2 6 Image 2 7 All calibrations performed and OK Lenses...
Page 38: ...601 0445 05 Loki 38 Physical installation...
Page 48: ...601 0445 05 Loki 48 Getting started...
Page 70: ...601 0445 05 Loki 70 Image menu...
Page 71: ...71 601 0445 05 Loki Advanced picture adjustments 7...
Page 76: ...601 0445 05 Loki 76 Advanced picture adjustments...
Page 106: ...601 0445 05 Loki 106 Installation menu...
Page 116: ...601 0445 05 Loki 116 Status menu...
Page 120: ...601 0445 05 Loki 120 3D...
Page 121: ...121 601 0445 05 Loki Risk Group 3 Safety 12...


