Barco iD R600/R600+
Owners Manual
R9010340R9010341
R5976837/0221/09/2006
Downloaded From projector-manual.com Barco Manuals
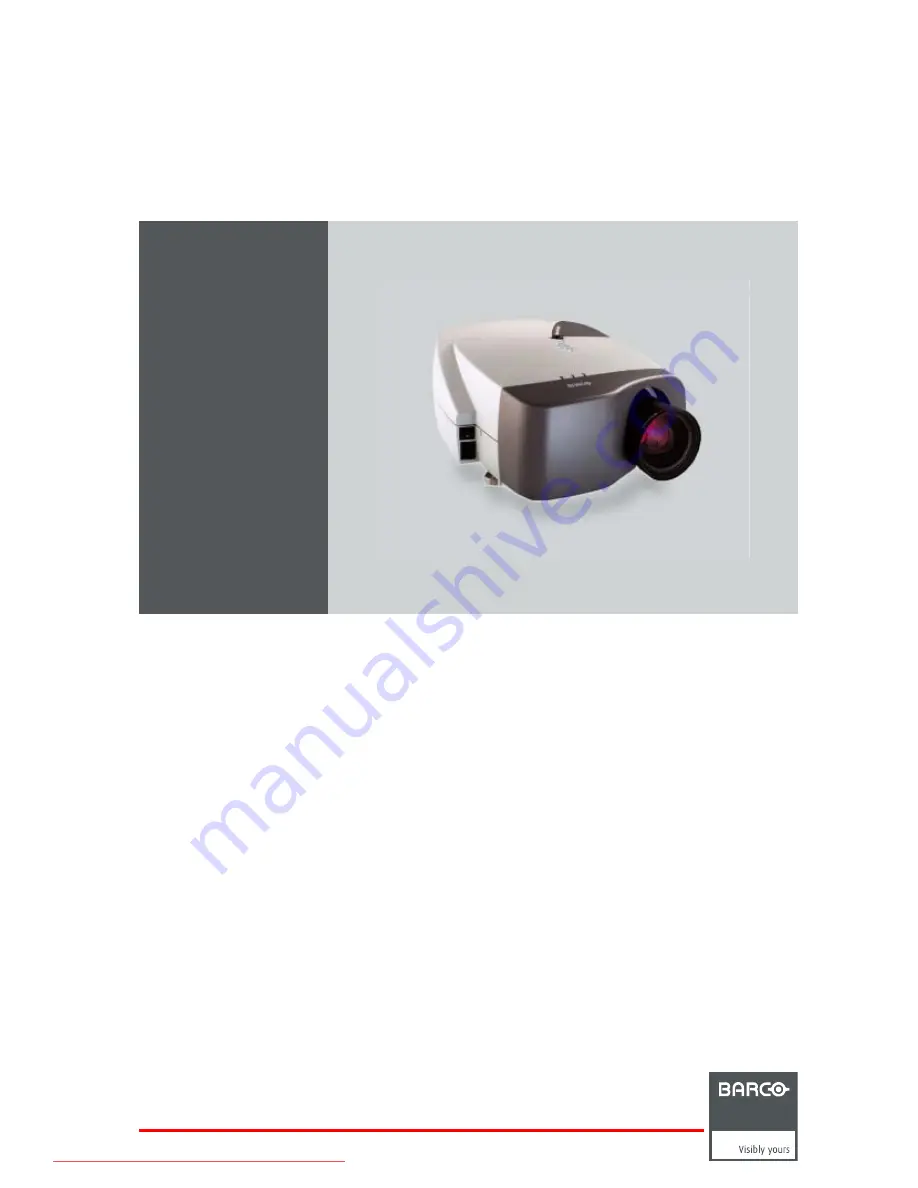
Page 1: ...Barco iD R600 R600 Owners Manual R9010340 R9010341 R5976837 02 21 09 2006 Downloaded From projector manual com Barco Manuals...
Page 2: ...V1 30 Barco nv Presentations Noordlaan 5 8520 Kuurne Phone 32 56 36 82 11 Fax 32 56 35 86 51 E mail presentations bid barco com Visit us at the web www barco com Printed in Belgium Downloaded From pr...
Page 3: ...rco provides this manual as is without warranty of any kind either expressed or implied including but not limited to the implied war ranties or merchantability and fitness for a particular purpose Bar...
Page 4: ...Downloaded From projector manual com Barco Manuals...
Page 5: ...1 RS232 IN connection 20 4 Setup 21 4 1 RCU Local keypad 21 4 2 Terminology overview 22 4 3 Switching on 24 4 4 Setting up the RCU address 25 4 5 Projector address 26 4 6 Orientation 27 4 7 Adjusting...
Page 6: ...87 6 8 1 Load file 87 6 8 2 Auto Image 88 6 8 3 Edit file 90 6 8 4 Rename file 93 6 8 5 Copy 94 6 8 6 Delete 94 6 8 7 Forced file load 95 6 9 Display Setup 96 6 9 1 Full screen representation 96 6 9 2...
Page 7: ...ion during transportation the projector is surrounded with foam The package is secured with banding and fastening clips R824562 R824561 R824518 cable basket R724408 R825784 Projector Image 1 1 Lens pa...
Page 8: ...he 3 screws spacers fixing the projector to the wooden board 7 Remove the projector from the board PULL TO OPE Image 1 2 Save the original shipping carton and packing material they will be necessary i...
Page 9: ...sumable parts dustfilters lamps For installations in environments where the projector is subject to airborne contaminants such as that produced by smoke machines or similar these deposit a thin layer...
Page 10: ...h screen type There are two major categories of screens used for projection equipment Those used for front projected images and those for rear projection applications Screens are rated by how much lig...
Page 11: ...projector Connections Dimensions overview Dimensions are given in mm 1 inch 25 4 mm Length with different lenses see table Cold air IN Cold air IN 69 20 Cold air OUT 415 487 length without Cable Baske...
Page 12: ...3 Insert the batteries as indicated in the RCU 4 Put the battery cover on its place How to replace the batteries in the RCU To replace the batteries 1 Remove the battery cover on the backside by push...
Page 13: ...ector 3 Push carefully to lock the lens in the housing Image 3 3 3 2 2 Removing the lens How to remove the lens 1 Unlock the lens by pulling the handle located on the right side of the projector image...
Page 14: ...W 1 97 PDmax 1 3 X SW 2 36 CLD 1 2 1 6 1 PDmin 1 19 X SW 0 02 PDmax 1 63 X SW 0 02 PDmin 1 19 X SW 0 79 PDmax 1 63 X SW 0 79 CLD 1 6 2 4 1 PDmin 1 58 X SW 0 00 PDmax 2 39 X SW 0 02 PDmin 1 58 X SW 0 0...
Page 15: ...ositioned so as to have the centre of the lens coinciding with the centre of the screen Positioning the projector The position of the projector with reference to the screen may also be different depen...
Page 16: ...3 Installation P PD x F a b c S S B SH SW SH SW F CD SH 2 B A A front plate Image 3 7 12 R5976837 BARCO ID R600 R600 21 09 2006 Downloaded From projector manual com Barco Manuals...
Page 17: ...ion means that the position of the centre of the lens is shifted by half the screen height Never use a short throw lens in an Off Axis installation Shifting the lens will not guarantee optimal image q...
Page 18: ...t Optional Communications Connections 3 5 2 1 Input section Input Layers The input section is divided in layers each of them regrouping several inputs this architecture allows the input section to be...
Page 19: ...e projector and can be fitted on the front of the projector Image 3 10 Cable basket the white arrow shows the cables leaving the projector A Front view B Back view 3 5 2 3 5 Cable input Input specific...
Page 20: ...ls can be connected Signals Input BNC R G B H V RGBHV R G B H V RGsB1 R Gs B RGBS1 R G B S Component PR Y PB How to select a source on the 5 cable input 1 Press 1 on the RCU Note Another way for selec...
Page 21: ...2 5 S Video input Input specification Image 3 13 Which signal can be connected Standard S Video S VHS with separate Y luma and C chroma signals How to select the S Video input 1 Press 4 on the RCU Not...
Page 22: ...ansition Minimized Differential Signal from Silicon Image and DDC Display Data Channel from VESA Video Electronics Standards Association DVI can be single or dual link Input specifications Single link...
Page 23: ...rough typical 0 8 Vpp 75 terminated output impedance 75 Image 3 16 How to select the SDI input 1 Press 7 on the RCU Note Another way for selecting this input is via Source on the local keypad or via t...
Page 24: ...ommunicate with a Computer e g IBM PC or Apple Macintosh Image 3 18 Applications of the RS232 connection Remote control easy adjustment of projector via IBM PC or compatible or MAC connection address...
Page 25: ...keypad How controlling the projector The projector can be controlled by the local keypad or by the remote control unit Location of the local keypad The local keypad is located on the topside of the p...
Page 26: ...switching to pause blanked picture full power for immediate restarting direct access to all connected sources Diagnose LED s Green Red LED1 cool down sequence flickers 60 seconds 120 seconds in case o...
Page 27: ...switched on and to switch off the projector without switching off the power switch Attention Switching to Standby When the projector is running and you want to go to standby press the standby key for...
Page 28: ...sual indicator to check the operation of the remote control 22 IR receiver IR receiver Table 4 2 ordernumber RCU R763794K 4 3 Switching on How to switch on 1 Press the power switch to switch on the pr...
Page 29: ...ts If this is done the original status of the LED s is restored 9 0 EN T ER M EN U B A C K D I G I Z O O M PH A SE PA U SE PI P L O G O Image 4 4 Displaying the Projector Address in projection mode 1...
Page 30: ...RC5 address 1 Press MENU to activate the Tool bar 2 Press to select the Installation 3 Press to Pull down the Installation menu 4 Use or to select Projector address image 4 5 5 Press ENTER A dialog bo...
Page 31: ...orientation image 4 8 7 Press ENTER The projection is adapted and a black bullet shows the active configuration Image 4 8 4 7 Adjusting the lens What must be done Depending on the projection distance...
Page 32: ...B R I G H T N Image 4 9 9 0 EN T ER M EN U B A C K D I G I Z O O M PH A SE PA U SE PI P L O G O Image 4 10 How to Zoom focus or shift in the OSD 1 Press MENU to activate the Tool bar 2 Press to select...
Page 33: ...n the software of the projector How to change the Language 1 Press MENU to activate the Tool bar 2 Press to select the Installation item 3 Press to Pull down the Installation menu 4 Use or to select L...
Page 34: ...ss keys 1 Scroll through the menus to the desired menu item 2 Push the desired function key for 3 seconds image 4 16 The menu item is stored in the quick access key F 1 F 2 F 3 M EN U B A C K Image 4...
Page 35: ...altered environmental conditions when restarting at power resume How to enable disable the Automatic startup 1 Press MENU to activate the Tool bar 2 Press to select the Installation item 3 Press to P...
Page 36: ...4 Setup 32 R5976837 BARCO ID R600 R600 21 09 2006 Downloaded From projector manual com Barco Manuals...
Page 37: ...ct an existing custom layout non factory from the PiP select menu image 5 2 2 Add the video window from the PiP add window menu by selecting the desired composite video source image 5 3 image 5 4 Note...
Page 38: ...source s should be displayed with the right settings thanks to AutoImage If it s not the case in case of some non standard source specifications see Image files in the Advanced chapter 34 R5976837 BA...
Page 39: ...on the RCU to select the desired window image 5 6 2 Use the Image setting buttons on the RCU image 5 7 F 1 F 2 F 3 M EN U B A C K Image 5 6 C O N T R B R I G H T N C O L O R T IN T PH A SE Image 5 7...
Page 40: ...5 Getting started 36 R5976837 BARCO ID R600 R600 21 09 2006 Downloaded From projector manual com Barco Manuals...
Page 41: ...ease or decrease the value Image 6 2 Entering numeric values using the arrow keys on the local keypad 1 Press ENTER to activate the input field 2 Press or to select the digit to be changed 3 Press or...
Page 42: ...urce can be shown in its native resolution or can be re scaled to the projector s resolution the latter case brings of course some loss of quality For more info on resolution match see the Show native...
Page 43: ...on the BNC s This signal is routed to the video circuit and is projected in a Video Window 6 2 2 Composite Video How to select one of the 7 composite video inputs 1 Press MENU to activate the Tool ba...
Page 44: ...presence of a video signal also called S VHS signal An S Video signal is available on the Mini Din connector of a camera VCR or DVD player How to select one of the 3 S Video inputs 1 Press MENU to ac...
Page 45: ...rrupting the image projection With the Pause function the image projection can be stopped the projector remains with full power for immediate restart How to interrupt the image projection 1 Press MENU...
Page 46: ...by timer is enabled a dialogbox is displayed and the projector will shut down after a determined time The countdown time can be set in a dialog box in a range from 180 to 3600 seconds default value 30...
Page 47: ...in case of teleconferencing The configuration has to be done in the Audio Setup menu Starting the Audio Setup menu 1 Press MENU to activate the Tool bar 2 Press to select General 3 Press to Pull down...
Page 48: ...switching will also be done using a fade in out effect 6 3 4 2 Audio Settings Audio Settings 1 Press MENU to activate the Tool bar 2 Press to select General 3 Press to Pull down the General menu 4 Us...
Page 49: ...e Tool bar 2 Press to select General 3 Press to Pull down the General menu 4 Use or to select Identification image 6 15 5 Press ENTER to activate the function On the screen appears a text box In this...
Page 50: ...ess Color Tint hue Sharpness Gamma Phase Noise reduction What can be done Correct image settings are important for a good image reproduction The image settings are made through a dialog box with a scr...
Page 51: ...keys on the remote or the keypad to change the contrast Image 6 19 6 4 1 2 Brightness Brightness adjustment Adjusting the brightness will affect the dark areas of the image Increase the brightness to...
Page 52: ...Tint hue How to change the Tint 1 Press MENU to activate the Toolbar 2 Press to select the Image item 3 Press to Pull down the Image menu 4 Use or to select settings 5 Press to pull down the menu 6 U...
Page 53: ...oise text can end to be unclear How to change the Phase 1 Press MENU to activate the Toolbar 2 Press to select the Image item 3 Press to Pull down the Image menu 4 Use or to select settings 5 Press to...
Page 54: ...antage of the higher vertical resolution offered by the 4 3 ratio The anamorphic term means that the original widescreen image is squeezed in order to fit the 4 3 aspect ratio 4 3 16 9 2 35 1 Image 6...
Page 55: ...llows the best reproduction The Auto function calculates an aspect ratio based on the information stored in the image files Selecting Auto in case of a Video source may shrink the image horizontally H...
Page 56: ...Press ENTER to confirm A dialog box is displayed image 6 27 8 Enter the values for width and height of the image The image aspect ratio is updated Image 6 27 6 4 3 Show native resolution Reality SXGA...
Page 57: ...the complete native resolution of the LCD panels How to enable the Show native resolution function 1 Press MENU to activate the Tool bar 2 Press to select the Image item 3 Press to Pull down the Image...
Page 58: ...wn the Image menu 4 Use or to select Keystone image 6 29 5 Press ENTER to confirm A sliderbox is displayed image 6 30 Use or the numeric keys on the remote or the keypad to adjust the keystone The Top...
Page 59: ...the desired preset color temperature 7 Press ENTER The color temperature of the image is adapted and a white bullet shows the active setting How to start up the custom color temperature 1 Press MENU...
Page 60: ...to bad de interlacing This function may cause undesired effects on standard sources therefore it can be disabled OFF at any time Enabling disabling the filmmode detection 1 Press MENU to activate the...
Page 61: ...that increasing the white peaking will decrease the color saturation How to adjust the White peaking level 1 Press MENU to activate the Tool bar 2 Press to select the Image item 3 Press to Pull down...
Page 62: ...color gamut within this diagram This color gamut is defined by the triangle formed by the x y coordinates of Red Green and Blue These parameters are used by the DynaColor adjustment Image 6 41 The pro...
Page 63: ...by matching the color gamuts of the different projectors to a Common Color Gamut Image 6 43 Common Color Gamut The Common Color Gamut In a basic setup with 2 projectors the perimeter of the Common Co...
Page 64: ...White Common Color Gamut The following parameters can be adjusted within DynaColor the x y coordinates and g Light Output of the 6 Common Color Gamut perimeter points the x y coordinates and g Light...
Page 65: ...6 Advanced 5 Push the cursor key or select enable diasable and then ENTER Image 6 45 R5976837 BARCO ID R600 R600 21 09 2006 61 Downloaded From projector manual com Barco Manuals...
Page 66: ...e projectors iD R600 and iD Pro R600 R9010340 and R9010350 the measuring is done with white peaking 0 In the projectors iD R600 and iD Pro R600 R9010341 and R9010351 however the white peaking must be...
Page 67: ...ow g Yellow Light Gain Magenta g Magenta Light Gain White g White Light Gain Status Enables or disables Dynacolor Factory Preset Sets the measured parameters back to the factory preset for the current...
Page 68: ...esired values for red set to x 633 and y 328 im age 6 51 7 Repeat step 5 to 6 for all coordinates on both projectors Both projectors will now operate within the same color gamut Image 6 47 64 R5976837...
Page 69: ...6 Advanced Image 6 48 R5976837 BARCO ID R600 R600 21 09 2006 65 Downloaded From projector manual com Barco Manuals...
Page 70: ...6 49 Red coordinates for both projectors 650 640 310 320 330 660 R1 R2 Rc Image 6 50 Coordinate is not present within the gamut of the adjusted projector 66 R5976837 BARCO ID R600 R600 21 09 2006 Down...
Page 71: ...settings are stored in the image files In other words each custom file or source has its own blanking values See the blanking procedure in the Display settings menu If the selected source is not entir...
Page 72: ...signals of a particular source there are conditions in fact we must know the black and the white level of the source i e 1 the source in question must be able to generate a white signal ideally a 100...
Page 73: ...a minimal value Note this minimal value is not necessary provided that the 2 other colors are not influencing too much the color to be adjusted in fact the aim is to minimize the effect of the two ot...
Page 74: ...lue is not necessary provided that the 2 other colors are not influencing too much the color to be adjusted in fact the aim is to minimize the effect of the two other colors since there is a risk of r...
Page 75: ...trol allows an automatic amplitude gain control of the incoming video signal AGC is only for Video signals Enabling disabling the AGC 1 Press MENU to activate the Tool bar 2 Press to select the Image...
Page 76: ...disabled The manual gain control must be done on an external pattern with white areas grey scale bar pattern How to set the Manual Gain Control 1 Press MENU to activate the Tool bar 2 Press to select...
Page 77: ...of the IQ projector allows a multitude of combinations of different input signals which may be projected in the 4 windows of the PiP screen The PiP mode allows independent settings for each window Im...
Page 78: ...buttons PiP Adjust this button allows to focus on one particular window this is shown with a white frame surrounding the selected window A source identification box is displayed in the right lower cor...
Page 79: ...t is possible to add a window to the existing windows maximum 4 therefore a source must be selected Sources which are already used are non selectable If for instance the PiP layout contains a componen...
Page 80: ...rame each hit on PiP ADJUST will move the frame along the different windows Image 6 68 6 5 5 PiP layout Overview PiP Save PiP rename layout PiP delete layout 6 5 5 1 PiP Save What can be done The acti...
Page 81: ...n fixed layouts factory and personal layouts can be renamed The maximal length of the name is 12 characters A fixed layout can not be renamed How to rename a layout 1 Press MENU to activate the Tool b...
Page 82: ...ivate the Tool bar 2 Press to select the Tools item 3 Press to Pull down the Tools menu 4 Use or to select PiP layout 5 Press to pull down the menu 6 Use or to select Delete 7 Press ENTER A dialog box...
Page 83: ...o select PiP Adjust 5 Press ENTER The menu dissapears The focus moves to the next window when pressing ENTER clockwise rotation If you press BACK or if you wait 5 seconds the menu is displayed When us...
Page 84: ...from one source to another one can use the Seamless switching mode beside Seam less switching there is a wide choice of several effects which render the source switching transitions more enjoyable How...
Page 85: ...ing will also be done using a fade in out effect 6 6 2 Background Purpose If there is no signal connected to the projector the background will be a logo a black or a blue screen depending on the backg...
Page 86: ...fter the predetermined time 6 7 Lamp management 6 7 1 Runtimes How to display the lamp runtimes 1 Press MENU to activate the Toolbar 2 Press to select the Lamp item 3 Press to Pull down the Lamp menu...
Page 87: ...ilure is logged and the lamp will never be initialized in the future Image 6 82 Single mode operation switching principle Dual mode Both lamps are working When one lamp fails the projector continues t...
Page 88: ...will not be possible in the first 60 seconds Dual in the menu is greyed out and LED1 is flickering thereby preventing hot restrike which may damage the lamp 6 7 3 History How to view the history 1 Pre...
Page 89: ...to activate the Tool bar 2 Press to select the Lamp item 3 Press to Pull down the Lamp menu 4 Use or to select Reset runtime 5 Press to pull down the menu 6 Use or to select the lamp to be reset imag...
Page 90: ...or the numeric keys on the remote or the keypad to change the serial number of the lamp serial number 0000000 will not be accepted Image 6 88 WARNING Lamp runtime reset as well as the lamp replacement...
Page 91: ...age 6 90 WARNING Lamp runtime reset as well as the lamp replacement can only be done by a Barco authorized technician 6 8 Image files menu Overview Load file Auto Image Edit file Rename file Copy Dele...
Page 92: ...ideo type if the active window is a video window What to do if the image is not perfect If the displayed image is not correct after AutoImage or after selecting the best fitting file go to the Edit me...
Page 93: ...n the Image files menu 4 Use or to select Auto Image 5 Press to open the menu 6 Use or to select the desired file scan method image 6 93 7 Press ENTER A text box showing a progress bar is displayed im...
Page 94: ...e files menu 4 Use or to select Edit image 6 95 5 Press ENTER A dialog box is displayed 6 Use or to select the desired file Note If in PiP mode the cursor is placed by default on the active file which...
Page 95: ...zontal pixels Horizontal start in pixels Horizontal period in ns Active vertical lines Vertical start in lines Advanced video settings Image 6 98 The advanced button enables the advanced settings for...
Page 96: ...enables the advanced settings for a data source Image 6 100 video info a Hs Hs b Image 6 101 Hs horizontal sync pulse a active low b active high The VCO range setting determines the frequency range of...
Page 97: ...values 6 8 4 Rename file How to rename a file 1 Press MENU to activate the Tool bar 2 Press to select the Image files item 3 Press to Pull down the Image files menu 4 Use or to select Rename image 6 1...
Page 98: ...age 6 107 If the AutoImage function does not succeed in finding a file and no file is loaded load list is empty which means that the source is not displayed then use the copy function Copy a standard...
Page 99: ...e the forced file load The specification for the file to be selected for each input on that layer is done via RS232 see the RS232 User Guide for more information on the Forced file load command to be...
Page 100: ...ector in this case 1920 1080 or 1 77 1 the image will end to be distorted stretched or shrinked How to enable disable the full screen representation 1 Press MENU to activate the Tool bar 2 Press to se...
Page 101: ...isplay or not the different sliderboxes used for instance for picture settings contrast it also affects the source information windows displayed in the right lower corner of the screen How to enable d...
Page 102: ...to center the menu 1 Press MENU to activate the Toolbar 2 Press to select the Display setup item 3 Press to Pull down the Display setup menu 4 Use or to select Menu bar position menu 5 Press ENTER 6 U...
Page 103: ...9 8 AutoImage Setup What can be done Autoimage allows to detect automatically the characteristics of the source total pixels per line and uses this information to adapt the image to the LCD panels Aut...
Page 104: ...t to logo 6 9 9 Blanking What can be done The image can be blanked in several ways Top blanking Bottom blanking Left blanking Right blanking Image 6 117 Note that here the blanking is only done on the...
Page 105: ...enable disable the blanking Use the Reset key to reset the blanking values The logo is also affected by the blanking 6 9 10 Soft Edge Overview Introduction Soft Edge overlap zone horizontal Soft Edge...
Page 106: ...the overlap zone so that the light output in that zone equals the light output of the rest of the image Adjustable overlapping area 50 100 50 100 image 2 image 1 image 2 image 1 Light output per image...
Page 107: ...projector 1 Go to File Edit menu of second projector 2 Enter value for horizontal active Pact as follows Pact Horz resolution of 1 projector Total horz screen resolution x horz resolution source 3 Hor...
Page 108: ...splayed 8 Use or to select the desired adjustment Image 6 122 Adjusting with the arrow keys 1 When on an adjustment use the or key to move the border line to the desired position The border line will...
Page 109: ...6 Advanced Image 6 123 Width selections Image 6 124 Width set up for projector 1 R5976837 BARCO ID R600 R600 21 09 2006 105 Downloaded From projector manual com Barco Manuals...
Page 110: ...ing image excluding the overlap zone How to adjust 1 Press MENU to activate the menu bar 2 Press to select the Display setup item image 6 126 3 Press to pull down the Display setup menu 4 Use or to se...
Page 111: ...ed in the installation menu or via the dedicated keys on the remote The following parameters can be adjusted Zoom Focus Shift also for non motorized lenses How to Zoom focus or shift 1 Press MENU to a...
Page 112: ...cond 3 wrong codes a wait cycle of 30 minutes 1 hour The security mode can be enabled or disabled How to activate the security mode 1 Press MENU to activate the Tool bar 2 Press to select the installa...
Page 113: ...the PIN code and confirm it image 6 134 An informative text box is then displayed Press ENTER or BACK to escape image 6 135 Image 6 131 Image 6 132 R5976837 BARCO ID R600 R600 21 09 2006 109 Download...
Page 114: ...security mode is now disabled 6 10 3 Change password How to change the password 1 Press MENU to activate the Tool bar 2 Press to select the Installation item 3 Press to Pull down the Installation men...
Page 115: ...ew password is accepted if the new password and the confirmed password coincide If the password is forgotten contact a Barco authorized technician R5976837 BARCO ID R600 R600 21 09 2006 111 Downloaded...
Page 116: ...6 Advanced 112 R5976837 BARCO ID R600 R600 21 09 2006 Downloaded From projector manual com Barco Manuals...
Page 117: ...1480 1152 912 864 EXGA1_75 1152x864 75 67 499 107 999 1600 1152 900 864 EXGA2_70 1152x864 70 66 098 99 941 1512 1152 945 864 EXGA2_75 1152x864 75 75 199 110 092 1464 1152 1002 864 FMR 640x400i 42 323...
Page 118: ...MAC_POR 640x870 74 996 68 846 57 280 932 640 918 870 METH_BOOT1 720x400 70 31 500 28 350 900 720 448 400 METH_BOOT2 640x480 59 31 000 24 800 800 640 524 480 MXGA_100 1152x864 100 92 997 145 820 1568...
Page 119: ...24 76 107 81 130 135 000 1664 1280 1066 1024 SUNXGA60 1024x768 59 984 48 287 64 125 1328 1024 805 768 SUNXGA70 1024x768 70 041 56 596 74 250 1312 1024 808 768 SUNXGA77 1024x768 77 069 62 040 84 375 13...
Page 120: ...50 1200 UXGA_L 1600x1200 60 72 801 119 977 1648 1600 1216 1200 UXGAP1_60 1200x1600 59 95 804 119 946 1252 1200 1620 1600 UXGAP2_60 1200x1600 60 99 404 163 817 1648 1200 1656 1600 VGA_60 640x480 60 31...
Page 121: ...0 68 680 94 500 1376 1024 808 768 XGA_EOS 1024x768 63 000 50 000 67 200 1344 1024 796 768 XGA75_GS 1024x768 74 534 59 701 79 284 1328 1024 801 768 SXGA_60 1280x1024 60 63 980 107 997 1688 1280 1066 10...
Page 122: ...A Standard Image Files 118 R5976837 BARCO ID R600 R600 21 09 2006 Downloaded From projector manual com Barco Manuals...
Page 123: ...s MENU to activate the Tool bar 2 Press to select the Tools item 3 Press to Pull down the Tools menu 4 Use or to select Diagnostics 5 Press to pull down the menu 6 Press ENTER to select I2C image B 1...
Page 124: ...mage B 3 For Barco certified service technicians only For more information on possible hardware failures refer to the Service Manual 120 R5976837 BARCO ID R600 R600 21 09 2006 Downloaded From projecto...
Page 125: ...e lens surface as this tends to grind dirt into the coating 3 Do not leave cleaning cloth in either an open room or lab coat pocket as doing so can contaminate the cloth 4 If smears occur when cleanin...
Page 126: ...dle downwards to unlock the filter image C 2 3 Slide out the filter image C 3 image C 4 image C 5 See image C 6 4 Clean the dust filter with a dry cloth 5 Re insert the dust filter by sliding it back...
Page 127: ...At that time it is strongly recommended to replace or clean the dustfilter under the X cube Failing to do so will strongly reduce the lifetime of the LCD s and the analyzers The manufacturer reserves...