10
Optional: Cloud Connectivity
Banner Engineering’s Occupancy Solution Kit offers a fast and easy way to gain access to the data and history of the occupancy at your
facility. The following section will show you how to configure your gateway over Ethernet and quickly create your solution on the Banner
CDS platform. See your data on a default dashboard and create your own visual tools and reporting.
1
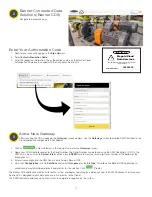
Connect the devices using the supplied cables
1. Plug the threaded end of the Ethernet cable to the DXM Controller. Aligning the pins and connect the quick disconnect
connector. Hand-tighten only.
2. Connect the RJ45 connector to a local area network device, such as a Wi-Fi router or network modem.
Network Configuration
The Occupancy Solution Kit can be connected to a network using either Static IP or Dynamic IP (DHCP). By default, the Occupancy
Solution Kit is configured to use DHCP. Use DHCP when connecting directly to a modem or router. Use a Static IP address if directed to by
your IT department.
Setting a Static IP Address
To define a specific IP address of your choosing:
1. On the DXM, use the arrows and move to the
System Config
menu. Press
ENTER
.
2. Use the arrow keys to select the
Ethernet
menu. Press
ENTER
.
3. Highlight the
DHCP
selection and press
ENTER
. Set
DHCP
to
OFF
.
4. The system will request a restart, press
ENTER
to confirm.
5. Follow steps 1 and 2 to enter the
Ethernet
menu. Use the arrow keys to select
IP
. Press
ENTER
.
6. Use the up and down arrows to change the IP address. Press
ENTER
to move to the next octet.
7. Press
ENTER
on the final octet to accept the changes.
8. Cycle power to the DXM1200. The changes are saved on the DXM1200 and the new IP address will be used.
Use the same procedures to set the subnet mask (SN) and default gateway (GW) to match your network requirements. Your IT department
can provide these settings if needed.
System Config
to change the value
to accept
ENTER
BACK
to return to the previous menu
↑ ↓
Ethernet
DHCP
Update DHCP Mode
IP:
SN:
GW:
Reset
Update IP Address
Update SN
Update GW Address
Resets Ethernet parameters
to xml defaults.
After making changes to the
Ethernet settings, restart the DXM.


