background image

23

Set the time and date 

When you preset your television to 
switch itself on or off at a particular 
time, or when you preset a timed 
recording of a programme on a 
connected video recorder, the clock 
ensures that these features are 
switched on and off at the right 
times. 

The simplest way to set the clock is 
to synchronise it with a tuned TV 
program’s teletext service via the 
CLOCK menu. If you choose to 
synchronise the clock, this is done 
with the teletext service offered by 
the TV program you are currently 
watching. If a teletext service is not 
available, you can set the clock 
manually. 

Before synchronising the clock with a tuned 
program, make sure that the program you are 
watching offers a teletext service. 

To bring up the clock in the display, press LIST 
repeatedly to display CLOCK* on Beo4, then 
press GO. To remove the clock again, repeat 
the procedure. 

> Press 

TV 

to switch on the television. 

> Press 

MENU 

to bring up the TV SETUP menu 

and press   to highlight OPTIONS. 

> Press 

GO 

to bring up the OPTIONS menu and 

press   to highlight CLOCK. 

> Press 

GO 

to bring up the CLOCK menu. 

> Press   or   to see your choices for each item. 
> Press   or   to move through menu items. It is 

only necessary to enter the time manually if 
SYNCHRONISE is set to NO. 

> Press 

GO 

to store your clock and calendar 

options, or …

> … press 

EXIT 

to exit all menus without storing. 

If the clock is not updated in the transition between 
summer and winter time, simply select the program 
with which you originally synchronised the clock, 
and the clock is updated. 

Abbreviations for months 

  Jan …  January 

Jul …  July 

  Feb …  February 

Aug …  August 

  Mar …  March 

Sep …  September 

  Apr …  April 

Oct …  October 

  May …  May 

Nov …  November 

  Jun …  June 

Dec …  December 

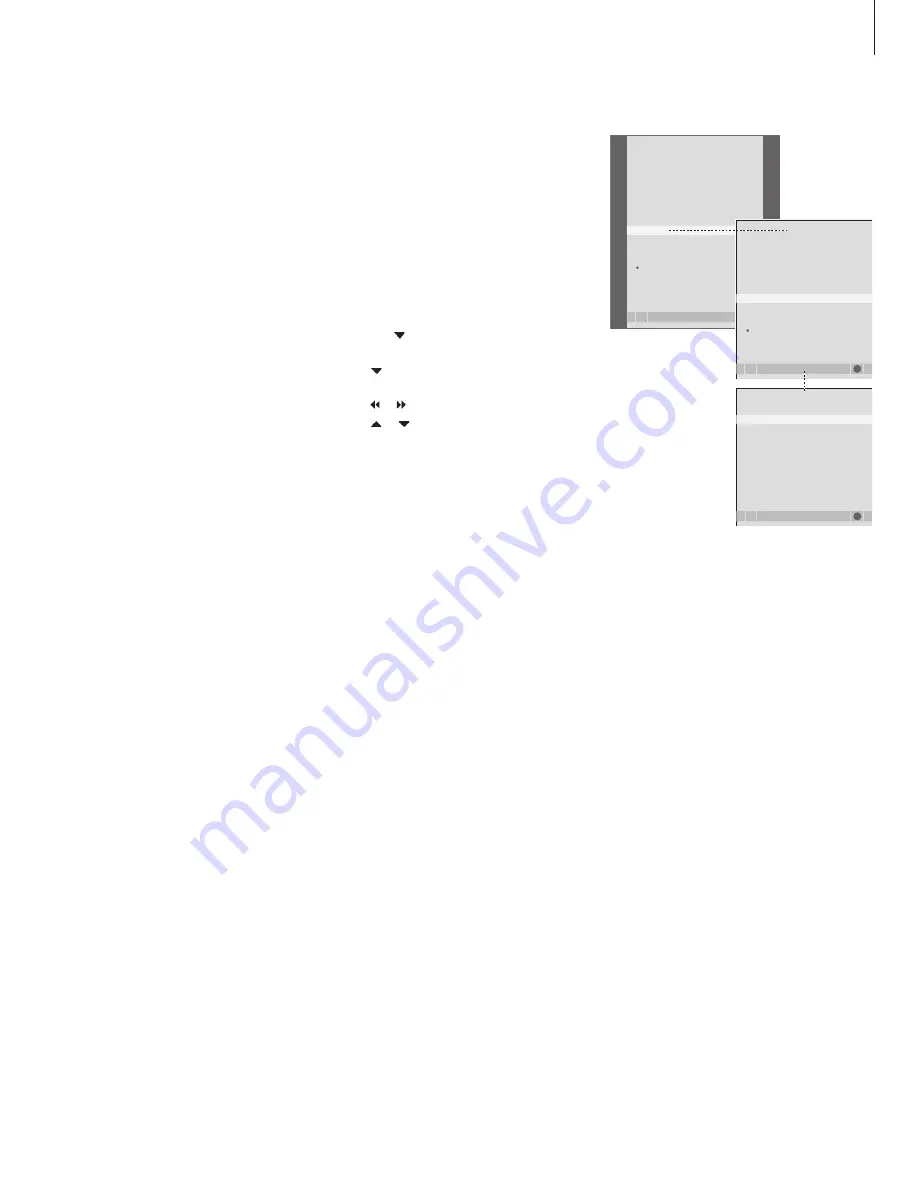
CLOCK


store

GO

TIME 

20:00

DATE 

23

MONTH 

APR

YEAR 

2001

SYNCHRONISE 

NO

SHOW CLOCK 

YES

TV  SETUP


select

GO

PROGRAM  GROUPS

TUNING

TIMER  RECORDING

PLAY  TIMER

OPTIONS

STAND POSITIONS

  CONNECTIONS
  SOUND
  PICTURE

OPTIONS


select

GO

CONNECTIONS

SOUND

PICTURE

CLOCK

MENU  LANGUAGE

  TIME
  DATE
  MONTH

*NOTE! In order to display CLOCK on Beo4, you 
must first add it to the Beo4 list of functions. For 
further information, refer to the chapter 

Customise Beo4

’ on page 52. 

Summary of Contents for BeoCenter 6-23

Page 1: ...BeoCenter 6 23 Reference book...

Page 2: ...h its own detailed table of contents provided with page references Texts in black refers to the current section whereas the remaining sections are described in general terms and written in grey The ma...

Page 3: ...sockets are placed Find out how to connect a decoder set top box or video recorder to your television and how to register extra equipment BeoLink system 43 Find out how to connect an audio system to y...

Page 4: ...TIMER Press GO to bring up the WAKE UP TIMER menu Press or to move through the menu items Use the number buttons to enter information or press or to view your choices for each item When you have lled...

Page 5: ...ns Bring up the computer image on the screen To see the computer picture on the television screen you must bring it up with Beo4 To bring up the computer picture Press repeatedly until PC appears in t...

Page 6: ...ght PLAY TIMER Press GO to bring up the PLAY TIMER menu and press or to highlight TIMER ON OFF Press GO to bring up the TIMER ON OFF menu Press or to reveal ON Press GO to store the setting For furthe...

Page 7: ...ress to move the setting back into the list You can also press EXIT to exit all menus Press the yellow button a second time to delete the setting TIMER PROGRAMMING store GO SOURCE TV PROGRAM 18 BBC ST...

Page 8: ...Beo4 buttons are shown to the left on the menu and the set top box buttons are shown to the right Set top Box Controller menu Set top box operation The built in Set top Box Controller acts as an inte...

Page 9: ...Selects and activates a function Press GO and then or to step between menu pages or step in program lists Exits menus or returns to a previous menu Exits menus enters or exits different modes such as...

Page 10: ...10...

Page 11: ...ence settings 11 First time setup of your television 12 Edit tuned programs 15 Re tune or add programs 20 Set positions for the television to turn to 22 Set the time and date 23 Adjust picture and sou...

Page 12: ...If you wish to change the menu language at a later date you can find the item under OPTIONS in the TV SETUP menu Press TV to switch on the television The language menu appears Press or to move between...

Page 13: ...tore your choice Store all programs and settings When you have made your selections a menu for program tuning automatically appears on the screen When the menu for auto tuning appears the prompt CHECK...

Page 14: ...television from turning and press GO to start adjustment again Once adjustment is complete the text ADJUSTMENT OK appears followed by the STAND POSITIONS menu Move between the different stand position...

Page 15: ...the program out of the list Press or to move the program to the desired program number Press to make the program move back into the list or change places with the program which occupies the desired pr...

Page 16: ...or press EXIT to exit all menus Delete programs Press TV to switch on the television or RADIO to switch on the radio Press MENU to bring up the SETUP menu and press to highlight TUNING Press GO to bri...

Page 17: ...t character As you move the television suggests possible names but you can still use and or and to enter or edit all the characters in the name you choose Press GO to store the name If necessary repea...

Page 18: ...relevant or select type of sound When you have nished editing press GO to accept the settings Press GO to store the adjusted program Press EXIT to exit all menus If the item SYSTEM appears on the men...

Page 19: ...the green button to start the naming procedure Use or and to enter the characters in the name you choose When you have nished editing press GO to accept the settings Press GO to store the adjusted pr...

Page 20: ...find your TV and radio programs for you Preset up to 99 different TV and radio programs on program numbers of their own and give each program a distinct name You can tune in new programs for example...

Page 21: ...ew programs are added automatically as they are found When tuning is completed and new programs have been added the EDIT PROGRAMS menu appears You can then rearrange the program order delete programs...

Page 22: ...ress GO to determine the VIDEO position Press or to turn the television and place it according to your viewing position Press GO to store the position To store a stand position for when the radio is s...

Page 23: ...light OPTIONS Press GO to bring up the OPTIONS menu and press to highlight CLOCK Press GO to bring up the CLOCK menu Press or to see your choices for each item Press or to move through menu items It i...

Page 24: ...on the television Press MENU to bring up the TV SETUP menu and press to highlight OPTIONS Press GO to bring up the OPTIONS menu and press to highlight PICTURE Press GO to bring up the PICTURE menu Pre...

Page 25: ...the values or choose a setting Press EXIT to store your settings until you switch off the television or press GO to store your settings permanently If you connect loudspeakers or headphones The conte...

Page 26: ...V SETUP menu and press to highlight OPTIONS Press GO to bring up the OPTIONS menu and press to highlight MENU LANGUAGE Press GO to bring up the MENU LANGUAGE menu Use and to move to your language choi...

Page 27: ...bring up the RADIO TUNING menu and press to highlight RADIO DISPLAY Press GO to bring up the RADIO display menu Press or to change the settings Press GO to store your choice Press STOP to back up thr...

Page 28: ...28...

Page 29: ...daily use such as how to operate timed play and timed standby functions and a connected set top box Tuning and preference settings 11 Find out how to set up your television for the first time and tun...

Page 30: ...nts only Use within a temperature range of 10 40 C 50 105 F Do not place any items on top of the television Always place your television on a rm and stable surface Do not attempt to open the televisio...

Page 31: ...nually While mounting the television on the base stand or wall bracket you can use the packaging to support the products This makes mounting easier For further information refer to the Guide enclosed...

Page 32: ...gned for the television If you change the plug or in any way damage the mains cord it will affect the TV picture adversely When connections are complete and the cables have been secured as described o...

Page 33: ...n auto matically registers the signal and you can see the still pictures on the screen If the signal from the camera is switched off Press LIST repeatedly to display CAMERA on Beo4 and press GO In ord...

Page 34: ...V 21 pin socket for the AV connection of other equipment such as a DVD player a set top box a second decoder or a game console The socket may be used for an AV 2 Expander instead which gives the oppor...

Page 35: ...the sound output on the computer to the L R sockets on the television Reconnect the television the computer and all equipment connected to the computer to the mains IMPORTANT If you wish to connect a...

Page 36: ...onnect all involved systems from the mains before you connect external equipment Connect the cable from the external aerial to the socket marked TV on the television Connect the decoder to the 21 pin...

Page 37: ...s that you can select if the connected set top box should switch to standby automatically The options are AFTER 0 MIN The set top box switches to standby immediately when you select another source AFT...

Page 38: ...aerial connection or cable TV network connection and the aerial cable supplied with the video recorder Connect the cable from your external aerial to the signal input socket marked on the rear panel...

Page 39: ...39...

Page 40: ...TUP menu and press to highlight OPTIONS Press GO to bring up the OPTIONS menu CONNECTIONS is highlighted already Press GO to bring up the CONNECTIONS menu Press or to select the AV1 which corresponds...

Page 41: ...ect STB in the CONNECTIONS menu STB SETUP store GO NOKIA 96025 NOKIA 9820T NOKIA 9850T PACE DTR730 IM SKY DIGITAL SELECTOR CANALdig DK S N MACAB DCB 101 TPS 96573D CANAL SAT r2 Planet PL 9000 CANALdig...

Page 42: ...42...

Page 43: ...t sockets and connections 29 Find out how to handle and place your television and where the sockets are placed Find out how to connect a decoder set top box or video recorder to your television and ho...

Page 44: ...ision it cannot be used as source Not all Bang Olufsen audio systems support integration with the television Connect and operate an audio system Connect a radio If you connect an audio system to your...

Page 45: ...o4 and press GO Press LIST repeatedly to display A OPT on Beo4 and then key in the appropriate number 0 1 2 5 or 6 The television and an audio system set up in one room all speakers are connected to t...

Page 46: ...ed a link radio to your television also To listen to sound from a television source on your audio system speakers without switching on the screen press LIST repeatedly to display AV on Beo4 and then p...

Page 47: ...which radio you want to listen to However you can only use the internal radio in your television if you have enabled it as described on page 46 To listen to radio from the audio system simply press RA...

Page 48: ...ake the link and aerial connections 5 Reconnect the link room television to the mains For your entire system to function properly it is essential that the television in the link room is set to the cor...

Page 49: ...e TV TUNING menu and press to highlight LINK FREQUENCY Press GO to bring up the LINK FREQUENCY menu FREQUENCY is already highlighted Press or to nd the frequency Press GO to store the setting or press...

Page 50: ...usual Listen to stereo sound in your link room Usually sound distributed from a main room video source such as a set top box to the link room is transmitted in mono However you can select stereo sound...

Page 51: ...splay OPTION on Beo4 and press GO Press LIST repeatedly to display V OPT on Beo4 and press 4 Operate your television in Option 4 Normally you can activate a source such as TV simply by pressing the re...

Page 52: ...he display Press repeatedly to display CONFIG on Beo4 Press to be able to select the type of con guration Press repeatedly to display VIDEO on Beo4 Press to get access to the video con guration Press...

Page 53: ...ction automatically Remove an extra button You can remove any of the extra buttons that are available when you press LIST Press and hold the standby button down Press to get access to the Beo4 setup f...

Page 54: ...GRAM AND STATION GROUPS TV TUNING EDIT PROGRAMS ADD PROGRAMS AUTO TUNING MANUAL TUNING EXTRA FINE TUNE DECODER TV SYSTEM SOUND RADIO TUNING EDIT PROGRAMS ADD PROGRAMS AUTO TUNING MANUAL TUNING RADIO D...

Page 55: ...they appear in the lists You can delete unwanted programs and you can name or rename your programs For further information refer to the chapter Edit tuned programs on page 15 What s on the ADD PROGRA...

Page 56: ...ER to one of following options ON for decoder on or OFF for no decoder TV SYSTEM TV broadcast system this option is only available on certain types of TV sets as the TV broadcast system is usually sel...

Page 57: ...le no selection can be made here PROGRAM Choose between different programs within the found ensemble PROGRAM NUMBER Store or change program number You can store 99 programs NAME Access the naming menu...

Page 58: ...sent out by the broadcaster has been shown once MINIMUM Shows the radio program number and the name of the radio program OFF No display in radio mode What s on the TV RECORD menu NOW Use this option...

Page 59: ...ble sources in your system PROGRAM Program number Choose the program number you want START TIME Key in the time when you want the system to start playing ON OFF Activate or deactivate your Wake up Tim...

Page 60: ...What s on the SOUND SETUP SOUND ADJUSTMENT menu VOLUME Adjusts the volume level the TV uses when you switch it on CENTRE Only available if you have connected loudspeakers to the television Adjusts the...

Page 61: ...he available languages What s on the DVI SETUP menu BRIGHTNESS Adjusts the picture brightness CONTRAST Adjusts the contrast level in the picture COLOUR Adjusts the colour intensity in the picture This...

Page 62: ...ons 48 Loudspeakers 34 Register additional video equipment 40 Set top box 37 Socket panel 34 Sockets for temporary connections 33 What s on the CONNECTIONS menu 60 Contact Contact Bang Olufsen Guide p...

Page 63: ...Move tuned programs 16 Name tuned programs 17 Re tune via automatic tuning 20 Listen to tuned programs Guide p 14 See list of all programs Guide p 14 What s on the PROGRAM GROUPS menu 55 What s on th...

Page 64: ...ame tuned programs 17 Re tune via automatic tuning 20 Select a TV program Guide p 6 What s on the ADD PROGRAMS menu 55 What s on the AUTO TUNING menu 56 What s on the EDIT PROGRAMS menu 55 What s on t...

Page 65: ...65...

Page 66: ...ted and disposed of separately Products and equipment which must be collected for reuse recycling and other forms of recovery are marked with the pictogram shown When disposing of electrical and elect...

Page 67: ......

Page 68: ...www bang olufsen com...

Reviews: