Technical staff manual
The transitional set’ s and the channel separator’s construction provides regulation of amount of combustion inlet air with a butterfly damper. The amount of inlet air
depends on pipe length and is defined with the help of gas sensor. It is necessary to turn the butterfly damper clockwise, reducing the amount of inlet combustion air, until
the gas sensor detects the increase of CO level (more than 0,05%) in smoke gases. After this you should turn the butterfly damper invertedly a little and fix.
Using separate pipes it is necessary to additionally take into account the following:
-The total maximum pipe length must not exceed 25 m. Each 90
° branch pipe is equal 1 m pipe, each knot bend 45 ° - 0,5 m pipe;
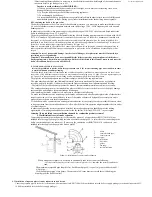
-In case of big length of the smoke exhauster pipe and possible appearance of condensation in it, a condenser tank 4 must be installed by the inlet into the boiler (see
Scheme 7);
- The slope of the horizontal parts of the smoke exhauster pipe must be not less than 3° towards the condenser tank (if there is one);
9.2.1.
Installation of separate pipes of smoke exhauster and air circuit by means of transitional set KHG 714061510
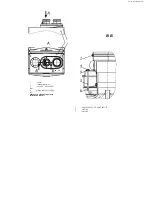
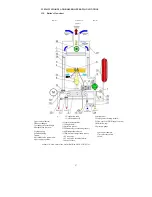
Scheme 7. Installation of separate pipes of smoke exhauster and air circuit by means of transitional set
The transitional set consists of details 7, 8, 9 (see Scheme 7). The smoke exhauster adaptor 7 is installed onto the central orifice on the upper surface of the boiler and
is fixed by clip 8.
The boiler’s construction provides a possibility of installation of the air circuit pipe 3 (air inlet) both on the left and on the right side from the smoke exhauster pipe.
9.2.2. Installation of separate pipes of smoke exhauster and air circuit by means of channel separator 8023-10.000
ATTENTION! In order to install the channel separator 8023-10.000 onto the boiler you must have the following items (not included into the supply package):
-screw (self-driving screw) Ph - 4,8x60 DIN 7981 – 4 pcs.;
-plain washer 5,3х10 DIN 125 (GOST 11371) – 4 pcs.;
-ring 005−008−19−2−2 GOST 9833−73 or a seal gasket with inner diameter 5 mm and external diameter 8-10 mm (material-paronite) – 4 pcs.;
The channel separator installation sequence:
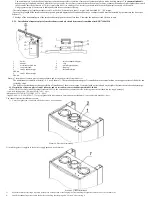
1)
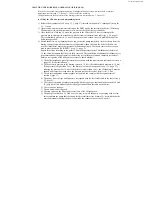
Unscrew eight screws 1 and take off the duct slice 2 (see Scheme 8);
3)
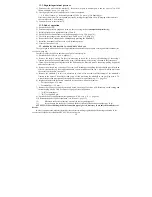
Make sure that the seal ring 6 is placed (at the place of connection of the fan plug) before installing the separator onto the boiler (see Scheme 10);
4)
Install the channel separator 2 onto the boiler, controlling that the plug won’t “bite on” the seal ring 6;
1
- boiler;
2
- adaptor;
3
- air inlet pipe Ø80 мм;
4
- condenser tank;
5
- smoke exhauster pipe
Ø80 мм;
6
- smoke exhauster pipe
Ø80 мм;
7
- smoke exhauster adaptor;
8
- clip;
9
- air inlet pipe adaptor;
10
- fan plug;
11
- thermoinsulation
Scheme 8. Duct slice dismantling
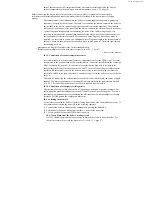
2) install the gasket 1 (supplied in the boiler’s supply package) (see Scheme 9);
Scheme 9. Gasket installation
Summary of Contents for NEVALUX-8230
Page 35: ...Assembly is performed in reverse order Scheme 23 Heat exchanger dismantling...
Page 41: ...48...
Page 47: ...Ignition and ionization plugs in the assembly pos 67...
Page 54: ......
Page 55: ......


