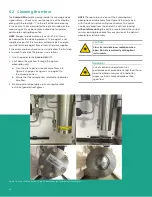
4. Using a piece of lens tissue, wet a small area with a
very small amount of analytical grade acetone
(barely wet the lens tissue). Typically, one drop of
acetone will suffice. Tilt the lens tissue so that the
acetone drop is absorbed by the lens paper along
the length of the piece (see Figure 83 below).
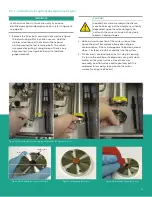
5. Place the wet lens tissue on top of the mirror and
drag it horizontally across the surface of the mirror
(see Figure 84 below), ensuring minimal liquid
residue/streaks are left behind on the mirror surface.
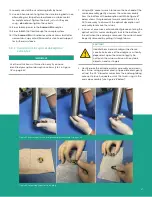
6. Use the air blower to blow dry air onto the surface
of the mirror. Puff repeatedly until the mirror
surface appears dry (see Figure 85 below).
7. Repeat steps 4-6 at least three times, using a new
lens tissue each time. Each lens tissue wetted with
acetone is used only once to clean off any visible
residue on the mirror surface.
8. Visually inspect the mirror, and record any observation
of gross contamination.
9. If the mirror does not appear to be clean after
repeated cleanings, contact Panametrics Technical
Support for further assistance.
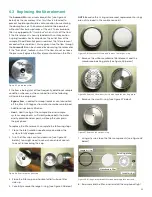
10. If the mirror does appear to be clean, re-install it onto
the measurement cell.
11. As you line up the mirror with the measurement cell,
note the “key” for properly connecting the two pieces.
The mirror will align for mounting in only one position.
Rotate the mirror assembly to line up the alignment pin
with the alignment pin slot (see Figure 86 below).
Figure 83: Using analytical grade acetone
Figure 84: Dragging the wet lens tissue across the mirror
Figure 85: Drying the mirror
Figure 86: Reinstalling the mirror end cap assembly
66
Summary of Contents for Panametrics Aurora H2O
Page 2: ...ii...
Page 4: ...no content intended for this page proceed to next page iv...
Page 20: ...no content intended for this page 10...
Page 32: ...no content intended for this page 22...
Page 71: ...Figure 74 Exporting a simplified image Figure 75 Selecting enhanced metafile 61...


