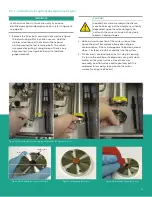
12. Loosely reinstall the six retaining bolts by hand.
13. Use an Allen wrench to tighten the six retaining bolts in an
alternating or star pattern to achieve a uniform metal-
to-metal contact. Tighten the bolts just until they are
snug -
do not
over-tighten these bolts.
14. Re-establish power to the
Aurora H2O
analyzer.
15. Re-establish the flow through the sample system.
16. If the
Aurora H2O
still indicates a check mirror fault after
normal start-up, contact Panametrics technical support
for further assistance.
6.2.2 Instructions for optical absorption
cell style 2
IMPORTANT
Use the instructions in this section only if you have
identified your optical absorption cell as style 2 in Figure
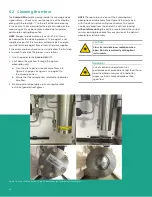
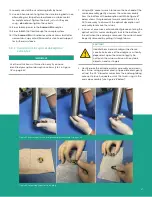
1. Using a 5/8’ socket wrench to loosen the hex head of the
mirror assembly, gently unscrew the mirror assembly
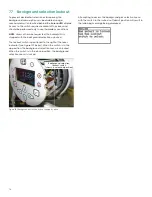
from the bottom of the absorption cell. While Figure 87
below shows this procedure for a dismounted cell, it is
NOT necessary to dismount the optical absorption cell
assembly to remove the mirror.
2. In cases of excessive contamination/grease entering the
optical cell, this mirror could get stuck to the bottom of
the cell when the end cap is removed. The mirror should
be gently removed by pulling it straight down.
CAUTION!
Handle the mirror assembly with extreme
care. Performance of the analyzer is critically
dependent upon the mirror integrity. Do
not touch the mirror surface with any tools,
objects, hands or fingers.
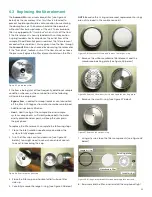
3. Gently place the extracted mirror assembly on a clean
lens tissue. Using a pair of plastic-tipped tweezers gently
extract the 0.5” diameter mirror from the end cap, taking
care not to touch, squeeze or nick the two O-rings in the
end cap assembly (see Figure 88 below).
Figure 88: Inspecting the mirror assembly
Figure 87: Removing mirror end cap assembly from the absorption cell
67
Summary of Contents for Panametrics Aurora H2O
Page 2: ...ii...
Page 4: ...no content intended for this page proceed to next page iv...
Page 20: ...no content intended for this page 10...
Page 32: ...no content intended for this page 22...
Page 71: ...Figure 74 Exporting a simplified image Figure 75 Selecting enhanced metafile 61...


