background image

20  |  

Baker Hughes

© 2020 Baker Hughes Company. All rights reserved.

XIII. Maintenance Instructions (Contd.)

Uniformly coat the disc with a small amount of lapping 
compound and place it on the Lap Ring. The operation is 
basically the same as the nozzle except that the disc must be 
moved on the Lap Ring.

Now all parts should be cleaned. First remove grease and 
sealants, then remove rust and scale. Inspect the internal parts 
to ensure they are not damaged by galling. Look especially at 
the rubbing surfaces of the guide and disc holder. 
Inspect the spindle to ensure concentricity. Over-gagging is 
one of the common causes of bent spindles. 
Inspect the spring and washer assembly for excess clearance 
[greater than .031” (0.79 mm)] and inspect the bearing surfaces 
for galling.
1.   Between the upper spring washer and the adjusting screw
2.  The lower spring washer and the spindle shoulder
3.   Spring - look for corrosion pits. Replace the spring if 

severe corrosion or pitting is present. If the spring has 
been in service a long time, measure the free length of the 
spring. Contact Baker Hughes and give this dimension, the 
spring number, and the valve set pressure to obtain their 
recommendations. 

On all disc holders, inspect the bearing surface between the 
spindle pocket of the disc holder. 
Inspect all bearing parts for concentricity, apply a very thin layer 
of Clover 3A grinding compound to the actual bearing surfaces, 
and grind together to determine if smooth, uninterrupted 
contact is made. If grinding does not restore the original 
condition or very close to it, then the parts should be replaced. 
Spherical surfaces should have a 63 RMS or better surface 

finish and their radius must be continuous. Each corresponding 

bearing surface should be conical and smooth with a 63 RMS 

or better surface finish. All traces of lapping compound must be 

carefully and totally removed prior to reassembly. 

A surface finish comparator is required to obtain these 

readings. See Maintenance Tools and Supplies on Section XX. 
The bellows (if present) should be visually inspected and 
perhaps reassembled to the disc holder with a good gasket, 

filled with water, and allowed to set for an hour or two to show 

any leakage. At conclusion, if a successful test, then dump the 
water and remove the gasket and allow the bellows to dry out. 
(Make sure bellows is dry when valve is reassembled). 
If conventional valve with eductor tube, push a wire through the 
tube to check for plugging.

Nozzle - The nozzle seating surface must be inspected for 
nicks, cuts or grooves. Minor steam cuts can be lapped out. 
See dimensions in (Figure 19) and Tables 3 and 4.
Thermodisc™ - If surface defects cannot be lapped out, the 
disc must be replaced. If after lapping, “A” in (Figure 16 in 
Section XIII) is less  than “A min.” (Table 1), replace the disc.
Adjusting Ring - The adjusting ring must have undamaged 
threads. Both surfaces “A” and “B” must be undamaged (see 
Figure


20).

Adjusting Ring Pin - Pin must be inspected to ensure that it is 
long enough to keep the Adjusting Ring from turning yet without 
touching the bottom of the notch (See Figure


20). 

Gasket Surfaces - All gasket surfaces should be inspected for 
cleanliness and be without radial scratches. Be sure all pieces 
of the old gasket have been completely removed. 

XIV. Inspection and Part Replacement 

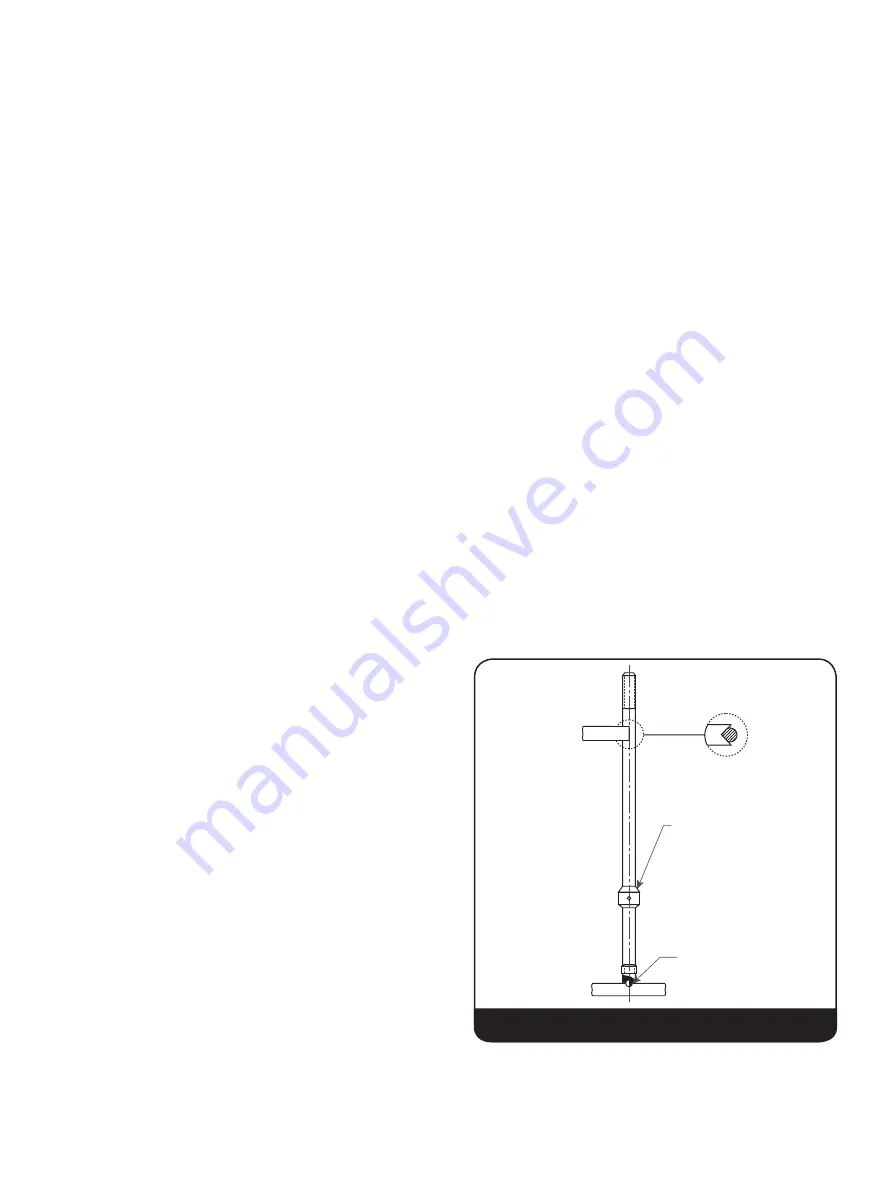
At a 45

0

 angle

an indicator reading
should not exceed
.007” (0.18 mm) runout

Ball Bearing

Top View

Figure 18: V-Block Support Setup

Summary of Contents for Consolidated 1900/P Series

Page 1: ...Consolidated 1900 P Series Safety Valves The Eductor Tube Advantage Instruction Manual Rev C Baker Hughes Data Classification Public...

Page 2: ...UIREMENTS FOR OPERATION OF OTHER EQUIPMENT AT THE SITE THESE INSTRUCTIONS DO NOT PURPORT TO COVER ALL DETAILS OR VARIATIONS IN EQUIPMENT NOR TO PROVIDE FOR EVERY POSSIBLE CONTINGENCY TO BE MET IN CONN...

Page 3: ...tance All the United States Customary System USCS values are converted to metric values using the following conversion factors USCS Unit Conversion Factor Metric Unit in 25 4 mm lb 0 4535924 kg in2 6...

Page 4: ...mended Installation Practices 16 XII Disassembly of 1900 P Series Safety Valves 17 XIII Maintenance Instructions 18 A Machining of Seat Nozzle 18 B Lapping 19 C Reconditioning of Ring Laps 19 D Genera...

Page 5: ...ce Tools and Supplies 32 A Pin Spanner Wrenches 32 B Inside Snap Ring Pliers 32 C Lap Rings 33 D Lap Plate 33 E Lapping Compounds 33 XX Replacement Parts Planning 34 A Service Parts Inventory Planning...

Page 6: ...In some instances of human hazards the pictorial may instead depict what preventive measures to take such as wearing protective equipment The bottom panel may contain an instruction message on how to...

Page 7: ...or near the body can cause severe personal injury or death It is the owner s responsibility to specify and provide protective wear to protect persons from pressurized or heated parts Contact with pre...

Page 8: ...installation and start up of valves and or valve products may involve proximity to fluids at extremely high pressure and or temperature Consequently every precaution should be taken to prevent injury...

Page 9: ...valves and valves repaired in the field by Baker Hughes Field Service team are sealed to assure the customer of our guarantee against defective workmanship Unauthorized removal and or breakage of this...

Page 10: ...ressor discharge lines however the differential required between the operating and set pressures may be greater because of pressure pulsations coming from a reciprocating piston It is recommended that...

Page 11: ...to discharge a continuous stream Simmer Characterized by the audible visual passage of a fluid across the seating surfaces just prior to opening The difference between this start to open pressure and...

Page 12: ...n machined device and operates on the force balance principle Types 1900 P1 closed bonnet and P3 slotted bonnet valves have been designed for steam service in accordance with ASME Code Section I and V...

Page 13: ...ide 11 Guide Gasket 12 Bonnet 13 Bonnet Gasket P1 Only 14 Base Stud 15 Stud Nut 16 Spindle 17 Spring Washer 18 Spring 19 Adjusting Screw 20 Adjusting Screw Nut 22 Plain Cap 24 Cap Set Screw 26 Release...

Page 14: ...crew 26 Release Nut 27 Release Locknut 33 Top Lever 33A Top Lever Pin 34 Drop Lever 34A Drop Lever Pin Bolted Cap Assembly 35 Bolted Cap 23 Cap Screw 25 Cap Gasket P1 Only Gag Assembly 38 Gag Bolt 39...

Page 15: ...pany All rights reserved IX Contd 1A 1 2 NPT DRAIN 47 45 46 Part No Nomenclature 45 Bellows Bellows Nut Bellows Flange 46 Bellows Gasket 47 Seal Plate C Bellows Valve P1 Only Bellows Flange Bellows Be...

Page 16: ...inlet The inlet piping must be clean before installation The discharge piping size must never be less than the valve outlet size For conventional valves Baker Hughes recommends that the discharge pip...

Page 17: ...t all times 6 All the upper internal parts can be removed as a unit by lifting out the spindle 1 These parts should be removed by lifting straight up On bellows valves care should be taken not to bend...

Page 18: ...base surface at B run true within 001 0 03 mm on indicator If the nozzle has been removed grip the nozzle in a fourjaw independent chuck using a piece of soft material such as copper or fiber between...

Page 19: ...rance At this point clean and apply 1000 grit and lap to a mirror finish When lapping has been completed any lines appearing as cross scratches can be removed by rotating the lap which has been wiped...

Page 20: ...s should have a 63 RMS or better surface finish and their radius must be continuous Each corresponding bearing surface should be conical and smooth with a 63 RMS or better surface finish All traces of...

Page 21: ...08 G 312 7 92 025 0 64 1 085 27 56 868 22 05 955 24 26 H 250 6 35 025 0 64 1 255 31 88 1 083 27 51 1 125 28 58 J 375 9 53 025 0 64 1 565 39 75 1 385 35 18 1 430 36 32 K 437 11 10 025 0 64 1 885 47 88...

Page 22: ...359 136 12 6 109 155 17 N 5 984 151 99 5 984 151 99 5 984 151 99 5 984 151 99 5 984 151 99 P 5 734 145 64 5 734 145 64 7 484 190 09 7 484 190 09 7 484 190 09 Q 7 359 186 92 7 359 186 92 7 359 186 92 7...

Page 23: ...ot require any machining the same limit washer tagged during disassembly may be used again However lift should be checked and verified correct as described on Section XVI B b If D or E valve nozzle wa...

Page 24: ...101 22 3 985 101 22 6 620 168 15 372 9 45 T 5 187 131 75 5 187 131 75 7 992 203 00 434 11 02 Figure 23a D G Bellows Only Figure 23b D T Conventional H T Bellows A A Table 8 Maximum Clearance Guide Dis...

Page 25: ...ew into the bonnet until it contacts the spring washer 15 When compressing the spring hold the spindle with Vise Grip pliers to prevent the spindle from turning in the disc holder Turn the adjusting s...

Page 26: ...Washer Length Measured Lift C Limit Washer Length 6 Tighten nuts to compress gasket Do not use impact wrench on bellows valves 7 Place dial lift indicator on bonnet and over spindle then zero indicat...

Page 27: ...umber of times to ensure that the valve opens three times in succession at the desired set pressure Simmer If simmer causes erratic valve opening refer to Table 12 Troubleshooting Guide B Back Pressur...

Page 28: ...detector solution to all connections joints On bellows valves also install a clean pipe plug in the bonnet vent connection until it s just short of finger tight The purpose is to obtain the smallest...

Page 29: ...ig 6 89 barg 1 Set 100 psig 6 89 barg 1 D 24 2 Notches 6 Notches E 24 2 Notches 6 Notches F 24 2 Notches 6 Notches G 30 2 Notches 6 Notches H 30 2 Notches 6 Notches J 30 2 Notches 8 Notches K 32 8 Not...

Page 30: ...Increase differential Solids trapped on seat Lift lifting lever if equipped or inspect for seat damage Mechanical binding See Closing Hang up Improper assembly Remove valve and inspect parts Valve ov...

Page 31: ...reserved Plain Lever Packed Lever Bolted Cap Screwed Cap Weather Shield recommended for outdoor service on P3 series steam valves Also available with weather hood for cap Packed Lever with Gag XVIII...

Page 32: ...Holder XIX Maintenance Tools and Supplies Table 13 Pin Spanner Wrench Dimensions Valve Orifice Pin Spanner Wrench Part No Radius Pin in mm in mm D thru G 750 19 05 219 5 56 4451801 H 875 22 23 234 5 9...

Page 33: ...ensions Orifice in mm Part No D thru J 1 750 44 45 1672805 K L 2 625 66 68 1672807 M N 3 813 96 85 1672808 P 4 188 106 38 167210 Q R 5 500 139 70 167212 T 7 000 177 80 167213 Table 16 Lapping Compound...

Page 34: ...rupted operational time which can be expected by stocking predetermined valve component classifications Determine need probability coverage which is compatible with a specific company s operational ob...

Page 35: ...N SIZING THE DISCHARGE SYSTEM Your safety is our business Baker Hughes has authorized no company nor individual to manufacture replacement parts for our valve products When ordering replacement parts...

Page 36: ...Pin Gasket P1 P3 C B 1 1 1 Bellows Gasket P1 B 1 1 Class II Disc Holder P1 P3 C B 1 6 85 percent Spindle P1 P3 C B 1 6 Guide P1 P3 C B 1 6 Studs Base P1 P3 C B 1 set 6 Nuts Base Stud P1 P3 C B 1 set 6...

Page 37: ...er Hughes Consolidated factory maintains a Repair Center The repair department in conjunction with the manufacturing facilities is equipped to perform specialized repairs and product modifications e g...

Page 38: ...38 Baker Hughes 2020 Baker Hughes Company All rights reserved Notes...

Page 39: ...Consolidated 1900 P Series Safety Valves Instruction Manual 39 2020 Baker Hughes Company All rights reserved Notes...

Page 40: ...ker Hughes logo Consolidated Green Tag Eductor Tube Advantage and Thermodisc are trademarks of Baker Hughes Company Other company names and product names used in this document are the registered trade...

Reviews: