


Azure Cielo Real-Time PCR Systems User Manual
Page 19
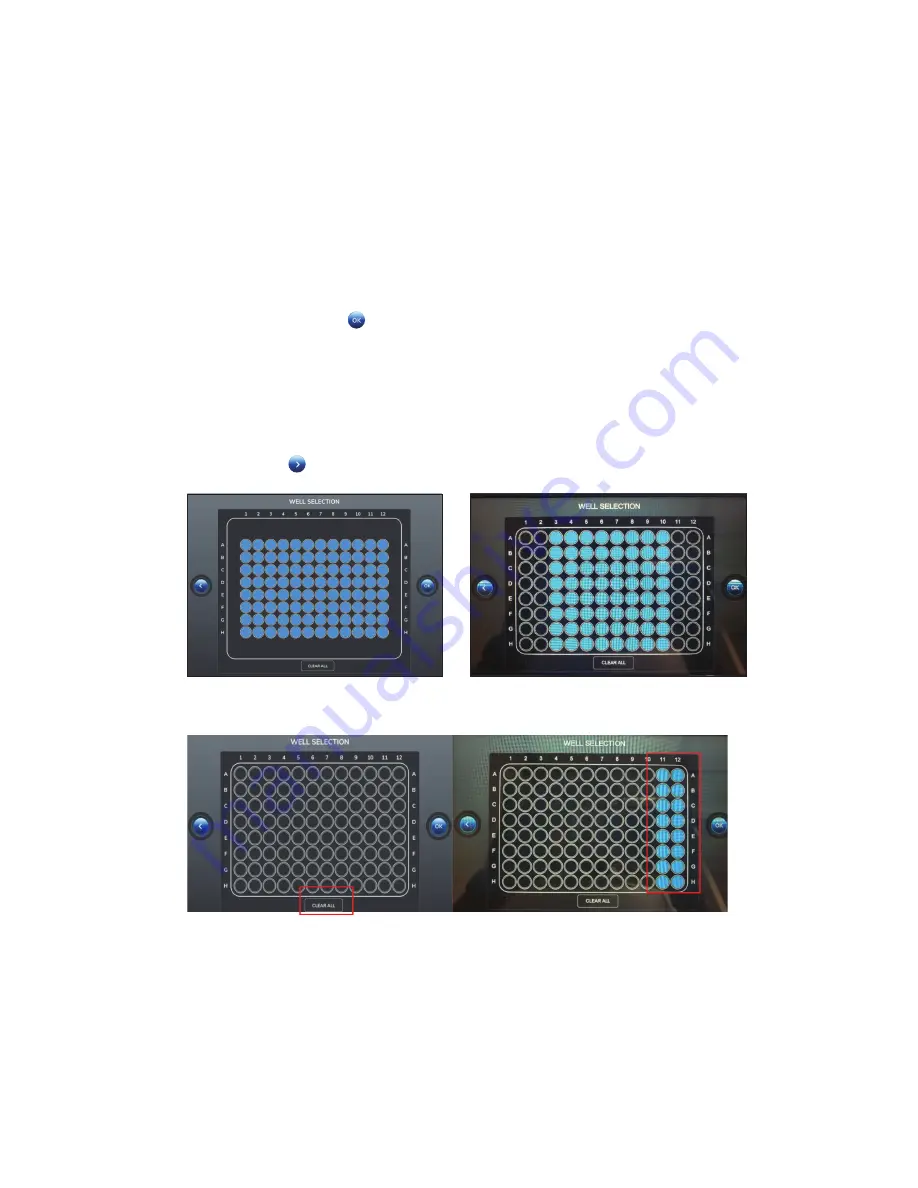
3.2.3—Well Selection Screen
• In the WELL SELECTION menu, a 96-well plate layout will be visible. The Azure Cielo
Real-Time PCR Instrument detects 16 wells or two columns at a time. The default setting
is to collect data from all wells across the entire plate which takes about 9 seconds. If the
experimental plate is not 96-wells, but only a few columns, the overall run time can be
reduced by opting out of detection for unused wells on the plate. The minimum selection
is two rows (or 16-wells). If opting to turn off columns to reduce run time, please ensure
detection remains on for any columns where samples will be placed. Wells that are
considered active for detection are shaded blue and will appear black or empty if turned off
(see images below).
• To deselect wells, tap on the well to clear selection. Wells are deselected in sets of two
columns. Press OK to save changes on to the plate and return to PROPERTIES screen.
Example:
Deselected Column 1, 2 and 11, 12.
Note:
2 columns of wells are deselected per tap.
• There is also a CLEAR ALL which will turn off all wells. The user will then select the blocks of
two columns that will be required for detection. Press OK to save changes on the plate and
return to PROPERTIES screen.
• Tap NEXT
to proceed to RUN SETUP screen.
Figure 19. WELL SELECTION screen.
Figure 20. Deselected columns 1,2 and 11,12 in
WELL SELECTION screen.
Figure 21. Select only Column 11 and 12 after “CLEAR ALL” selection.
3.2.4—Email Feature in Protocol Setting
Important:
Make sure that:
1. Cielo device is successfully connected to the Internet. To connect the Cielo Device to the
internet, please refer Section 2.3 (Connect Azure Cielo Real-Time PCR system to internet).