


Installing Hard Disks
AXIS 2460 User’s Manual
62
Appendix F - Installing Hard Disks
The AXIS 2460 can be fitted with various brands of commercially available IDE hard disk.
For more information about recommended brands, please visit www.axis.com and see the
product pages for the AXIS 2460.
Follow these instructions to install a disk:
1. Switch off power to the unit. First press the power button on the front panel until it
turns amber and wait until the unit shuts down. Then set the main power switch on the
rear panel to
0
.
2. Mount the disk(s) in the holder(s).
3. Set the disk in the upper position to
master
. If installing a second disk on the same
cable (channel) set this to
slave
. Exactly how this is done varies from one type of disk
to another. Refer to the documentation provided with the disk.
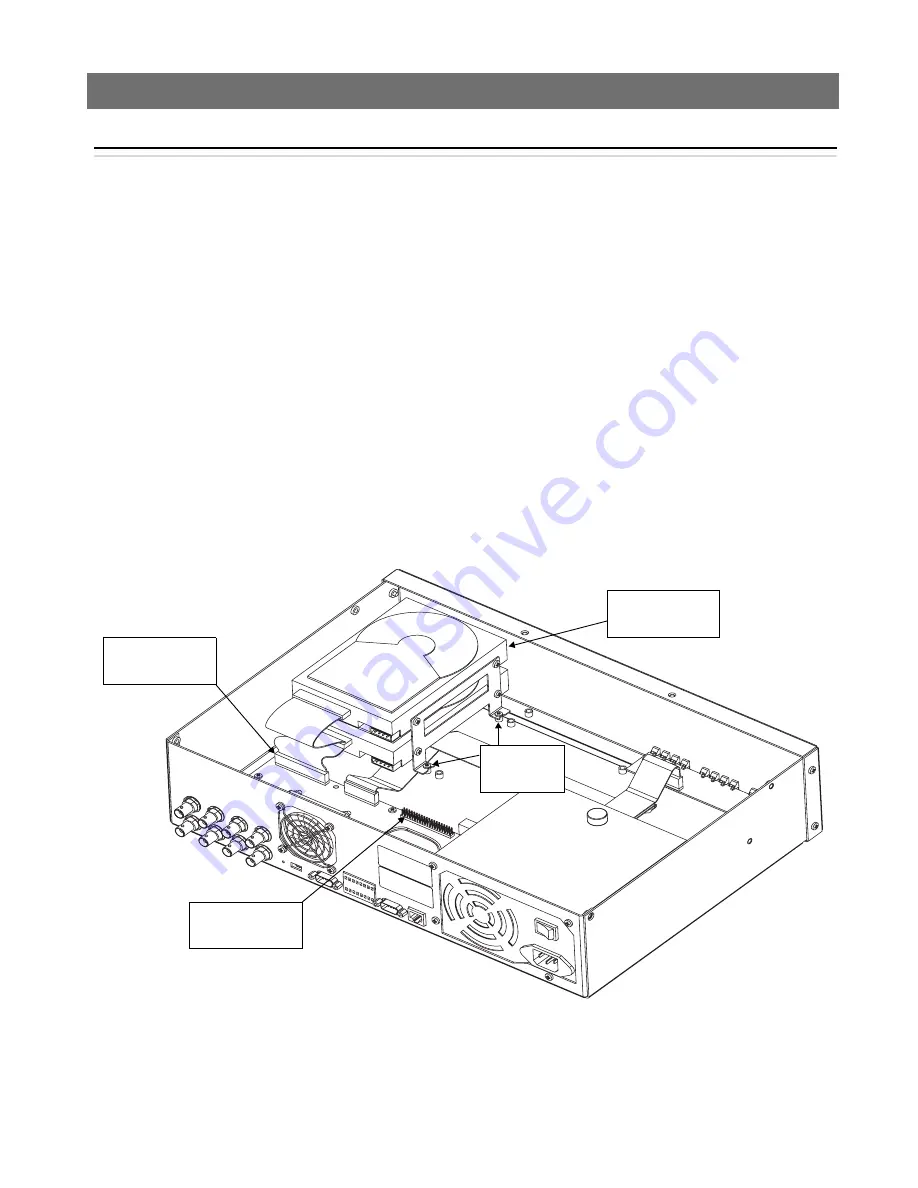
4. Remove the cover from the AXIS 2460. Connect the IDE-cable to the disk(s) and
connect the other end to the motherboard.
5. Connect the power cable to the disk(s).
6. Screw the disk holders in place inside the unit, using 2 screws on each side. Use a
magnetic screwdriver.
Connection for
IDE Channel B
Fasten with
screws here
Set upper disk
to Master.
Connection for
IDE Channel A