


AXIS 2460 User’s Manual
Installing the AXIS 2460 Network DVR
15
Installing via the Null Modem Cable
This section describes how to install the AXIS 2460 using the null modem cable. For information
on how to configure the unit for modem operation, please see the configuration section.
Important!
Connecting Your Computer Using the Null Modem Cable
• Although instructions for installing the AXIS 2460 using a null modem cable are provided below, it is
recommended that, whenever possible, the unit is initially installed and configured over a network.
• The information and examples featured here are specific to Windows 2000, but the process is similar in
other versions of Windows. Refer to your system information for further information on creating a
Dial-Up Networking connection if you are using any other operating system.
• Windows Dial-Up Networking and TCP/IP must be correctly installed prior to commencing with the
modem cable connection. Detailed information on how to check this is provided in Windows Help.
❶
Connect the supplied Null modem cable
between the COM-2 Serial Connector on
the AXIS 2460 and the COM-port on your
computer.
❷
Press the Power button on
the front panel and check that the Power
Indicator lights up.
❸
From the Start menu, open the
Control Panel and click
Phone and
Modem Options
. Select
Modems
.
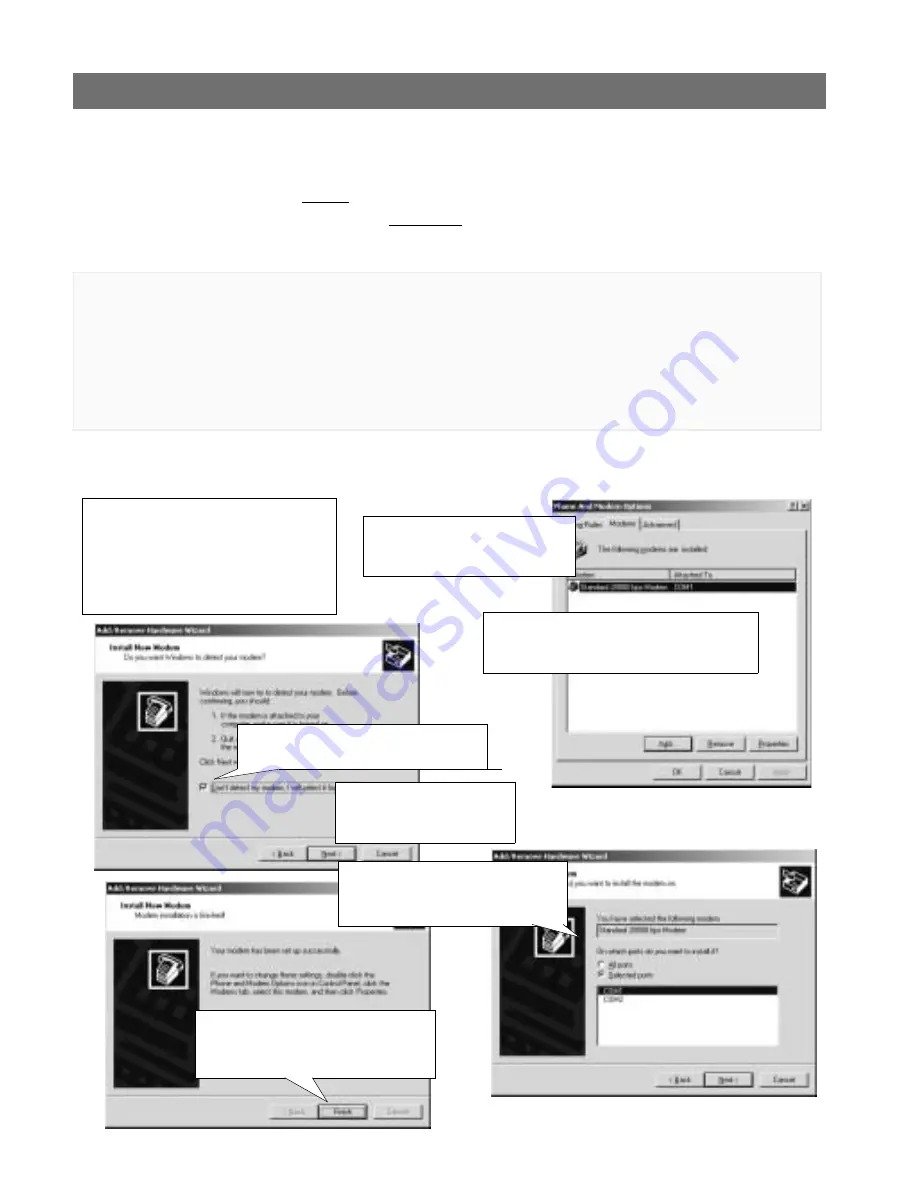
❹
If a Standard Modem is already set up, you
should proceed directly to the next page. If no
modem is installed, click
Add
and go to step 5.
❻
Select the Standard 28800
modem from the displayed
list of modems. Click
Next>
.
❺
Check the box:
Don’t detect my modem,
I will select it from a list
. Click
Next>
.
❽
A Standard 28800 modem connection
is now available for the AXIS 2460. Click
Finish
to complete the installation.
❼
Select the serial port to which your
AXIS 2460 is now connected via the
Null Modem cable. Click
Next>
.