


AXIS 2460 User’s Manual
Setting up Events and Alarms
23
3. Under the heading
Alarm Inputs
, select how the event will react to each Alarm Input.
The options available are
Active, Inactive
or
-----
. The first option means that the
alarm must have been triggered, the second that the alarm must be in an untriggered
state, and the third option means that the alarm input will effectively be ignored. Note
that the criteria for all enabled alarms must be met before the event will begin to
record.
4. If the alarm input is marked as
Disabled
, click the Alarm Settings button to go to the
alarm configuration page (see above).
5. In the section
Advanced Settings
, you can choose to include a
Pre-Buffer,
which will
record immediately before the event, and/or a
Recording Duration,
which specifies a
fixed length of time the event will record for, starting from when the event is initially
triggered. This length can be set in seconds, minutes or hours. If no Recording Duration
is specified, the event will record only for as long as it is active.
6. Click the
Save
button.
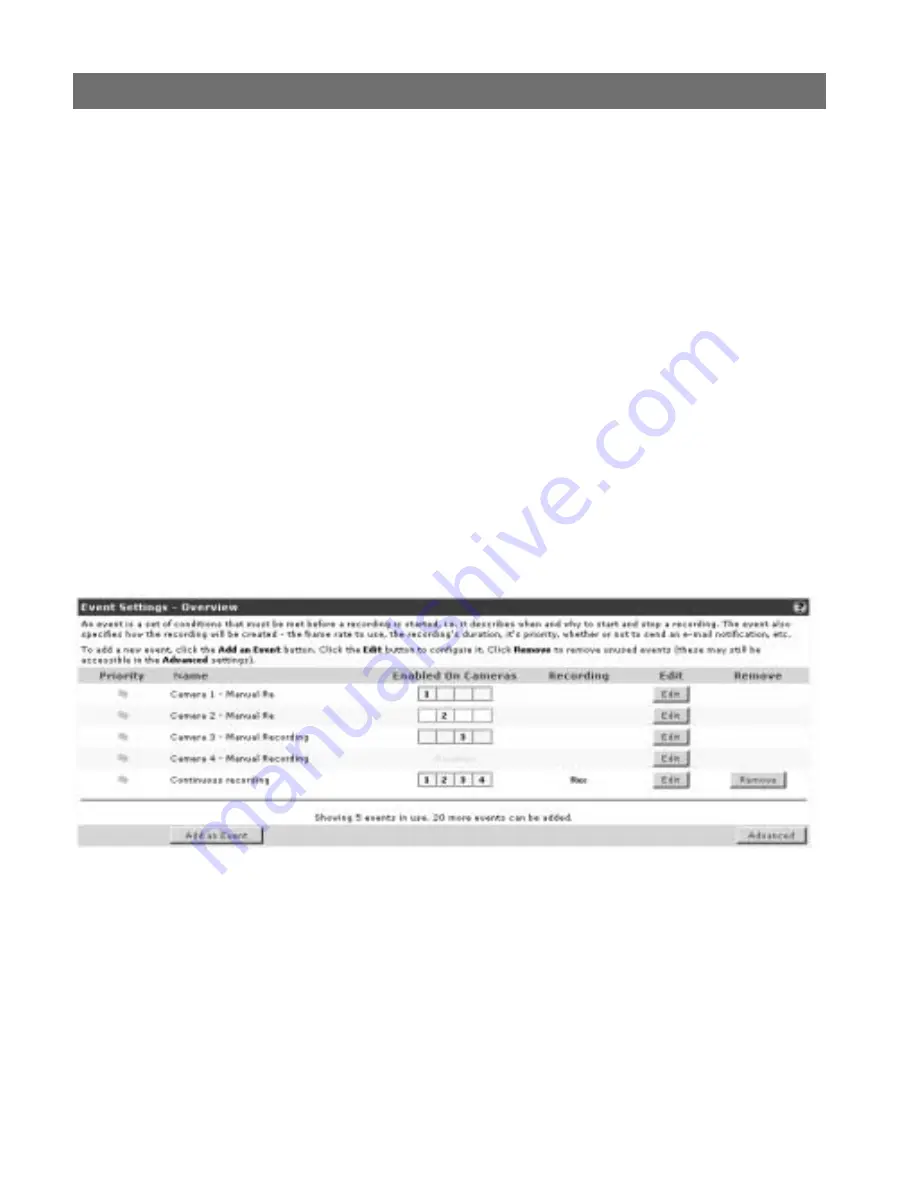
Complete Event Settings
The Event Settings list displays all of the events currently configured in the Network DVR.
There is one event predefined for each camera, called
Camera X - Manual Recording
. This
manual event can be disabled, but not deleted. It has the same settings as other events
except that it is not possible to define any alarm triggers or to schedule it. This event is
triggered when the
Rec
button is pressed.
To add a new event, click the Add an Event button. Then click the Edit button to the right
of the new event to enable it, rename it and make other necessary settings, as described
below.
The AXIS 2460 can hold a maximum of 25 events. The text at the bottom of the event list
shows how many events are currently in use, and how many more can be added.