6: A
dv
an
ce
d C
on
tr
ol
s •
4
6
©2012 Axia Audio
Chapter Six:
Advanced Controls
Many of the RAQ/DESQ features can be customized
by software settings.. And owners like you have given
us great ideas for new operational capabilities, some
of which are included in our periodic software updates.
With that in mind, we strive to keep our documentation
as up-to-date as possible.
If you have questions that are not covered here, we
invite you to contact our 24/7 Support crew:
•
by email at [email protected]
•
by phone at +1 216-241-7225.
QOR Configuration Screens
The QOR Control Center
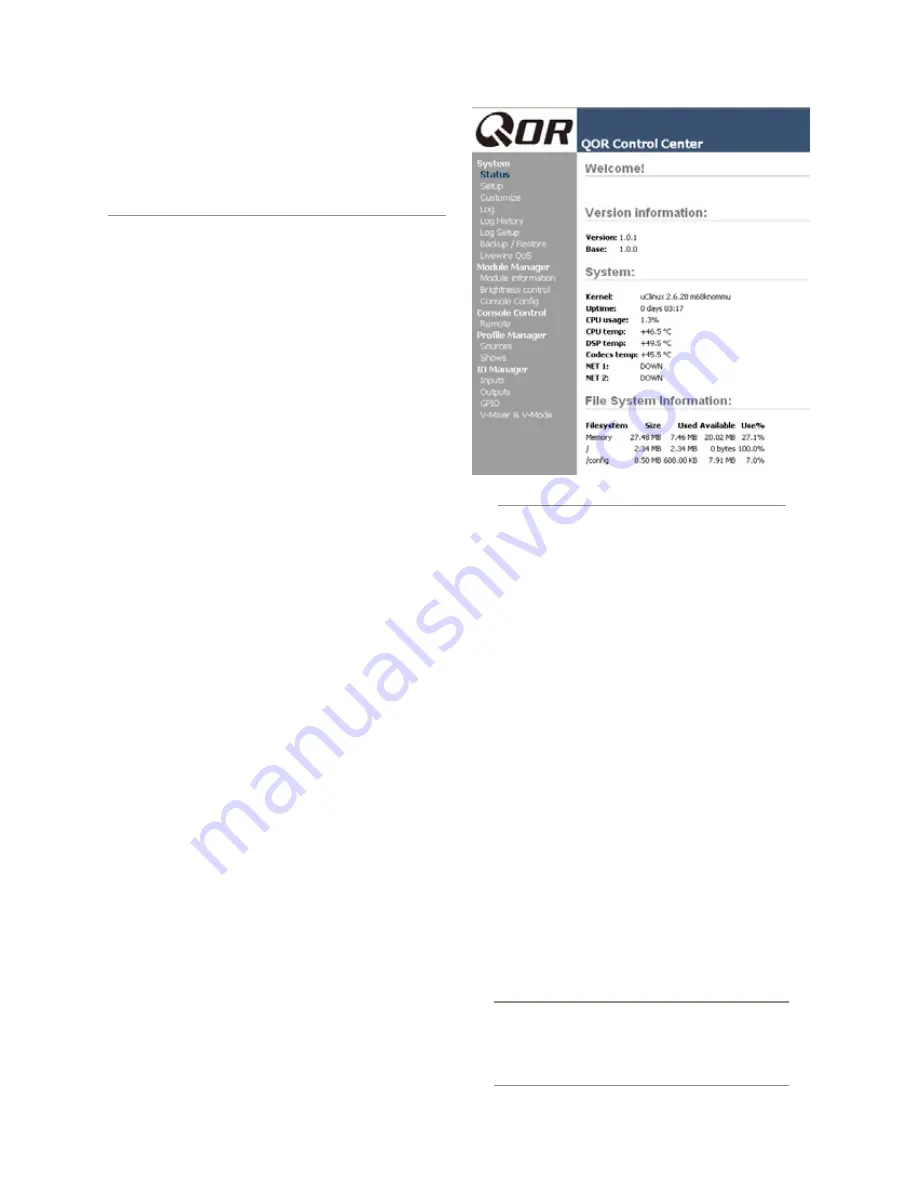
Figure 6-1 shows the screen that greets you when you
log into your QOR from your Web browser. The main
menu runs down the left side and gives access to op-
tions and settings. In the main window you can see at a
glance what version of QOR software is loaded, system
information, CPU statistics, and more. For diagnostic
purposes, this information screen is openly accessible,
but clicking on any menu heading will prompt you for
a password. Here you’ll find options related to the QOR.
the Status Screen
The Status screen is your home page. It displays ba-
sic system status as well as information pertaining to the
active software load. A sample of this screen is shown
in figure 6-1. Additional information displayed may in-
clude:
• QOR software version info including the current ac-
tive Version and Base
• System Information including:
»
Version of Linux kernel
»
Uptime of the QOR expressed in days, hours and
minutes
»
CPU utilization
»
Network Information
»
Debug information
• File System Information - provides information on
memory and solid state disk utilization for the oper-
ating system. This information may be requested by
Axia tech support.
the Setup Menu
We touched briefly on the IP features of the Setup
screen in Chapters 1 and 2. Now let’s look at the rest of
the tools on this page shown in Figure 6-2.
•
Network Configuration
contains the fields for the
QOR IP Address and other network functions.
»
Hostname
is the unique name you give the con-
sole to identify it in the Web interface. You might
want to name it after the studio it’s in.
»
IP Address:
This is the network address of your
QOR. We suggest that you have a plan to ensure
that all of your Livewire devices are assigned
unique, IP addresses.
Shortcut Key:
You can also set the IP address
of your QOR by pressing and holding the
Me-
ter
key
on the Console. Use the Preview knob
to navigate and follow the prompts to give your
QOR a new IP address.
Figure 6-1: Status Screen


