1: S
et
up a
nd C
on
ne
ct
io
ns •
5
©2012 Axia Audio
Chapter One:
Setup and Connections
Introduction
If you are reading this manual, you are probably the
proud owner of a new RAQ or DESQ console. Thank you!
the Basics
This chapter covers connecting the QOR to your
other studio gear, such as microphones, CD players and
other audio playback devices. The audio outputs of the
QOR connect to control room monitors, preview (cue)
speaker, headphones amplifiers and audio recording de-
vices. These external audio devices may be analog or
AES devices.
The GPIO (General Purpose Input Output) ports pro-
vide logic control interfaces to devices such as air lights,
recorders and CD players.
The 100 Mbps Ethernet ports may be used to con-
nect PCs running Axia’s IP-Audio driver, to expand your
system by adding other Livewire devices such as Axia
Audio Nodes, or equipment from Axia Partners (see
AxiaAudio.com/partners/
for the latest list of companies
whose equipment connects directly to Axia networks).
1000 Mbps (Gigabit) Ethernet ports are used to con-
nect to other QOR units or an Ethernet core switch - an-
other topic covered in Chapter 7.
A 6-pin Molex connector is used to connect your
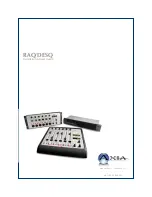
RAQ or DESQ surface with the QOR mixing engine.
assigning an iP address
Before you can configure your hardware, you’ll need
to assign it an IP address. Press-and-hold the Meter Op-
tions key for five seconds. The meter display now shows
the options and the Preview control is used to navigate,
select IP Address options and change parameter values.
Consult your network administrator if you are unsure
about what address to use.
Each QOR requires a single, fixed IP address. The
RAQ or DESQ control surfaces are controllers for the
QOR, so they share the same IP addresses. See Chapter
7 for more details when multiple QORs are used or when
a QOR is a part of a larger network.
notes on Physical installation
The QOR is fan-free, so it can be located in any stu-
dio without fear of unwanted noise. Those vents and heat
sinks serve a very important purpose! Be sure to mount
the QOR in an equipment rack with free air flow. We
recommend using a ventilated 1RU rack spacer above
and below the QOR to ensure adequate ventilation.
To install the DESQ surface in your studio, all you
need is a desk – no cutout required. To install the RAQ
surface, all you need is 4 RU in a standard 19 inch rack.
QOR: Front Panel
The indicator panel of the QOR, shown on the follow-
ing page, is very simple. There are no controls for you to
push or turn. Configuration and setup is performed from
the console itself or through the web browser interface.
Front Panel Indicators
Even though there are no knobs or dials, the front
panel has some very useful indicators that tell you about
the health and status of your QOR. In all cases, solid
GREEN indicates normal operating conditions.
cHEcK
This is a general health indicator for the QOR. If this
indicator is RED, immediately check the web pages for
abnormal operating conditions such as excessive CPU
temperature. Do not ignore this indicator. Note that it is
normal for this indicator to flash during boot-up.
liVEWirE
When lit, indicates that Livewire channels are being
taken from the network. If no network sources are being
received, this indicator is not illuminated.


