G
et
tin
g S
ta
rt
ed •
1
©2012 Axia Audio
Getting Started
The following chapters of this manual will give
you an in-depth understanding of the capabilities of
your new RAQ or DESQ surfaces, from installation to
advanced functions. This section will help you get ev-
erything connected quickly, and point you to the parts
of the manual you’ll need to get up and running with a
minimum of fuss.
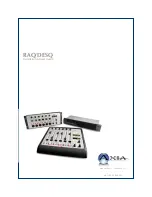
RAQ consists of these components:
•
RAQ mixing surface:
6-fader rackmounted
frame with master controls and meters.
•
QOR.16 or QOR.32:
Rack-mounted CPU chas-
sis with audio I/O and GPIO connectors.
DESQ consists of these components:
•
DESQ mixing surface:
6-fader frame with
master controls and meters.
•
QOR.16 or QOR.32:
Rack-mounted CPU chas-
sis with audio I/O and GPIO connectors.
Making Connections
You’ve probably unpacked your boxes and are sitting
next to a pile of Axia gear, wondering what to do first.
Here’s what you need to know in order to get started:
1. Packed with your RAQ/DESQ is a cable with
6-pin Molex
TM
connectors on each end. This is the
power/communications cable. Connect the end of
the cable without the strain relief to the port on the
underside of your RAQ or DESQ control surface.
Connect the other end of the cable to the connector
labeled CONSOLE on the back of your QOR unit.
2. Connect audio sources (microphones, CD play-
ers, etc) to inputs of your QOR.
3. Connect monitor amplifiers, headphone ampli-
fiers, etc to outputs of your QOR. Be sure to set all
amplifiers to their minimum volume setting.
4. Follow the instructions found in Chapter 1 to
configure IP address settings for your RAQ/DESQ.
5. Refer to the User’s Manuals packed with any
other Axia Audio nodes for information on how to
configure IP addresses for these units.
What’s Next?
When you’ve completed physically connecting your
Axia hardware, jump to Chapter 2 for a quick tutorial
on configuring audio sources. With that done, you’ll be
a hop, skip, jump away from being on-air! After that,
you’ll likely want to do some in-depth reading about all
that your new console can do. Here’s a brief description
of the contents of the following chapters:
• Chapter 1: Setup and Connections
explains con-
nections and basic setup.
• Chapter 2: Inputs and Outputs
explains how to
generate Source Profiles and construct backfeeds
for selected sources.
• Chapter 3: Surface Operations
takes you behind
the scenes to explore operator controls and options.
• Chapter 4:Show Profiles
illustrates how to set and
save unique “snapshots” tailored for specific shows.
These Show Profiles can be instantly recalled when-
ever needed.
• Chapter 5: GPIO
tells how to associate routable
logic commands with any audio source.
• Chapter 6: Advanced Controls
discusses advanced
features that are configured in configuration web pages.
• Chapter 7: Livewire Networking
and QOR will tell
you how to connect your console to a network and
reap the benefits of networked studio systems.
• Appendices
provide additional technical specifica-
tions and a complete set of block diagrams for your
reference.
Stay up to date!
We recommend joining the
Axia Tech mailing list to ensure that you receive
immediate updates regarding new software or
documentation releases. You can do this by
clicking the “Sign Up Here” link at the top of
AxiaAudio.com/manuals/ & AxiaAudio.com/downloads/.


