22
M3060 User Instructions
3
Installation
3.5 Power Connections - AC
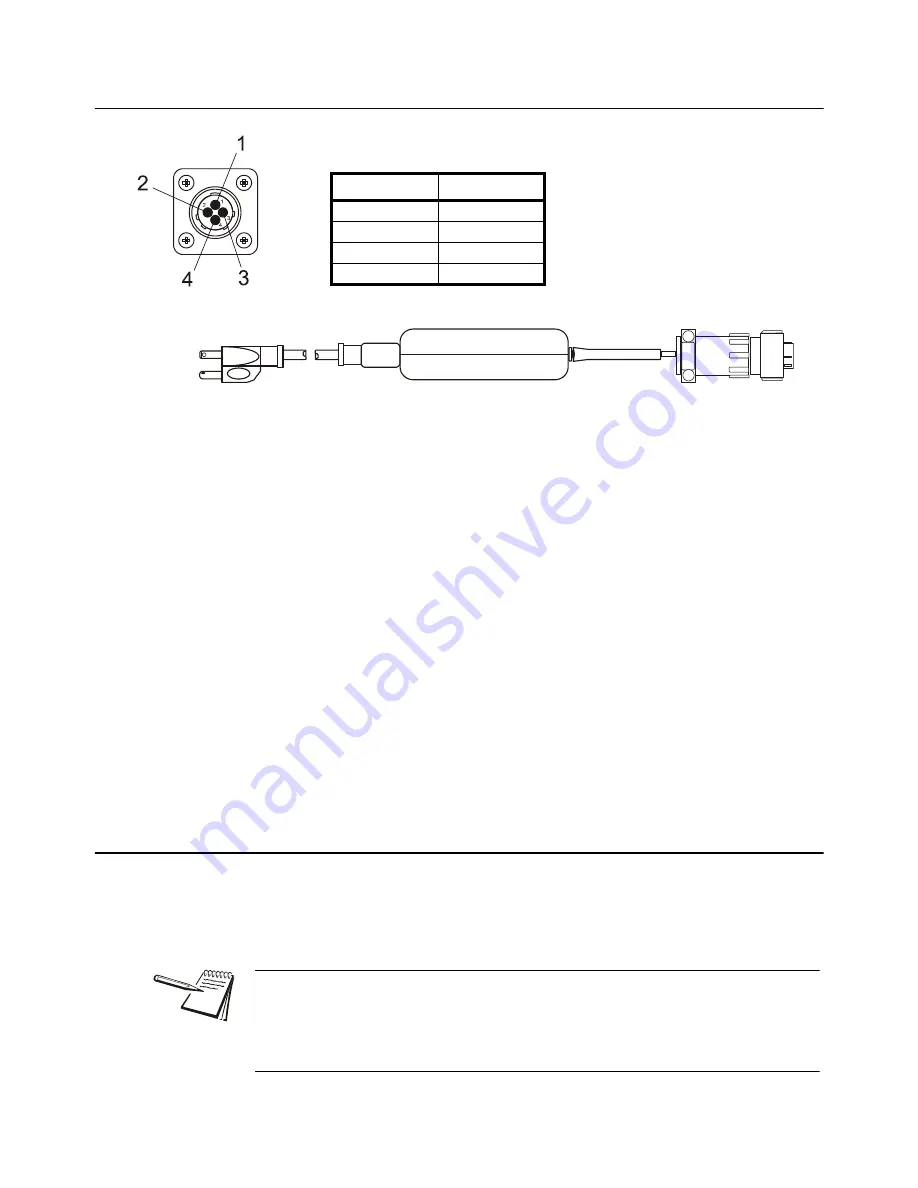
Power Connector
Pin
Description
1
+ 12 VDC
2
Ground
3
Output #1
4
Input #1
Part No. 28300-0057
Figure 3.12 Power Connections, AC
For applications requiring AC power, follow these instructions.
1.
Loosely attach the AC power adapter to the area near the outlet with a cable tie.
2.
Route the cable from the electrical outlet to the indicator. If possible, run the
power cable through existing channels or conduit so that it will be out of the
way and cannot be damaged by any moving parts.
3.
Inspect the cable run and make sure that the cable is not pinched, kinked or in
the way of moving parts or sharp objects.
4.
Tuck or cable tie the excess cable along the run as necessary.
5.
Tighten the AMP connector on the underside of the indicator.
6.
Plug the AC adapter in to the outlet.
7.
Press and hold the
On/Off
key on the M3060 until the red light above the key
comes on.
8.
Check that the indicator powers on.
3.6 Optional Communications Connections
The M3060 comes with three serial communications (COM) ports which can be used
for various peripheral equipment such as a the XLR-8 remote displays, printer, RM200
or other device. Use the following instructions for connecting a serial peripheral device
to the M3060.
All COM ports on the M3060 indicator have the same pinouts as shown in
. COM 1 is configured for a printer, COM 2 is configured for RM200 and COM 3 is
configured for XLR-8 remote display. The default settings for each port are:
9600 Baud, 8 Data Bits, No Handshaking and 1 Stop Bit. Contact your Avery Weigh-
Tronix representative if you need to change these settings.


