background image


6-8


System Administrator’s Guide


U s i n g   F l a s h   M e m o r y  


Use these basic guidelines when storing files in your printer's flash  memory. 


Your printer has volatile RAM (packets deleted when the printer is off) and flash 
memory (packets saved when the printer is off). 


Flash memory must be formatted before any packets can be saved.  See "

Formatting 

Flash Memory

" for more information. 


Formats, graphics, and check digits can be saved in flash (a copy is automatically 
placed in RAM).  Any packets saved in flash cannot exceed the memory available in 
RAM. 


There is not a 1-to-1 ratio between the RAM memory (formats, graphics, and check 
digits) in your printer and the memory in your PC.  For example, a file that is 5K in 
Windows may require 15-20K to store in your printer. 


Use temporary storage for graphics that are only used once or twice.  However, if you 
have a logo that is used on multiple formats, save the graphic in flash. 


Each line in a packet requires the same amount of memory.  The smaller the format, 
the less memory required to save it. 

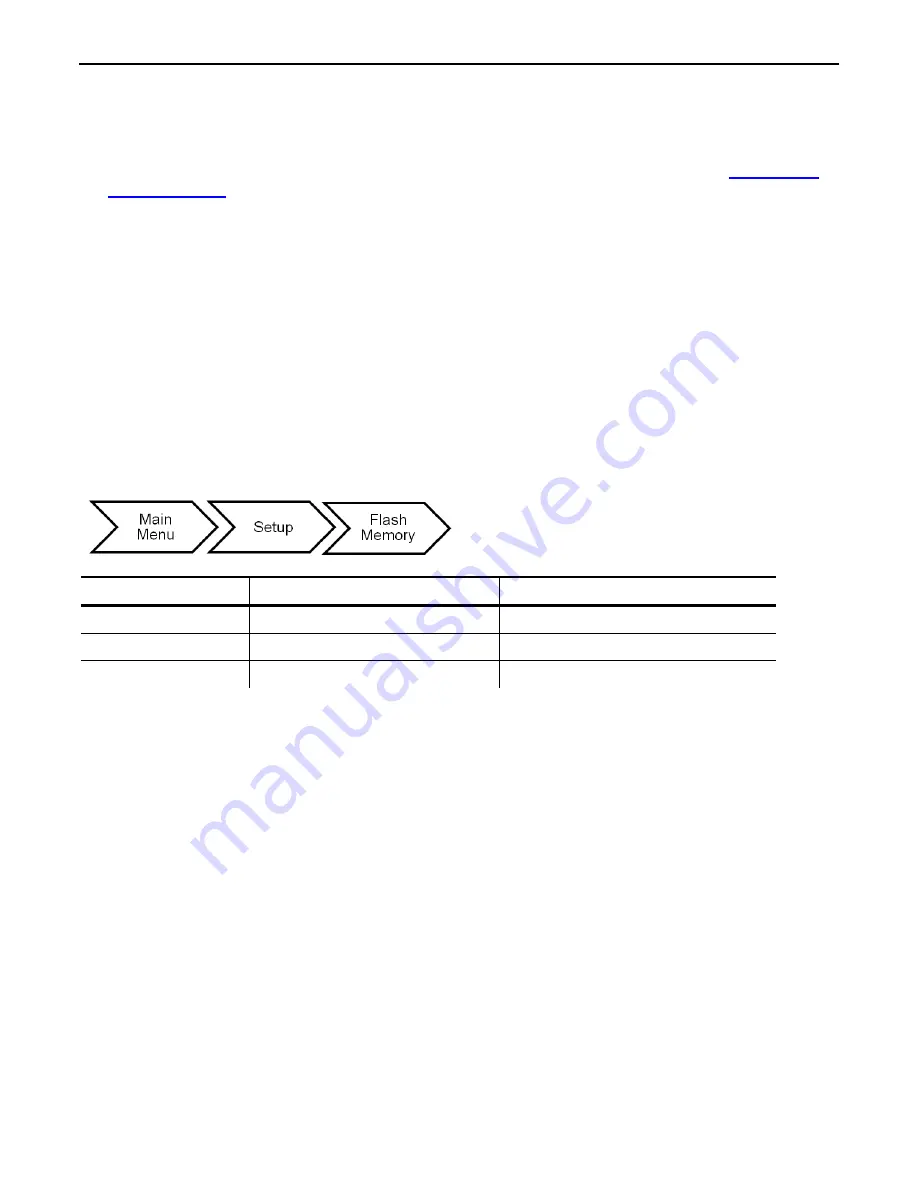
The flash memory options are in the table below. 


Option 

Choices 

Default 

Format Flash 

No/Yes 

No 

Unused Flash 

NA 

NA 

Pack Flash 

No/Yes 

No 


Summary of Contents for Monarch Tabletop Printer 1

Page 1: ...TCADTP1SA Rev AC 12 15 2015 Avery Dennison Corp All rights reserved Monarch Products SYSTEM ADMINISTRATOR S GUIDE TABLETOP PRINTER 1 Printer Fastener Solutions...

Page 2: ...l not be liable for any omissions or inaccuracies Any update will be incorporated in a later edition of this manual 2015 Avery Dennison Corp All rights reserved No part of this publication may be repr...

Page 3: ...Setting the Cut Mode 2 5 Recommended Cutter Operation 2 6 Setting the Backfeed 2 6 Adjusting the Position Settings 2 7 Setting the Print Position 2 7 Setting the Supply Position 2 8 Setting the Margin...

Page 4: ...the SSID 5 2 Wireless Mode 5 2 Roam Threshold 5 3 Transmit Rate Ad Hoc Only 5 3 Channel Ad Hoc Only 5 4 SETTING DEFAULTS 6 1 Setting the Monetary Sign 6 2 Setting the Secondary Sign 6 2 Setting the Nu...

Page 5: ...8 1 RFID Operational Overview 8 1 About RFID Supplies 8 2 What is Pitch 8 2 Getting Started With RFID 8 3 Using the Easy Setup Menu 8 3 Selecting the Inlay 8 4 Entering the Inlay Position 8 4 Using th...

Page 6: ...NG 11 1 Configuring a Wireless Printer using a Wired Connection 11 1 Using the Network Console Packet 11 4 Adjusting the Printer to Remove Ribbon Wrinkle 11 6 About the Ribbon s Take up Reel 11 7 Adju...

Page 7: ...e available on our Web site However they are not label production software Call Customer Service for information about label production software Using the Control Panel The control panel has a four li...

Page 8: ...r changes are not saved Printing a Test Label From the Main Menu select TLABEL Select from the test label options Printer Information MPCL Label Contains generic information including inch counts and...

Page 9: ...g latch 3 Lift the printhead assembly using the printhead tab until the assembly locks into place 4 Remove both cover thumbscrews 5 Gently push down on the control panel release tab located inside the...

Page 10: ...1 4 System Administrator s Guide...

Page 11: ...lt Supply Type E Aperture E Die Cut E Black Mark Continuous C Aperture C Die Cut C Black Mark C Tag Edge E Die Cut Ribbon No Yes High Energy Yes Speed 2 5 4 0 6 0 8 0 10 0 12 0 Default Default Feed Mo...

Page 12: ...is sensed using the gap between the labels If using semi die cut supplies tags with rounded corners on the edges select Edge Die Cut E Black Mark Edge Black Mark or C Black Mark Center Black Mark Blac...

Page 13: ...ARK Require an elevated heat setting for resin ribbon applications Using a High Energy Ribbon When you select high energy ribbon for the printer setting you are setting the printer to a higher printin...

Page 14: ...o print 6 0 ips AD 318M5GWC 4 0 IPS 4 0 IPS Easy Setup does not adjust the print speed Recommended Maximum Pint Speeds Options Print Speed inches per second 2 5 4 0 6 0 8 0 10 0 12 0 300 dpi printhead...

Page 15: ...cutter The cutter operates when the printer is running If the printer is paused the cutter stops cutting The cutter also stops cutting whenever the cutter s cover is opened Note When cutting RFID supp...

Page 16: ...s No 1 2 4 300 Yes Yes 3 5 Note Some RFID supplies may curl and cause a jam with cut mode 3 If this happens use cut mode 1 Contact Service to order replacement 300 dpi printheads KST for use with the...

Page 17: ...his function adjusts the image s position on the supply in the feed direction Adjust the print position if the print is too close to the top or bottom of the supply or overtypes the pre printed area T...

Page 18: ...ress the left function button to change the amount by 1 10 or 100 Setting the Margin Position This function adjusts where the format prints side to side on the supply The adjustments are in dots where...

Page 19: ...ing Moves the print up Note Press the left function button to change the amount by 1 10 or 100 Setting the Backfeed Distance The function adjusts the amount to move the label backwards at the start of...

Page 20: ...batch separators Using Skip Index Skip index mode skips or ignores a sense mark and prints an image over multiple labels if necessary For example if you have 4 0 long supplies loaded but the image is...

Page 21: ...Continue 4x Overstrike Continue 5x Attempt to reprint the label for one two three four or five consecutive tries An overstrike pattern is printed each time the reprint fails Printing is stopped after...

Page 22: ...ct print contrast setting is important because it affects how well your bar codes scan and how long your printhead lasts High contrast settings may require additional printhead cleaning create bar cod...

Page 23: ...eed to set your Serial Comm values to match your computer s online communications The serial communication values are in the table below Option Choices Default Baud rate 1200 2400 4800 9600 19200 3840...

Page 24: ...ommunicate at 19200 bits per second 38400 Communicate at 38400 bits per second 57600 Communicate at 57600 bits per second 115200 Communicate at 115200 bits per second Setting the Word Length Word leng...

Page 25: ...w control is the method the printer uses to tell the computer whether it is ready to accept data Select To None Set the flow control to none Xon Xoff Set the flow control to XON XOFF XON is 17 XOFF is...

Page 26: ...opers like NiceLabel Virtual Serial Using the Virtual Serial port requires the ADTP1 inf file which installs the printer as a virtual com port for example COM4 COM5 etc See Installing the Virtual Seri...

Page 27: ...Next 7 Select Monarch as the Manufacturer 8 Select Monarch ADTP1 203dpi or 300dpi based on your printhead as the Printer 9 Click Next 10 Select the first available USB port for example USB001 Click Fi...

Page 28: ...P1 inf from our Web site 2 Save it to your hard drive 3 Use a USB cable to connect the USB port on the printer to the USB port on your computer 4 Turn on the printer Set the USB Mode to Virtual Serial...

Page 29: ...computer searches for the software You may see 10 Select Install this driver software anyway A message appears that Windows has successfully updated your driver software 11 Click Close to continue The...

Page 30: ...3 8 System Administrator s Guide...

Page 31: ...nection is established The network options are listed in the table below Option Choices Default MAC Address View only None preset value IP Address xxx xxx xxx xxx 192 0 192 0 Subnet Mask xxx xxx xxx x...

Page 32: ...ields If using the optional keyboard enter the subnet mask you need using the numeric keys and press ENTER Select To Subnet Mask Change the printer s subnet mask Press or to highlight the position to...

Page 33: ...ault address If this IP address appears on your printer it indicates the DHCP request failed Default Network The default network option allows you to reset the Ethernet wireless module Select To Defau...

Page 34: ...and does not change IP Address Subnet Mask 255 255 000 000 IP Gateway Signal Strength 0 SSID none Wireless Mode Infrastructure Roam Threshold 6 Transmit Rate 1 Channel 1 Boot Method DHCP Boot Tries 5...

Page 35: ...ferent IP addresses for wired vs wireless communication The options are listed in the table below Option Choices Signal Strength 0 to 100 SSID xxxxxxxxxxxxxx Wireless Mode Ad Hoc Infrastructure Roam T...

Page 36: ...or press CANCEL to exit without saving Note Hold CHANGE to scroll quickly through the characters or press CHANGE once to scroll one character at a time To clear the SSID scroll to the end of the field...

Page 37: ...r signal strength 4 6 Sets the roam threshold to 12 decibels 7 10 Sets the roam threshold to 13 decibels 11 13 Sets the roam threshold to 14 decibels 14 15 Sets the roam threshold to 15 decibels Note...

Page 38: ...channel for ad hoc mode In infrastructure mode the channel is negotiated with the access point and this setting is ignored Use this setting in ad hoc mode only Select To 1 Use channel 1 2 Use channel...

Page 39: ...ling Rs Rupee Ruble Rubel Won Baht Yuan Euro Dollar Secondary Sign No Yes No Decimal Places 0 1 2 3 2 Slashed Zero No Yes No Power up Mode Online Offline Online Prompt Set English Fran ais Deutsch Esp...

Page 40: ...pee Print the Rs sign Ruble Rubel Print the sign Won Print the sign Baht Print the sign Yuan Print the sign Euro Print the sign Setting the Secondary Sign If you select the dollar as the monetary sign...

Page 41: ...zero character Bold and OCR fonts print the standard zero 0 only The slashed zero selection does not take effect until the format is sent to the printer again If you change the way zero prints you mus...

Page 42: ...venska Displays prompts in Swedish Espa ol MX Displays prompts in Latin American Spanish Dansk Displays prompts in Danish Nederlands Displays prompts in Dutch Polski Displays prompts in Polish T rk e...

Page 43: ...mat does not print as expected an error message appears on the display Enabled If a format does not print as expected no error message appears and the format prints as is For example bar codes require...

Page 44: ...nds to all online configuration packets Enabled The printer ignores all online configuration packets This is useful when you cannot change your host s data or when you want the printer to operate as s...

Page 45: ...is 30 Format B prints 5 82 inches long Note Refer to the Packet Reference Manual for more information about defining the format header Select To Decrease the setting Reduces the image length by the e...

Page 46: ...saved in flash cannot exceed the memory available in RAM There is not a 1 to 1 ratio between the RAM memory formats graphics and check digits in your printer and the memory in your PC For example a fi...

Page 47: ...s or graphics saved in the printer s flash memory are deleted and must be resent to the printer Viewing Available Flash Memory If you receive errors when downloading a script or other packets make sur...

Page 48: ...ith the printer s firmware and does not need to be flashed separately However new inlays may be qualified in between firmware releases Only inlays qualified for use in the ADTP1 printer are included T...

Page 49: ...o a folder named ADTP not ADTP1 or the root Setting the Clock Optional The EF version extended features printer contains a real time clock Set the clock during initial printer setup The printer keeps...

Page 50: ...es to the specified time Setting the Day of the Month Set the clock s day of the month Select To 1 31 Sets the day of the month to the specified number Setting the Month Set the clock s month Select T...

Page 51: ...pears in the upper left hand corner of the display The interpreter options are in the table below Option Choices Default Interpreter MPCL MLI XML MCPL Select To MPCL Use the MPCL interpreter Refer to...

Page 52: ...6 14 System Administrator s Guide...

Page 53: ...The script options are in the following table Option Choices Default Load Script NA NA Enable Script No Yes No Script Info NA NA Delete Script No Yes No Status Polling Disable Enable Disable Immediat...

Page 54: ...printer to accept a script file Note Only one script can be loaded in the printer at a time Send the script file to the printer When downloading a script if you receive an error Check the available fl...

Page 55: ...ble Do not use status polling Enable Use status polling Using Immediate Commands You can use immediate commands to reset the printer or cancel and repeat batches Immediate commands are turned on or of...

Page 56: ...7 4 Operator s Handbook...

Page 57: ...w An RFID printer has an antenna to program RFID inlays Two antenna modules are available one for FCC and one for ETSI frequencies The antenna module type prints on the RFID configuration label See Pr...

Page 58: ...ort supply length enable singulate mode to prevent adjacency issues Die cut supplies Measure from the leading edge of one label to the leading edge of the next label Black mark supplies Measure from t...

Page 59: ...oding The Easy Setup options include Option Choices Default Select Inlay various N A Inlay Pos mm 0 200 0 The printer contains a RFID inlay database d46ESxx db If the database is not already installed...

Page 60: ...or example AD 383U7 GNC 2 Press or to select your inlay then press SET Custom appears as the selected inlay s name if the print speed is increased or any RFID settings are changed Entering the Inlay P...

Page 61: ...the RFID Printer Setup Utility Adjusting these settings may cause undesired results The advanced setup menu changes whether non stop encode mode or stop to encode mode is selected The Advanced Setup...

Page 62: ...time Non stop encoding is required for minimum pitch supplies See What is Pitch for more information Performance Considerations with RFID The printer has two RFID modes of operation stop to encode and...

Page 63: ...lay over the antenna Note While singulate mode is more reliable it may decrease throughput No Disable singulate mode The printer does not use the TID field to program a specific inlay Setting the Writ...

Page 64: ...te Press the left function button to change the amount by 1 or 10 Setting the Encode Position This option only appears in the Advanced Setup menu when using stop to encode mode The encode position is...

Page 65: ...Advanced Setup menu The first TID position is only used in non stop encode mode with singulate mode enabled The range is 0 to 2000 The default is 0 The first TID position moves the hotspot of the fir...

Page 66: ...s 0 The start encode position is measured from the leading edge of the supply to the beginning of the RFID inlay encoding area in 0 01 inches The start encode position must lead be before the first TI...

Page 67: ...enna It is the length in dots of the programming zone area The range is 50 to 2000 The default is 200 Note Encode zone should not exceed the pitch of the label If the encode zone is too large adjacenc...

Page 68: ...he read EPC data matches the programmed EPC data using the internal antenna External Confirms the read EPC data matches the programmed EPC data using the optional external verifier Requires setting th...

Page 69: ...he RFID inlay in the verifier s field may not be read Increase the setting If the verify power setting is too high adjacent RFID inlays may be read Note Press the left function button to change the am...

Page 70: ...ata daily or after each batch Select To Yes Clear erase all RFID data collected since the last time it was cleared No No data is erased This is the default RFID Troubleshooting with Non Stop Encoding...

Page 71: ...BEL1 FMT COM1 Transmits a file called LABEL1 FMT to COM1 COPY LABEL1 BCH COM1 Transmits a batch called LABEL1 BCH to COM1 If you use the COPY command to download your formats set flow control to DTR n...

Page 72: ...all fixed data 1 Design the format to be saved in flash memory using the Packet Reference Manual or using label creation software 2 Format flash memory Any formats graphics and fonts saved in flash m...

Page 73: ...password is required to access the diagnostic functions Press Feed three times and then press Enter Checking the Versions View the version number of the printer s firmware RFID module s firmware and...

Page 74: ...sense mark pass the detection test Y or N Using a Password The password feature prevents formats graphics or fonts from accidentally being deleted from the printer s memory It limits access to the Se...

Page 75: ...e a wired connection to initially configure the wireless printer Note The ADTP1 printer has different IP addresses based on connection type one for wired Ethernet and a different one for wireless conn...

Page 76: ...de 7 From the side Menu Bar click Network Configuration 8 From the Protocols tab set the Boot Method and Boot Tries if necessary Click Save Changes 9 From the SNMP tab change the printer s name System...

Page 77: ...utes 12 The MonarchNet2 screen should refresh and show the new printer s name with a wired connection 13 Disconnect the Ethernet cable 14 Turn off the printer Wait two seconds then turn on the printer...

Page 78: ...in the wireless module N5 name Packet name 0 to 8 characters enclose within quotation marks is the default C1 C Command field C2 con_comds Console commands Must be enclosed within quotation marks is...

Page 79: ...C set en key 2 Sets WEP key 2 to use C set en keyval 123456abcdef1 Sets WEP key 2 value to 123456abcdef1 C set en authtype open Sets authentication type to open C set en id fnlname Sets the authentica...

Page 80: ...ake up core is loosely wrapped or contains folds Rotate the take up core until it is tight If that does not help load a new ribbon when there is uneven pressure across the width of the printhead Make...

Page 81: ...Troubleshooting 11 7 About the Ribbon s Take up Reel Rotate the take up reel until the ribbon is tight under the printhead and no wrinkles are visible Ribbon Take up Reel...

Page 82: ...just the printhead pressure dials Note Both dials must be set to the same position Each dial has four settings Least pressure Light pressure Medium pressure Most pressure Use the following guidelines...

Page 83: ...upply roll must move freely 2 Unlock the supply guides and feed the supply through the supply path so a few inches extend past the front of the printer Tuck the supply under the nibs and die cut senso...

Page 84: ...l transfer supply with a 4 inch wide ribbon 5 Set the printhead pressure dials to an equal setting 6 Loosen the locking screw on the end of the ribbon take up guide set the guide at the nominal positi...

Page 85: ...Specifications Accessories A 1 S P E C I F I C AT I O N S A C C E S S O R I E S Printer Height 13 8 inches 351 1 mm Width 11 6 inches 293 5 mm Depth 21 7 inches 550 8 mm Weight 33 lb 15 kg A...

Page 86: ...67 6 MHz frequency range ETSI the radio operates within the frequency range in accordance with local rules and regulations Supplies Media Contact your Sales Representative for supply recommendations i...

Page 87: ...ype Standard wax high speed Premium wax resin TUFF MARK resin Ribbon Widths Use with Maximum supply width 1 5 inches 38 mm 1 3 inches 33 mm 1 8 inches 46 mm 1 5 inches 38 mm 2 3 inches 58 mm 2 0 inche...

Page 88: ...y not available with peel mode 300 dpi printhead ADK script programming for special applications Shipping the Printer If you need to ship the printer to a different location and do not have the origin...

Page 89: ...Menu Structure B 1 M E N U S T R U C T U R E Use the Function button to select MENU Then use or to scroll through options Press SELECT when you see the menu option you need B...

Page 90: ...B 2 Operator s Handbook...

Page 91: ...use in Monarch RFID supplies tags Inlays can be made with different types of transponders interrogator The electronics module that programs the RFID inlays through the antenna LCD Display on the prin...

Page 92: ...s to be loaded in the printer Located in the supply path supplies Labels and tags used for printing TID The Transponder Identification Number which contains the chip type features and available custom...

Page 93: ......

Page 94: ...Avery Dennison 170 Monarch Lane Miamisburg OH 45342 Printer Documentation http rbis averydennison com en home products printers tabletop ADTP1 product support pc html US CA Printer Fastener Solutions...

Reviews: