


REMOTE OPERATION
~
51
~
8.2 IE Web Browser
You can view the live images only via IE web browser.
Note:
The supported PC operation systems are Windows 2000 and Windows XP.
Step 1: Key in the IP address used by your DVR in the URL address box, such as 60.121.46.236, and press Enter.
You will be prompted to enter the user name and password to access the DVR.
If the port number your DVR used is NOT 80, you need to key in the port number additionally. The format is
ipaddress
:
portnum
. For example, for IP address 60.121.46.236 and port No. 888, please key
in ”http://60.121.46.236:888” into the URL address box, and press “Enter”.
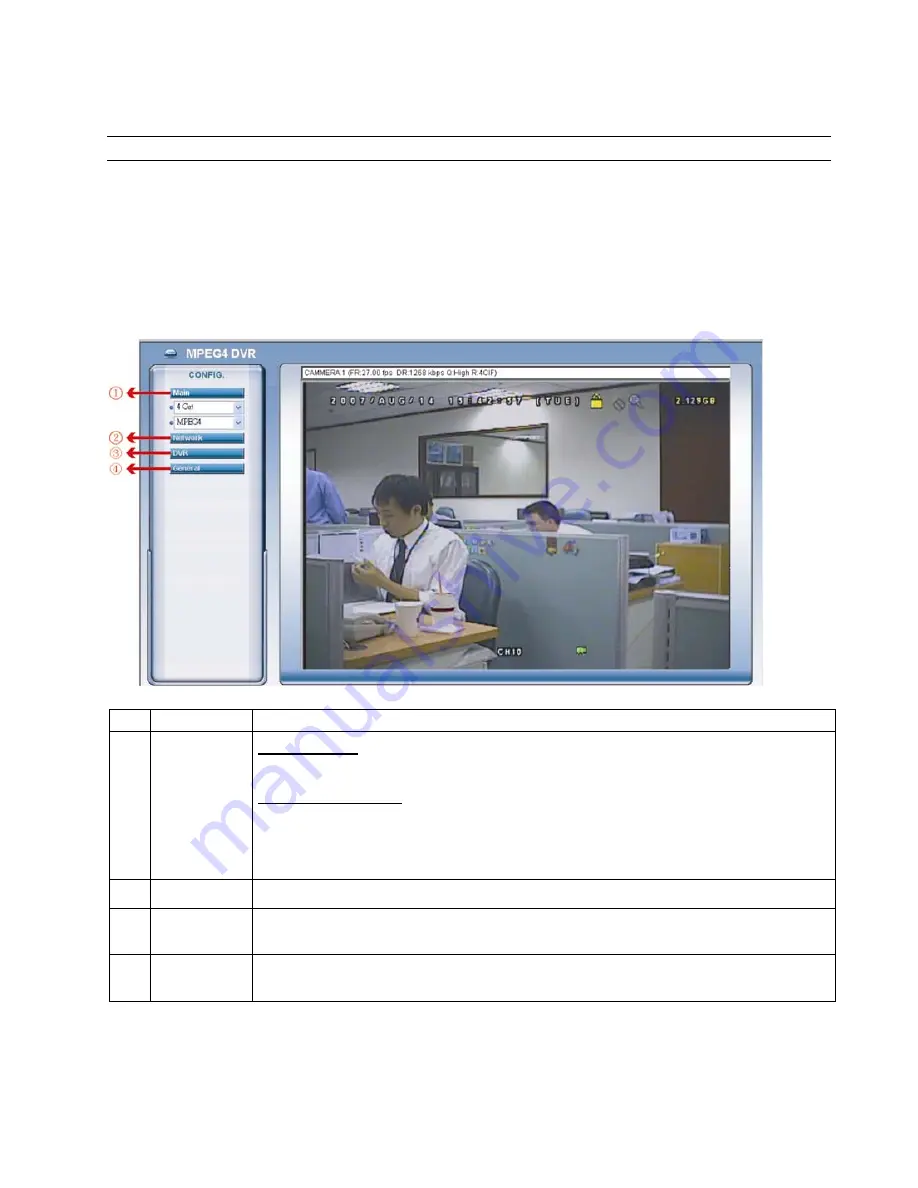
Step 2: Enter the user name and password, the same as the ones used at AP login, and press “OK”. You will see a
similar screen as the following when the login information is correct.
NO. Function
Description
1 Main
Menu
Channel Selection
Select to view a single channel (Channel 1 / Channel 2 / Channel 3 / Channel 4), or a 4-cut view (4 Cut).
Web Transmission Format
Select the web transmission format: MPEG4 or Quick Time.
QuickTime is Apple Inc.’s multimedia software. You need to have QuickTime installed in you operation system
first. When “QuickTime” is selected, you will be promoted to enter the user name and password to access the
server of the DVR.
2 Network
View and set the network configuration as described in “Network” at page 38.
3
DVR
View and set the DVR color, motion detection and alert. For details, please refer to “Color Setting” at page 32,
“Detection” at page 43, and “Alert” at page 44.
4 General
View and set the DVR language & accounts, check the server logs, and upgrade the DVR firmware. For details,
please refer to “38” at page 37, “Logs” at page 37, and “Tools” at page 45.