


REMOTE OPERATION
~
44
~
Function Description
detection.
The highest sensitivity setting is 0, and the lowest sensitivity setting is 15. The default setting is 2.
RE
“Reference”, is to set a reference for detection. The default value is 10, which means the DVR will
compare 10 continuous images at one time according to the sensitivity of LS, SS, TS
simultaneously.
The bigger the value is, the higher sensitivity for motion detection. The highest sensitivity is 61.
Alarm
Select N.C. (normal closed) / N.O. (normal opened) / OFF for the alarm polarity. For N.C. / N.O.
contact details, please refer to “APPENDIX 2”.
Motion Detection
Setting Area
Set the motion detection area by selecting the area grids with your mouse. Pink grids represent
the area that is not being detected while the transparent grids are the area under detection. You
can set multiple areas under detection.
Click “
-
” (Clear All) to set the whole area undetected.
Click “
+
” (Select All) to set the whole area under detection.
Apply / Return
To save the setting, click “Apply” and return to “Server Setting” window.
To discard the setting, click “Return” to directly return to “Server Setting” window without saving.
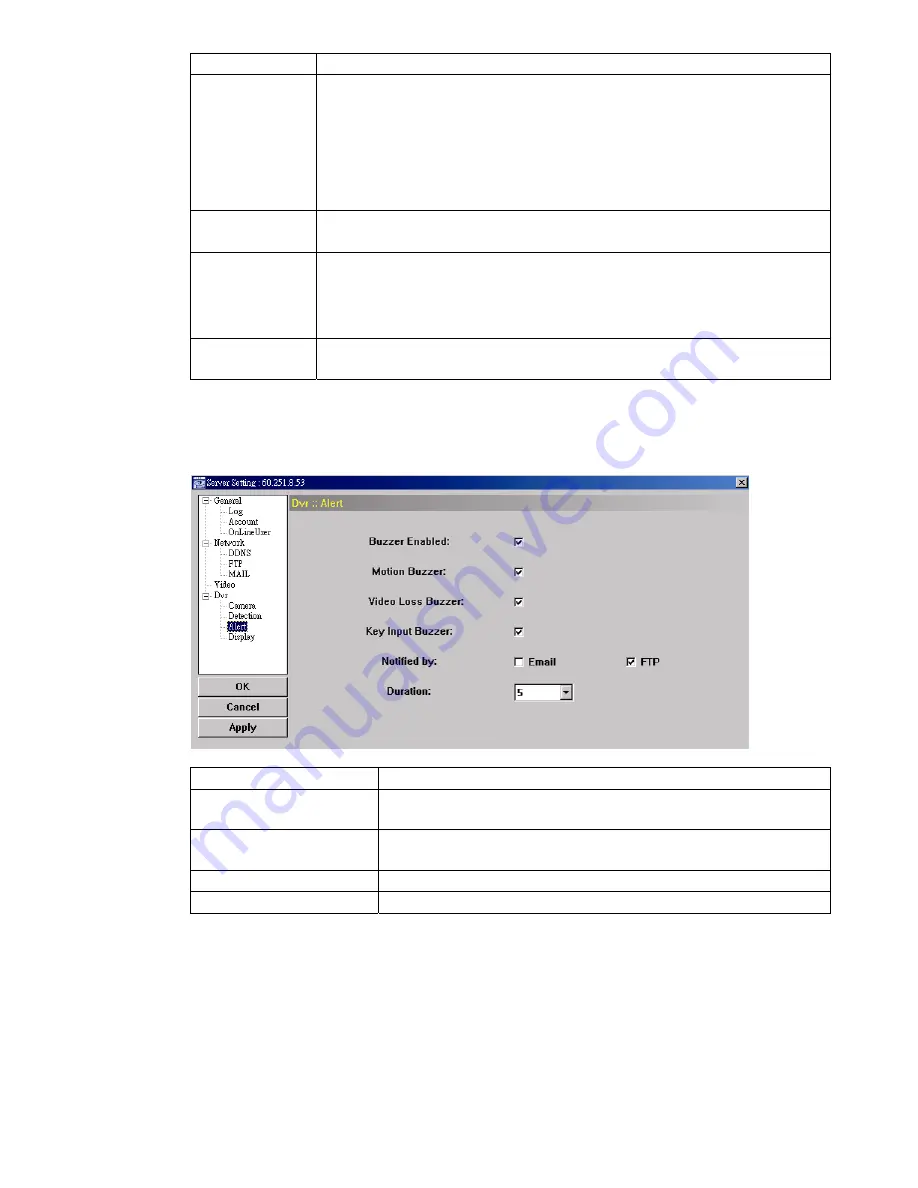
Alert
In “Alert”, you can set the DVR to beep for notification when there’s any alert happened. Check the
buzzer option you want, and set how long the beep sound will be lasted.
Function Description
Buzzer Enabled
This option must be checked for “Motion Buzzer”, “Alarm Buzzer” and “Video Loss
Buzzer” to take effects.
Motion Buzzer / Alarm Buzzer /
Video Loss Buzzer / Key Input
Check one of these 4 options, and you will hear the beep sound when any movement
is detected / the alarm is triggered / video loss occurs / any DVR key is pressed.
Notified by
Select the notification method when any event occurs: Email or FTP.
Duration
Set the alert and buzzers to beep for 5 / 10 / 20 / 40 seconds.
Display
In “Display”, you can choose whether to display some text indication or icons, set the channel display
switch time-out, set the DVR time remotely, and select the date format (Y-M-D / M-D-Y / D-M-Y).