background image

NL 15

BEDIENING

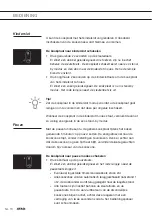
Eco stand-by modus 

In eco stand-by modus is de kookplaat uitgeschakeld en verbruikt de 
kookplaat het minste energie. 
De kookplaat kan naar eco stand-by modus geschakeld worden vanuit 
de stand-by modus en wanneer er nog kookzones actief zijn.

De kookplaat naar eco stand-by modus schakelen

•  Druk kort op de sleuteltoets.  

Er klinkt een enkel geluidssignaal. De eco stand-by modus is actief, 
het rode lampje naast de sleuteltoets knippert langzaam.

Vanuit de eco stand-by modus kunt u niet meteen beginnen met koken. 
Hiervoor moet de kookplaat eerst naar stand-by modus geschakeld 
worden.

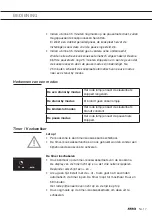
Stand-by modus 

In stand-by modus is de kookplaat ingeschakeld, maar staan alle zones 
uit. U kunt naar de stand-by modus schakelen vanuit eco stand-by 
modus, of door alle afzonderlijke kookzones uit te schakelen.
Vanuit de stand-by modus kunt u direct beginnen met koken. Druk op 
de aan-/uittoets van de gewenste kookzone of de wokbrander of zet 
een pan op een inductiezone en kies het gewenste vermogen.

De kookplaat vanuit eco stand-by modus naar stand-by modus 
schakelen

Het rode lampje naast de sleuteltoets knippert langzaam. 

•  Druk kort op de sleuteltoets om naar stand-by modus te schakelen. 

Er klinkt een enkel geluidssignaal. Alle lampjes op de kookplaat zijn 
uit, behalve eventueel de restwarmte-indicator “H”.

Tip!

De kookplaat verbruikt in eco stand-by modus minder dan 0,5 W. 
Na 30 minuten in de stand-by modus schakelt de kookplaat 
automatisch naar eco stand-by modus om onnodig energieverbruik  
te voorkomen.

F00002557 - LED Screen ATAG TC (700002940000)

24-08-09 IH

Summary of Contents for IGT9472MB

Page 1: ...gebruiksaanwijzing gas inductiekookplaat instructions for use gas induction hob IGT9472MB ...

Page 2: ...NL Handleiding NL 3 NL 35 EN Manual EN 3 EN 35 Gebruikte pictogrammen Pictograms used Belangrijk om te weten Important information Tip Tip ...

Page 3: ... modus 15 Kinderslot 16 Pauze 16 Herkennen van een modus 17 Timer Kookwekker 17 Geluidssignaal in en uitschakelen 18 Bediening inductie Inschakelen en vermogen instellen 19 Restwarmte indicatie 20 Boost 20 Twee achter elkaar liggende kookzones 20 Bridge induction 21 Uitschakelen 22 Automatische kookprogramma s 22 Kookstanden 24 Bediening wokbrander Ontsteken en instellen 26 Restwarmte indicatie 26...

Page 4: ...atje in het daarvoor bestemde kader achter in de handleiding Het gegevensplaatje bevat alle informatie die de servicedienst nodig heeft om adequaat op uw vragen te reageren Werking van de aanraaktoetsen Leg uw vinger toppen plat op de toetsen voor het beste effect U hoeft niet hard te drukken De sensoren onder de toetsen bevinden zich op de buitenste ring van de slider De aanraaksensoren zijn zoda...

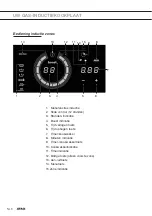
Page 5: ...e induction zone midden voor 6 Pauzetoets sleuteltoets 7 Bediening bridge induction zone midden achter 8 Bediening inductiezone rechts 9 Pauzetoets 10 Pauze indicatie 11 Kinderslotindicatie eco stand by indicatie 12 Sleuteltoets kinderslot eco stand by functie UW GAS INDUCTIEKOOKPLAAT 4 5 6 7 8 2 2 1 3 9 10 11 12 6 ...

Page 6: ...n 3 Standen indicatie 4 Boost indicatie 5 Tijd verlagen toets 6 Tijd ophogen toets 7 Timer kookwekker 8 Minuten indicatie 9 Timer kookwekkertoets 10 Kookwekkerindicatie 11 Timerindicatie 12 Bridge toets alleen voorste zone 13 Aan uittoets 14 Menutoets 15 Zone indicatie 1 3 4 5 6 2 13 9 10 11 8 12 15 14 7 ...

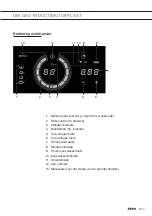
Page 7: ...ontrol 12 standen 3 Standen indicatie 4 Braadstand XL indicatie 5 Tijd verlagen toets 6 Tijd ophogen toets 7 Timer kookwekker 8 Minuten indicatie 9 Timer kookwekkertoets 10 Kookwekkerindicatie 11 Timerindicatie 12 Aan uittoets 13 Menutoets voor het kiezen van de brander standen 1 3 4 5 6 2 12 9 10 11 8 13 7 ...

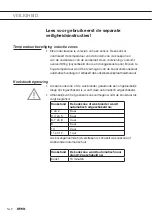
Page 8: ...tisch verlaagd of schakelt de kookzone kookplaat helemaal uit Kookduurbegrenzing Als een kookzone of de wokbrander gedurende een ongebruikelijk lange tijd ingeschakeld is wordt deze automatisch uitgeschakeld Afhankelijk van het gekozen kookvermogen wordt de kookduur als volgt begrensd Kookstand De kookzone of wokbrander wordt automatisch uitgeschakeld na 1 en 2 9 uur 3 4 en 5 5 uur 6 7 en 8 4 uur ...

Page 9: ...p staat Gebruikt u een kleine pan op een grote zone dan zal het vermogen zich aanpassen aan de diameter van de pan Het vermogen zal dus lager zijn en het zal langer duren voordat het gerecht aan de kook is Let op Zandkorreltjes kunnen krasjes veroorzaken die niet meer te verwijderen zijn Zet daarom alleen pannen met een schone bodem op het kookvlak en til pannen altijd op als u ze verplaatst Gebru...

Page 10: ...n zelf kunnen voedselresten niet inbranden Veilig De warmte wordt opgewekt in de pan zelf De glasplaat wordt niet warmer dan de pan Hierdoor blijft de kookzone een stuk koeler dan die van bijvoorbeeld een keramische kookplaat Na het wegnemen van een pan is de kookzone snel afgekoeld Inductiegeluiden Tikkend geluid Een licht tikkend geluid wordt veroorzaakt door de vermogensverdeling van de voorste...

Page 11: ...plaat is gekookt zijn niet meer geschikt voor inductiekoken Gebruik alleen pannen die geschikt zijn voor elektrisch en inductiekoken met een dikke bodem van minimaal 2 25 mm een vlakke bodem Het beste zijn pannen met het Class Induction keurmerk Tip Met een magneet kunt u zelf controleren of uw pannen geschikt zijn Wanneer de magneet wordt aangetrokken is de pan geschikt Geschikt Ongeschikt Specia...

Page 12: ...n Het toestel kan dan te warm worden waardoor de glasplaat kan barsten en de panbodem kan smelten Schade ontstaan door het gebruik van ongeschikte pannen of droogkoken valt buiten de garantie Pandiameter De minimale diameter van de panbodem is 12 cm Bij te kleine pannen schakelt de kookzone niet in Snelkookpannen Inductiekoken is zeer geschikt voor het koken in snelkookpannen De kookzone reageert ...

Page 13: ...el Wokring De wokring die ten behoeve van de wokbrander meegeleverd is zorgt voor extra stabiliteit bij een wok met een ronde bodem Gebruik de wokring uitsluitend op de wokstand in combinatie met een ronde bodem wok Bij gebruik tijdens de braadstand kan de wokring verkleuren Pandrager Plaats de pandrager rechtstandig naar beneden zonder over de glasplaat te schuiven Positioneer de pandrager op de ...

Page 14: ...ot een slecht functionerende brander 1 Plaats de branderkelk 2 in het branderhuis 1 2 Plaats de binnenring 3 op de branderkelk 2 met gebruik van de positioneernokken 3 Plaats de buitenring 4 op de branderkelk 2 met behulp van de positioneernokken GEBRUIK WOKBRANDER kelk plaatsen zijaanzicht ringen plaatsen 3 4 2 2 1 1 2 3 4 ...

Page 15: ...chakeld maar staan alle zones uit U kunt naar de stand by modus schakelen vanuit eco stand by modus of door alle afzonderlijke kookzones uit te schakelen Vanuit de stand by modus kunt u direct beginnen met koken Druk op de aan uittoets van de gewenste kookzone of de wokbrander of zet een pan op een inductiezone en kies het gewenste vermogen De kookplaat vanuit eco stand by modus naar stand by modu...

Page 16: ...at in de kinderslot modus staat verbruikt deze net zo weinig energie als in de eco stand by modus Pauze Met de pauze functie kunt u de gehele kookplaat tijdens het koken gedurende 5 minuten op pauze zetten De energietoevoer naar de kookzone stopt zonder instellingen te verliezen Denk er echter aan dat de kookzone nog een tijd heet blijft verwijder delicate gerechten daarom bij voorkeur van de kook...

Page 17: ...sleuteltoets knippert langzaam De stand by modus Er brandt geen enkel lampje De kinderslot modus Het rode lampje naast de sleuteltoets brandt constant De pauze modus Het rode lampje naast de pauzetoets knippert Timer Kookwekker Let op Per kookzone is één timer kookwekker beschikbaar De timer kookwekkerfunctie kan ook gebruikt worden zonder een bijbehorende kookzone te activeren De timer inschakele...

Page 18: ...n is Het kookwekkeralarm gaat af en geeft gedurende een kwartier in afnemende mate een geluidssignaal terwijl 0 00 en het rode pijltje naar beneden blijven knipperen Druk nogmaals op de timer kookwekkertoets of verwijder de pan van de kookzone om het kookwekkeralarm weer uit te schakelen Tip U kunt de of toets ingedrukt houden om sneller de gewenste kookduur in te stellen Geluidssignaal in en uits...

Page 19: ... het inschakelen van de kookplaat een pan op een inactieve kookzone geplaatst wordt licht de corresponderende bediening op en kan deze direct bedient worden zonder de aan uittoets te bedienen Als de kookzone niet binnen 10 seconden wordt ingeschakelt gaat deze vanzelf weer uit De kookzone kan vervolgens weer geactiveerd worden door de pan te verwijderen en opnieuw op de kookzone te plaatsen of doo...

Page 20: ... plek op de slider In de display verschijnt een lagere stand Of 2 Druk op de aan uittoets van de kookzone die u wilt uitschakelen Er klinkt een enkel geluidssignaal en de display dooft De kookzone is nu helemaal uit Twee achter elkaar liggende kookzones Twee kookzones die achter elkaar liggen beïnvloeden elkaar Wanneer deze kookzones tegelijk ingeschakeld zijn wordt het vermogen automatisch verdee...

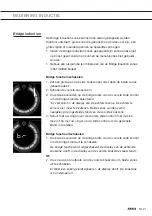
Page 21: ...te slide control om de bridge stand te selecteren br verschijnt in de display van de achterste zone De achterste zone is niet meer te bedienen Beide zones worden verhit naargelang de ingestelde stand van de voorste kookzone 4 Schuif met uw vinger over de voorste slide control met de klok mee of tip met uw vinger op de slide control om de gewenste stand in te stellen Bridge functie uitschakelen 1 D...

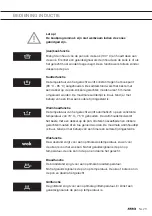
Page 22: ...eindtijd van een automatisch kookprogramma kunt u zelf instellen met behulp van de kookwekkerfunctie zie pagina 17 De kookprogramma s zijn gebaseerd op gangbare hoeveelheden Deze functie werkt het best met pannen die door ATAG worden geadviseerd zie hiervoor www atag nl Deze menufuncties werken het best als ze worden opgestart aan het begin van het kookproces Een automatisch kookprogramma instelle...

Page 23: ...unctie De temperatuur van het gerecht wordt automatisch op een constante temperatuur van 70 C 75 C gehouden De warmhoudstand werkt het beste met een deksel op de pan Grotere hoeveelheden en dikkere gerechten moeten af en toe geroerd worden De maximale warmhoudtijd is 8 uur tenzij er met behulp van een timer een kortere tijd ingesteld is Wokfunctie De wokstand zorgt voor een optimale woktemperatuur...

Page 24: ...kookpan wokken Gebruik stand 9 en 10 voor aanbraden van vlees bakken van vis bakken van omeletten bakken van gekookte aardappelen frituren Gebruik stand 7 en 8 voor bakken van dikke pannenkoeken bakken van dik gepaneerd vlees uitbakken van spek of bacon bakken van rauwe aardappelen bakken van wentelteefjes bakken van gepaneerde vis doorkoken pasta bakken en garen van dun vlees aanbraden groot vlee...

Page 25: ...NL 25 Gebruik stand 1 t m 3 voor trekken van bouillon pocheren warmhouden bereiden van stoofvlees smoren van groenten smelten van chocolade smelten van kaas BEDIENING INDUCTIE ...

Page 26: ...Na gebruik van de wokbrander kan deze nog een tijd heet blijven Zolang de brander heet is blijft er een H in de display staan Menu functie De wokbrander is voorzien van 4 brander standen De brander start automatisch op de wokstand Met de Menu toets kan een braadstand sudderstand of een braadstand XL worden gekozen Een branderstand instellen Druk op de menutoets of houd de menutoets ingedrukt om na...

Page 27: ... langzaam garen en warmhouden van het gerecht Met de twaalf instellingen is zeer precies het gewenste vermogen te regelen XL braadstand Gebruik deze stand voor het braden van gerechten op hoog vermogen Deze stand is geschikt voor grote pannen 28 cm De buitenbrander is ingeschakeld en zorgt met het maximaal beschikbare vermogen voor een egale verdeling van de warmte in de pan BEDIENING WOKBRANDER ...

Page 28: ...rdnekkige vlekken Ook hardnekkige vlekken zijn met een mild reinigingsmiddel bijvoorbeeld afwasmiddel te verwijderen Verwijder waterkringen en kalkresten met schoonmaakazijn Metaalsporen ontstaan door schuiven van pannen zijn vaak lastig te verwijderen Hiervoor zijn speciale middelen verkrijgbaar Verwijder overgekookte voedselresten met een glasschraper Ook gesmolten kunststof en suiker kunt u ver...

Page 29: ...de ren met een vloei baar reinigingsmiddel of een kunststof schuursponsje Gebruik nooit schuurpoeders schuurpads scherpe voorwerpen of agressieve reinigingsmiddelen Messing wokbranderdelen Enkele delen van de wokbrander zijn vervaardigd uit messing Het is normaal dat de kleur van het messing verandert als gevolg van de hoge temperaturen die tijdens het wokken ontstaan Let op Raadpleeg de website w...

Page 30: ...ing stellen verschijnen er tekens in de displays Dit is de standaard opstartroutine Normale werking De ventilatie blijft nog enkele minuten doorwerken nadat de kookplaat is uitgeschakeld Afkoeling van de kookplaat Normale werking De kookplaat geeft bij de eerste kookbeurten een lichte geur af Opwarmen nieuw toestel Dit is normaal en verdwijnt na enkele keren koken Ventileer de keuken U hoort een l...

Page 31: ...n de bediening reageert niet De bridge functie is ingeschakeld Schakel de bridge functie uit zie pagina 21 Foutcode F00 het rode lampje naast de kinderslottoets brandt en het lampje boven de pauzetoets knippert Het bedieningspaneel is vervuild of er ligt water op Bedieningspaneel schoonmaken Foutcode F0 t m F6 en FC De generator is defect Neem contact op met de servicedienst Foutcode F7 De omgevin...

Page 32: ...t Neem contact op met uw installateur Monteer een nieuwe zekering of schakel de zekering weer in Reinig droog de bougie Zet de branderdelen via de centreernokken in elkaar Reinig droog de branderdelen Let er hierbij op dat de uitstroomgaten open zijn Open de hoofdgaskraan Informeer bij uw gas leverancier Sluit een nieuwe gasfles aan of laat de tank vullen Controleer of het gebruikte gas geschikt i...

Page 33: ...t de gashoofdkraan en neem de stekker uit het stopcontact Neem contact op met uw installateur Let op Werp een gebarsten keramische glasplaat niet in de glasbak maar lever deze in bij de milieustraat van de gemeente Overige foutcodes Neem contact op met de servicedienst Resetten foutcode schakel de kookplaat uit aan door middel van sleuteltoets schakel daarna met de slider de gaszone in ...

Page 34: ...n het einde van zijn levensduur niet bij het gewone huisvuil mag worden gevoegd Het toestel moet naar een speciaal centrum voor gescheiden afvalinzameling van de gemeente worden gebracht of naar een verkooppunt dat deze service verschaft Het apart verwerken van huishoudelijke apparaten voorkomt mogelijk negatieve gevolgen voor het milieu en de gezondheid die door een ongeschikte verwerking ontstaa...

Page 35: ...1 Model identification Identificatie van het model Modellkennung Identification du modèle Type of hob Type kookplaat Art der Kochmulde Type de plaque Number of electric cooking zones and or areas Aantal elektrische kookzones en of gebieden Anzahl der elektrischen Kochzonen und oder flächen Nombre de zones et ou aires de cuisson électrique Number of gas burners Aantal gasbranders Anzahl der Gasbren...

Page 36: ...NL 36 ...

Page 37: ...ock 16 Pause 16 Recognising a mode 17 Timer Kitchen timer 17 Switching the audio signal on and off 18 Induction operation Switching on and power setting 19 Residual heat indicator 20 Boost 20 Two cooking zones behind each other 20 Bridge induction 21 Switching off 22 Automatic cooking programs 22 Cooking settings 24 Wok burner operation Ignition and adjustment 26 Residual heat indicator 26 Menu fu...

Page 38: ... the back of the manual The appliance identification card contains all the information that the service technician will need in order to respond to your questions appropriately Operation of the touch sensitive buttons For optimum working place your finger tips flat on the buttons You don t have to push hard The sensors under the buttons are located on the slider s outer ring The touch sensors have...

Page 39: ...on zone front middle operation 6 Pause button key button 7 Bridge induction zone rear middle operation 8 Right induction zone operation 9 Pause button 10 Pause indicator 11 Child lock indicator eco standby indicator 12 Key button child lock eco standby function YOUR GAS INDUCTION HOB 4 5 6 7 8 2 2 1 3 9 10 11 12 6 ...

Page 40: ...ndicator 4 Boost indicator 5 Time reduce button 6 Time increase button 7 Timer kitchen timer 8 Minutes indicator 9 Kitchen timer button timer button 10 Kitchen timer indicator 11 Timer indicator 12 Bridge button front zone only 13 On Off button 14 Menu button 15 Cooking zone indicator 1 3 4 5 6 2 13 9 10 11 8 12 15 14 7 ...

Page 41: ...ttings 3 Settings indicator 4 Searing setting XL indicator 5 Time reduce button 6 Time increase button 7 Timer kitchen timer 8 Minutes indicator 9 Kitchen timer button timer button 10 Kitchen timer indicator 11 Timer indicator 12 On Off button 13 Menu button to select the burner speed 1 3 4 5 6 2 12 9 10 11 8 13 7 ...

Page 42: ...off completely Cooking time limiter If a cooking zone or the wok burner is switched on for an unusually long time it will be switched off automatically Depending on the setting you have chosen the cooking time will be limited as follows Cooking setting The cooking zone or wok burner switches off automatically after 1 and 2 9 hours 3 4 and 5 5 hours 6 7 and 8 4 hours 9 3 hours 10 2 hours 11 and 12 ...

Page 43: ...zone on which the pan is placed is used If you use a small pan on a large zone the power will be adjusted to the diameter of the pan The power will thus be lower and it will take longer before the food comes to the boil Please note Grains of sand may cause scratches which cannot be removed Therefore only put pans with a clean base on the cooking surface and always pick pans up to move them Do not ...

Page 44: ...t get any hotter than the pans themselves food spills cannot burn into the glass Safe The heat is generated in the pan itself The glass top does not get any hotter than the pan This means that the cooking zone is considerably cooler than a ceramic hob for example Once a pan has been removed the cooking zone cools down quickly Induction sounds Ticking sound A light ticking sound is caused by the ca...

Page 45: ...already been used for cooking on a gas hob are no longer suitable for use on an induction hob Only use pans that are suitable for electric and induction cooking with a thick base of a minimum of 2 25 mm a flat base The best pans are those with the Class Induction quality mark Tip You can use a magnet to check whether your pans are suitable A pan is suitable if the base of the pan is attracted by t...

Page 46: ...ction causing the appliance to become too hot This may lead to the glass top cracking and the pan base melting Damage caused by using unsuitable pans or boiling dry is excluded from the guarantee Pan diameter The minimum diameter for the pan base is 12 cm If a pan is too small the zone will not work Pressure cookers Induction cooking is very suitable for pressure cookers The fast reacting cooking ...

Page 47: ...ns are not as stable Wok ring The wok ring supplied with the wok burner provides extra stability for round based woks Only use the wok ring on the wok stand in combination with a round based wok The wok ring may discolour if used on the searing setting Pan support Place the pan support vertically without sliding it over the glass top Use the positioning notches to position the pan support on the g...

Page 48: ...orly functioning burner 1 Place the burner distributor 2 in the burner housing 1 2 Use the positioning notches to place the inner ring 3 on the burner distributor 2 3 Use the positioning notches to place the outer ring 4 on the burner distributor 2 WOK BURNER USE position distributor side view position rings 3 4 2 2 1 1 2 3 4 ...

Page 49: ...hed on but all zones are off You can switch to the standby mode from the eco standby mode or by switching off all separate cooking zones From standby mode you can immediately start cooking Press the on off button for the desired cooking zone or the wok burner or place a pan on an induction zone and select the desired power Switching the hob from the eco standby mode to the standby mode The red lig...

Page 50: ...on When the hob is set to childproof mode it uses just as little energy as when it is in eco standby mode Pause With this pause function you can set the entire hob to pause for 5 minutes during cooking The energy supply to the cooking zone will stop without losing settings However do remember that the cooking zone will stay warm for some time preferably remove delicate dishes from the cooking zone...

Page 51: ... standby mode Not a single light is lit The childproof lock mode The red light next to the key button is lit constantly The pause mode The red light next to the pause button flashes Timer Kitchen timer Please note There s one timer kitchen timer available per cooking zone The timer kitchen timer function can also be used without activating an accompanying cooking zone Switching on the timer Press ...

Page 52: ...t time has passed The kitchen timer alarm goes off and releases an audio signal for a quarter of an hour while decreasing as the time passes while 0 00 and the downwards red arrow keep flashing Press the timer kitchen timer button again or remove the pan from the cooking zone to switch off the kitchen timer alarm Tip You can press and hold the or button to set the desired cooking time quicker Swit...

Page 53: ... the hob is switched on if a pan is placed on an inactive cooking zone the corresponding control will light up and can be operated immediately without operating the on off button If the cooking zone is not switched on within 10 seconds it will switch itself off again The cooking zone can be reactivated by removing the pan and replacing it on the cooking zone or by using the on off button This func...

Page 54: ...e a lower setting Or 2 Press the on off button of the cooking zone you want to switch off You will hear a single audio signal and the display dims The cooking zone has been switched off completely Two cooking zones behind each other The two cooking zones which are behind each other affect each other When both of these cooking zones are switched on at the same time the power is shared between them ...

Page 55: ...s to select the bridge setting br will appear in the display of the rear zone The rear zone can no longer be controlled Both zones are heated according to the setting set in the front cooking zone 4 Slide over the front slide control with your finger clockwise or tap on the slide control with your finger to set the desired setting Switching off the Bridge function 1 Press the bridge button of the ...

Page 56: ... You can set any end time of an automatic cooking program with the aid of the kitchen timer function refer to page 17 The cooking programs are based on regular quantities This function works best with pans recommended by ATAG please refer to www atag co uk These menu functions work best if they are started at the beginning of the cooking process To set an automatic program The cooking zone is swit...

Page 57: ...of a dish is automatically kept at a constant temperature of 70 C 75 C The keep warm setting works best with a lid on the pan Larger quantities and thicker dishes need to be stirred occasionally The maximum time for keeping warm is 8 hours unless a shorter time has been set with the aid of a timer Wok function The wok setting provides an optimal wok temperature for both the oil and the wok After t...

Page 58: ...fat bring a pressure cooker up to pressure use a wok Use settings 9 and 10 to sear meats fry fish fry omelets fry boiled potatoes deep fry Use settings 7 and 8 to fry thick pancakes fry thick slices of breaded meat fry up bacon fry raw potatoes make French toast fry breaded fish cook through pasta fry thin slices of meat roast large pieces of meat Use settings 4 to 6 to cook food through defrost h...

Page 59: ...EN 25 Use settings 1 to 3 to simmer bouillon poach keep warm stew meats simmer vegetables melt chocolate melt cheese INDUCTION OPERATION ...

Page 60: ... burner used may stay hot for several minutes As long as the burner is still hot an H will be visible in the display Menu function The wok burner is equipped with 4 burner settings The burner is set to the wok setting automatically Use the Menu button to select a searing setting simmer setting or XL searing setting Setting a burner setting Press the menu button or press and hold down the menu butt...

Page 61: ...uitable for slow cooking and keeping your dish warm With twelve settings the desired power can be controlled very precisely XL searing setting Use this setting to sear dishes on high power This setting is suitable for large pans 28 cm The outer burner is switched on and with the maximum available power provides an equal distribution of heat in the pan WOK BURNER OPERATION ...

Page 62: ...tubborn stains Stubborn stains can also be removed with a mild cleaning agent washing up liquid for example Remove water circles and limescale with cleaning vinegar Traces of metals caused by sliding pans can be difficult to remove Special products are available for this Use a glass scraper to remove food spills Melted plastic and sugar are also best removed with a glass scraper Please note Never ...

Page 63: ...t be removed with a fluid detergent or a plastic scouring sponge Never use scouring powder scouring pads sharp objects or aggressive cleaning products Brass wok burner parts Some wok burner parts are made of brass It is not unusual to see a change in the colour of the brass as a result of the high temperatures involved in wok use Please note Consult the www atagservices co uk website for additiona...

Page 64: ...everal minutes after the hob has been switched off The hob is cooling down Normal operation A slight smell is noticeable the first few times the hob is used The new appliance is heating up This is normal and disappears after the hob has been used a few times Ventilate the kitchen You can hear a ticking sound in your hob This is caused by the capacity limiter on the front and back zones A soft tick...

Page 65: ...an the control panel Error codes F0 to F6 and FC Defective generator Please contact your service centre Error code F7 The ambient temperature is not good Switch off all heat sources in the vicinity of the cooking plate Error codes F8 and F08 the red light next to the child lock button is lit and the light above the pause button is flashing Appliance overheated Let the appliance cool down and start...

Page 66: ...n dry the spark plug Use the centring notches to put the burner parts together Clean dry the burner parts Make sure that the outflow holes are open Open the main gas valve Consult you gas supplier Connect a new gas bottle or have the tank refilled Check whether the gas used is suitable for the appliance Contact your installer if it is not correct The burner does not burn evenly Burner parts not pl...

Page 67: ...t Contact your installer Please note Do not throw a broken ceramic glass plate in the glass recycling bin but take it to the municipality s waste recycling centre Other error codes Please contact your service centre Reset error code switch the hob off on using the key button Then switch on the gas zone using the slider FAULTS ...

Page 68: ...ely This means that the appliance may not be included with normal domestic refuse at the end of its service life The appliance must be taken to a special municipal centre for separated waste collection or to a dealer providing this service Separate processing of household appliances helps to prevent any potential negative impact on the environment and on health caused by improper disposal It ensur...

Page 69: ... 1 Model identification Identificatie van het model Modellkennung Identification du modèle Type of hob Type kookplaat Art der Kochmulde Type de plaque Number of electric cooking zones and or areas Aantal elektrische kookzones en of gebieden Anzahl der elektrischen Kochzonen und oder flächen Nombre de zones et ou aires de cuisson électrique Number of gas burners Aantal gasbranders Anzahl der Gasbre...

Page 70: ...EN 36 ...

Page 71: ...EN 37 ...

Page 72: ...atieplaatje Stick the appliance identification card here Houd wanneer u contact opneemt met de serviceafdeling het complete typenummer bij de hand When contacting the service department have the complete type number to hand Adressen en telefoonnummers van de serviceorganisatie vindt u op de garantiekaart You will find the addresses and phone numbers of the service organisation on the guarantee car...

Reviews: