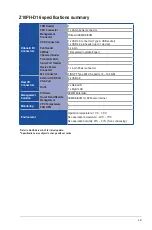


ASUS Z10PH-D16
2-9
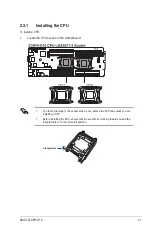
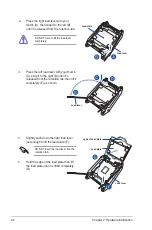
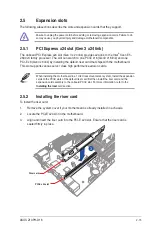
6. Get the CPU.
7.
Align and position the CPU over the
socket ensuring that the triangle mark on
the CPU matches the triangle mark on
the socket box.
8. Install the CPU into the slot.
The CPU fits in only one correct
orientation. DO NOT force the CPU
into the socket to prevent bending the
CPU pins on the socket.
Triangle mark
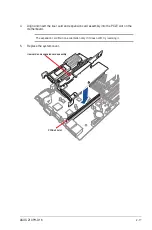
9. Gently push the load plate just enough
to let it sit on top of the CPU.
Do not force to close the load plate as
it may damage the CPU.
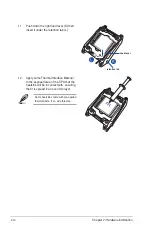
10. Push down the left load lever (H)
ensuring that the edge of the load plate
is fixed and tucked securely under the
lever (I) then insert the left load lever
under the retention tab (J).
The PnP cap pops out of the load plate when the left load lever is inserted into the retention
tab.
Keep the PnP cap. ASUS will process Return Merchandise Authorization (RMA) requests
only if the motherboard comes with the PnP cap on the LGA 2011-3 socket.
PnP cap
egde of Load plate
retention tab
Summary of Contents for Z10PH-D16
Page 1: ...Z10PH D16 Server Motherboard User Guide ...
Page 14: ...xiv ...
Page 22: ...2 4 Chapter 2 Hardware information 2 2 3 Z10PH D16 Motherboard layout ...
Page 58: ...2 40 Chapter 2 Hardware information ...
Page 62: ...3 4 Chapter 3 Powering up ...
Page 152: ...5 38 Chapter 5 RAID configuration ...
Page 180: ...A 2 Appendix A Reference information A 1 Z10PH D16 block diagram ...