V4.3 10/09/19
UD0090
Page 27 of 143
This Document is uncontrolled when printed unless over stamped “CONTROLLED DOCUMENT"
6.
Click the Access button to take you to the next screen.
7.
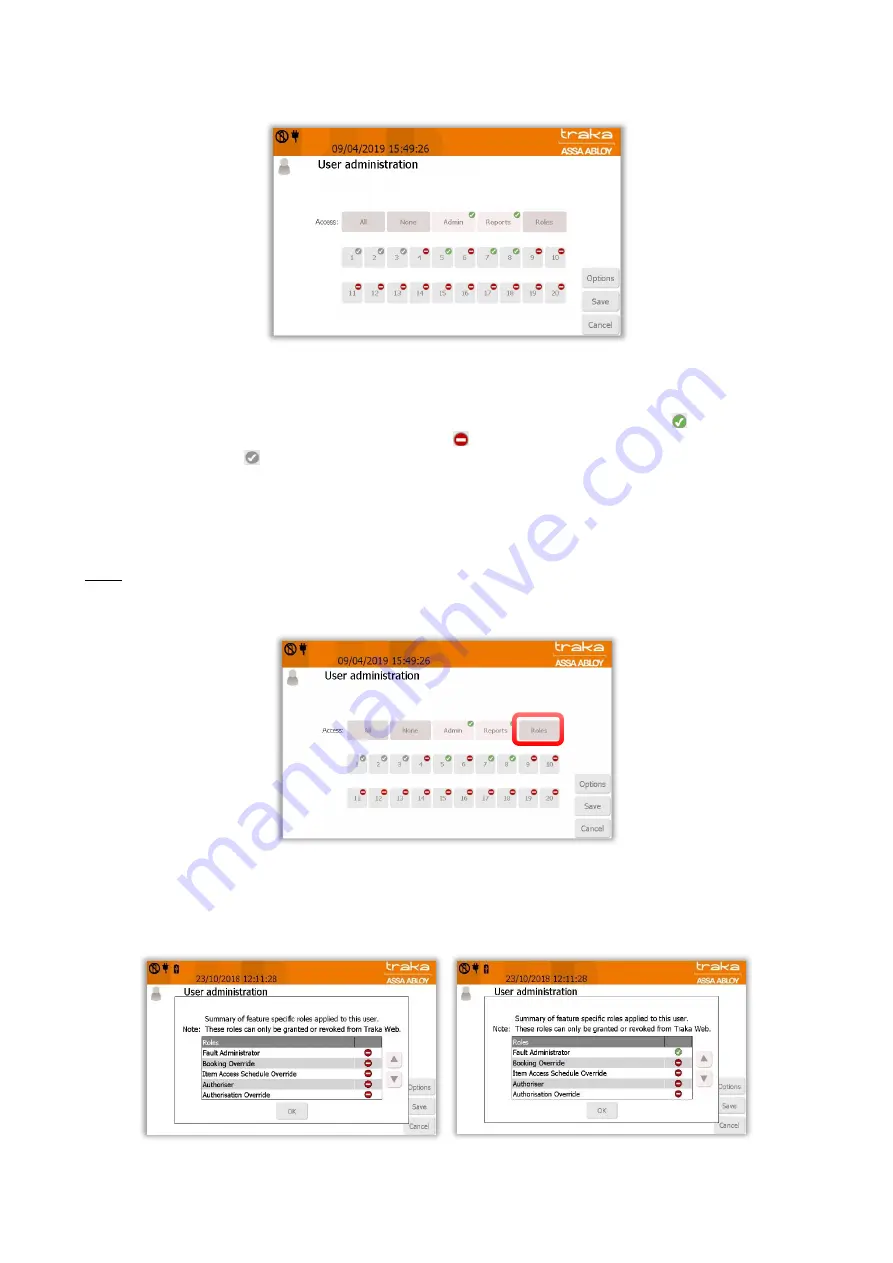
From the Access screen select which items you wish to have access to and whether or not you wish to view and
export key reports. Each of the access buttons on screen corresponds with an item in the cabinet. E.g. The ‘1’
button will only grant or remove access to the item in position 1. The tick and line symbols define whether or
not you have access to the item or not. For example any item with the tick symbol
, indicates that you
currently have access to the item. The line symbol indicates that you do not have access to the item. The
grey tick symbol
, indicates that the user has already been allocated these items through the ‘Item Access
Groups’ within Traka Web.
NOTE:
Item Access Groups is a Traka Web feature. It does not apply to stand-alone systems. For more
information on Item Access Groups, refer to the Traka Web User Guide, UD0018.
Roles
From the User Administration Screen, the Roles option can also be selected.
The Roles function will enable an admin user to view a summary of specific roles that have been allocated to users.
These can only be enabled from Traka Web. For Item Users, no roles will be active. In the example shown below, the
Fault Administrator role is shown as active to that particular user.


