


8
CHAPTER 3. INSTALLATION
This chapter describes procedures for installing the RA773/774UA radar in your ship and precautions to be
observed during installation. Follow the procedure below to install the radar.
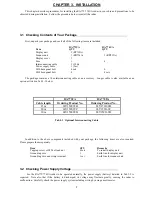
3.1 Checking Contents of Your Package
First, unpack your package and see if all of the following items are included.
RA773UA
RA774UA
Item
QTY
QTY
Display unit
1 (RF718A)
Scanner unit
1 (RB714A)
1 (RB715A)
Display cover
1
Fuse
1
4
Interconnecting cable
1 (10 m)
Power supply cable
1 (2 m)
M10 hexagonal bolt
4 sets
0
M12 hexagonal bolt
0
4 sets
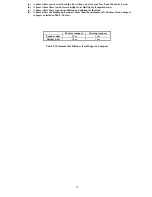
The package contains a 10m interconnecting cable as an accessory. Longer cable is also available as an
option as listed in Tab.3-1 below.
Tab.3-1 Optional Interconnecting Cable
In addition to the above components included with your package, the following items are also required.
Please prepare them separately.
Item
QTY
Remarks
Tapping screw or M5 bolt and nut
6 sets
To install display unit
Grounding wire
1
Earth line for display unit
Grounding wire and crimp terminal
1 set
Earth line for scanner unit
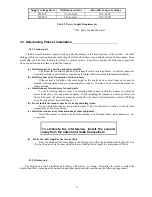
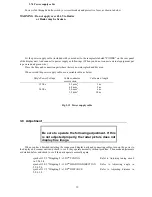
3.2 Checking Power Supply Voltage
For the RA773/774UA radar to be operated normally, the power supply (battery) detailed in Tab.3-2 is
required. Note also that if the battery is discharged, its voltage may fluctuate greatly, causing the radar to
malfunction. Carefully check the power supply system including wiring by using a multi-meter.
RA773UA
RA774UA
Cable length
Ordering Product No.
Ordering Product No.
15m
24Y159099B
24Y159169B
20m
24Y159099C
24Y159169C
30m
24Y159099D
24Y159169D


