background image

34

With the 

ORCHESTRA

, you can save the transition settings of any 

layer into 3 handy User Effects which can be called back and edited 

at any stage. To do this, proceed as follows:
1/ 

 Select a layer and configure its in and out transitions via the 

Element

 page.

2/ 

 Once all the desired settings have been made, press

 Save To 

User Effect

 1 to store the settings into the User Effect memory.

3/ 

 To recall the User Effect, press the

 [USER EFFECT 1]


button 

in the Transition section of the 

ORCHESTRA

. The User Effect 

will appear as you have set it up on your preview output.

4/ 

 press the 

[TAKE]


button to view the result on your Main output.

* NOTE *:

 To quickly save a User effect, in the Transition Section, 

press and hold a User Effect Button.

The 

[TAKE]


button of the 

ORCHESTRA

, allows users to bring the 

preview screen onto the Main screen. Typically, a user will work on 

a preset on the preview output, then switch that preset to the Main 

output by pressing the 

[TAKE]


button.

The smoothly weighted brushed aluminium T-Bar of the 

ORCHESTRA

allows users to seamlessly bring the preview screen presets, to the 

Main output. Typically, a user will work on a preset on the preview 

output, then bring that preset to the Main output by using the T-Bar.

* NOTE *: 

Elegant transitions can be achieved using the T-Bar by 

leaving it in the middle of its trajectory, resulting in Main and preview 

outputs  overlapping.  However,  the 

ORCHESTRA

  will  not  let  you 

access any settings or changes on any layer or source if the T-Bar 

has not completed its course.

* NOTE *:

 The TAKE button is indicated in red, and will flash when 

pressed indicating the switching process.

User Effects

Take

T-Bar

5-8. TRANSITIONS

* NOTE *: 

Taking between presets which exceed the slave device’s 

ressources (too many layers for the device to handle simultaneously) 

is  called  a 

Sequenced  Take

.  Typically,  in  a  Sequenced  Take,  the 

device  will  execute  all  the  closing  effects  of  layers  which  are  not 

in the following preset. Then, it will execute the cross effects of the 

layers  common  to  both  presets,  and  finally  execute  the  opening 

effects  of  the  new  layers  in  the  following  preset.  In  this  case,  the 

T-Bar is not available.

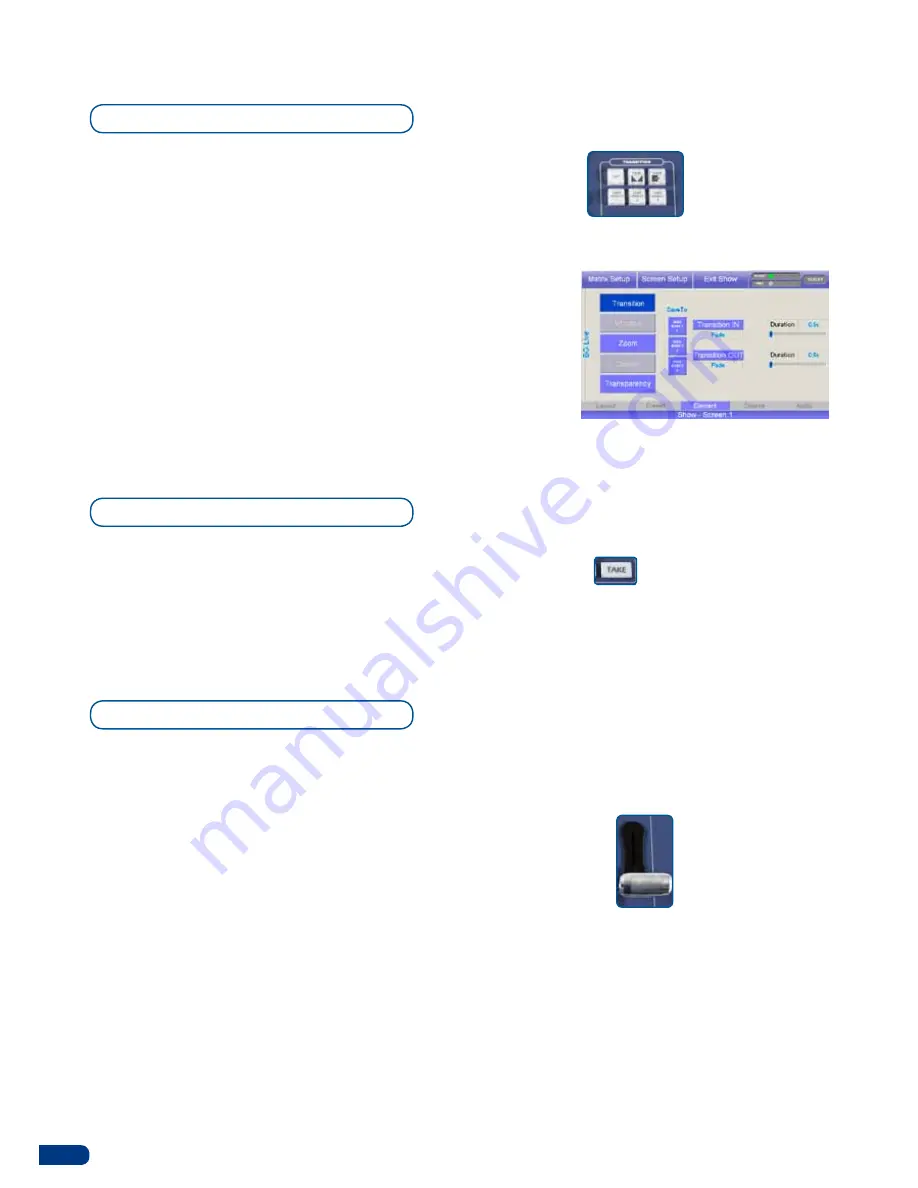
Transition: 

Selection of 

Effects and User Effects.

>  

Take: 

press the 

TAKE


button  to  display  the 

pre-selected  sources 

onto the MAIN output 

with  the  selected 

effects.

>  

T-Bar

 to control 

effect level.

Summary of Contents for ORCHESTRA

Page 1: ...version 3 10 USER MANUAL...

Page 2: ...Smart Edge Smart Quad or Di VentiX II unleash all your creativity for a new experience in show and event management by Analog Way THANK YOU TABLE OF CONTENTS 1 INTRODUCTION 5 1 1 WHAT IS THE ORCHESTRA...

Page 3: ...ection Preset Memory section Preset Edition section User configuration Screen setup Position Layer Settings Video Out configuration Source configuration Screen section User Effect section System confi...

Page 4: ...D TIPS 36 38 3 Adding a Live Background Adding a Frame Background Clearing a Live Background Clearing a Frame Background Adding a PIP Adding a logo User Effects Loading a Preset Memory Soft Edge setup...

Page 5: ...SOFT EDGE BLENDING HOW TO CONTACT US INFORMATION ON DISPOSAL CONTACT INFORMATION 46 WARRANTY AND SERVICES INFORMATION 45 9 1 ANALOG WAY LIMITED WARRANTY 9 2 SERVICES AND RMA 8 1 SOFT EDGE SETUP 8 2 S...

Page 6: ...e during your presentation Any last minute modification is easy thanks to the direct input output selection access Also equipped with a USB port the complete configuration of your events can be saved...

Page 7: ...le waiting for confirmation Finally some of the ORCHESTRA buttons SOURCE PREVIEW for example will turn pale yellow when they have been selected are active but are not currently being worked with PIP a...

Page 8: ...g guidelines The equipment connected to the network must have a release system easily accessible and located outside the unit Unplug the power cord do not pull on the power cord but always on the plug...

Page 9: ...ranch de la prise murale Appliquer les consignes suivantes Le mat riel reli demeure au r seau doit avoir un dispositif de sectionnement facilement accessible qui doit tre incorpor l ext rieur de l app...

Page 10: ...limentazione Per assicurarsi che totalemente l apparecchio non pi collegato il cavo deve essere disconesso della presa murale Seguire le instruzioni seguenti Il materiale collegato a residenza alla re...

Page 11: ...dieses Kabel aus der Netzsteckdose ausgesteckt werden Bitte beachten Sie die folgenden Hinweise Wenn Ger te dauerhaft am Netz bleiben m ssen sie ber eine leicht zug ngliche Trennvorrichtung verf gen d...

Page 12: ...be de ser desconectado de la toma de corriente Aplicar las siguientes consignas El material conectado a residencia a la red inform tica debe de tener un dispositivo de seccionamiento f cilmente accesi...

Page 13: ...x Power supply cord 1 x Rack mount ruler and screws 2 x Adjustable feet 1 x Pen 1 x Quick Start Guide PDF version 1 x User Manual PDF version Download on our website www analogway com 1 On Off switch...

Page 14: ...midity 10 to 80 non condensing Input voltage range 100 240 VAC 50 60 Hz Typical consumption 50 W CE Compliancy test following EN 55022 2006 A1 2007 EN 55024 1998 A1 2001 A2 2003 EN 61000 3 2 2006 EN 6...

Page 15: ...of the ORCHESTRA allows you to quickly access position size and zoom settings for any adjustable layer PIPs Live Backgrounds and position parameters for Logos The settings can be changed with the ORC...

Page 16: ...or modify all elements on screen You can also create use and rearrange PIPs logos and frames create store and recall user presets or simply toggle Main and Preview selection amongst other features Th...

Page 17: ...ose the user you have just created and press the OK button again The ORCHESTRA will now display its home page The ORCHESTRA System Configuration page allows you to parameter the IP address of the ORCH...

Page 18: ...se keyboard brightness 3 Wriggle and turn the joystick then let it return to its initial position If need be press the Calibrate button which will adjust the neutral position of the joystick precisely...

Page 19: ...he device in in this case Mixer Mode NOTE Screen parameters other than Edit Devices will not be available until a device is stored into a Screen and activated 3 Press Edit Devices and press Add the to...

Page 20: ...ve device video out card then select the output format resolution output rate and signal type On certain devices you can also disable enable the HDCP detection on the outputs 3 Press Pattern to genera...

Page 21: ...activating a source will result in an inaccessible button on the ORCHESTRA front panel Audio configuration Source configuration Soft Edge Setup The Edit Soft Edge tab will be available if the connecte...

Page 22: ...ss Pattern to go to the Patterns tab and select the appropriate patterns to setup and fine tune your Soft Edge image Choose amongst None V vertical Grey Scale H horizontal Grey Scale V vertical Color...

Page 23: ...the OK button to return to the Screen Setup page The Logos Frames page allows you to capture and store logos and frames see also Frame Background 1 In the Screen Setup page of the ORCHESTRA press Log...

Page 24: ...o allows you to reset a device to its default values or erase all image settings present on the device To setup a tally signal with the ORCHESTRA 1 On the Screen Setup page of the ORCHESTRA press Cont...

Page 25: ...element Any selected layer Frame Live Background PIP Logo on the ORCHESTRA is represented graphically on the Settings section tactile screen as a yellow rectangle outline Information on the layer is w...

Page 26: ...ter the Element page or turn the last knob of the Settings section On the Element page you will find a list of several accessible tabs The Transition tab default which allows you to determine how a la...

Page 27: ...follows 1 Press the BKGND LIVE button to select the Live Background you wish to clear from your Screen 2 Press the CLEAR button once In the ORCHESTRA Settings section the touch screen will ask to con...

Page 28: ...t the source you want to use as a Background Frame Press a Source Preview button 1 to 8 The chosen image should now appear on your Preview output 3 Press the TAKE button to view the result on your Mai...

Page 29: ...and adjust the zoom in the PIP with the help of the joystick see also Using The Joystick 3 When you have set the PIP zoom press the TAKE button to view the result on the Main output To select the PIP...

Page 30: ...Save load and modify presets Various layer properties are also available in this section CLEAR ALL button delete all layers Please refer to our user manual for all the functions in this section To add...

Page 31: ...OGO button or press on the LOGO on the touch screen of the ORCHESTRA Selecting a Logo Manipulating a Logo The Logo depth allows users to move Logos up or down through the successive layer hierarchy In...

Page 32: ...tra you have up to 64 presets memory Each preset memory can save at the given time the exact situation for 6 screens To manage to presets memory select your screens in the screen section make your pre...

Page 33: ...pages To load an existing Preset Memory at the begining or at any stage during your show proceed as follows 1 Press the LOAD FROM PRESET button 2 Short press on a preset loading of all information sa...

Page 34: ...xt operation without affecting the contents of any screens press and hold a single screen button TIP The screen which is currently open for editing and displayed on the touchscreen will have a blinkin...

Page 35: ...n presets to the Main output Typically a user will work on a preset on the Preview output then bring that preset to the Main output by using the T Bar NOTE Elegant transitions can be achieved using th...

Page 36: ...ct For example a PIP with a slide in from left effect will simply appear onscreen in its final position without executing the effect The Init T Bar button will help the unit to reduce theT Bar delay w...

Page 37: ...hich should now display the matrix you just configured 7 Press the OK button again to return to the ORCHESTRA show page Once the matrix has been added you must add the slave device to a Screen 1 Selec...

Page 38: ...urn to the Screen Setup page So far you have set a series of links between your slave device and a matrix but you are still limited to the slave device s input switching source 1 to slave device input...

Page 39: ...quipment In an effort to make the use of our machines the most pleasant experience possible the Analog Way team is constantly aiming to create easy to follow examples update information and furnish ou...

Page 40: ...w out Preview out Computer Live Background Camera Screen 2 3 Camera Screen 1 Camera Screen 2 3 Laptop 1 Laptop 2 dvd blu ray Screen 1 OPT 8044Vo splitter screen 2 screen 1 screen 3 TRIPLE SCREEN PRESE...

Page 41: ...uter Live Background Camera Screen 2 3 Camera Screen 1 Camera Screen 2 3 Laptop 1 Laptop 2 dvd blu ray Screen 1 OPT 8044Vo PIP 2 PIP 1 PIP 3 BACKGROUND SOFT EDGE PRESENTATION USING THE ORCHESTRA WITH...

Page 42: ...uter Live Background Computer PIP 1 Camera PIP 2 3 SOURCES Camera pip 1 Camera PIP 2 3 Laptop 1 Laptop 2 dvd blu ray Live Background 2 Recording Device PIP 1 PIP 2 PIP 1 PIP 3 BACKGROUND SOFT EDGE PRE...

Page 43: ...to do the setup in the right order as follows 1 Switch ON your Unit s 2 In the Control menu run an Erase Memories on all units 3 In the Control menu run a Default Values on all units 4 If you wish to...

Page 44: ...he middle of the Soft Edge If you can not get a perfectly straight line set the covering as best as possible and then adjust the projectors with their Lens Shift to get a perfectly straight line 43 Co...

Page 45: ...ack level adjustments thin white columns appear on the left and right edges of the overlapping area you can correct them by adjusting the Left and Right areas in the Soft Edge Black Levels Left Right...

Page 46: ...on your location See map below for information on which regional maintenance center you depend on RMA Conditions 1 Prior to returning any item you must receive a Return Material Authorization RMA num...

Page 47: ...ay com Before calling your regional maintenance center please gather the following information Serial number of the unit Firmware version look in CONTROL MENU VERSIONS Model reference ORC50 Descriptio...

Page 48: ...e subject to change without notice The illustrations and screens described in this manual may be exaggerated or simplified for easy recognition and may be slightly different from the actual unit ANALO...

Reviews: