


74
WebConsole - Security Options
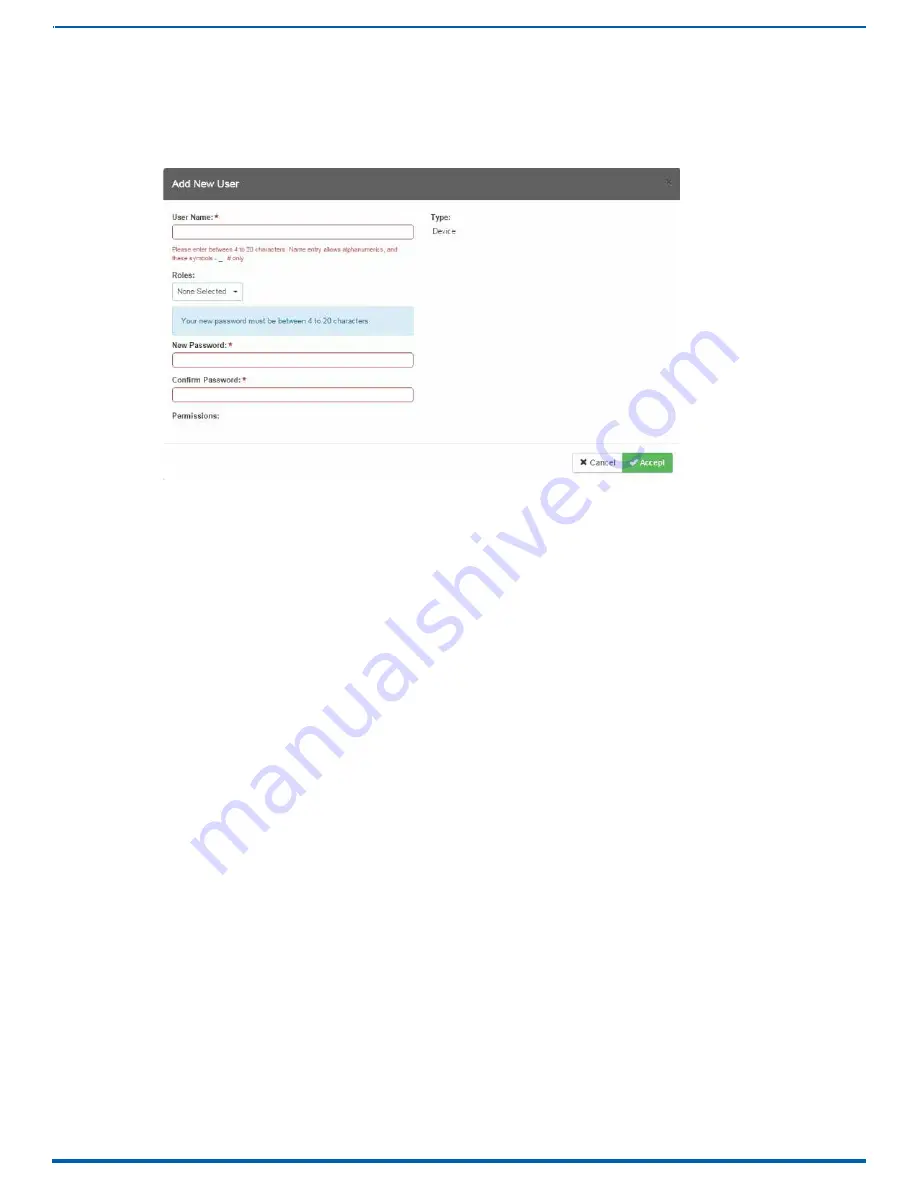
Adding a New User
TIP: For a quicker configuration, it is recommended to define all roles and permissions before defining users.
1. Select the
Users
option (in the
Security
section) to view the User Security Details page.
2. Click the
Add User
button (see FIG. 78) to access the
Add New User
FIG. 79
Add New User
3. In the
User Name
field, enter a unique name for the new role.
The name must be a unique alpha-numeric character string (4 - 20 characters), and is case sensitive.
The words “
administrator” and “NetLinx”
cannot be used since they already exist by default.
NOTE:
The Type field indicates the type of account for the user. This field lists either Normal or Device. Normal users are any
users which access the web interface, Telnet, or NetLinx Studio, and must be assigned to a Role with those permissions assigned
to it. Device connections are required for machine to machine over ICSP, such as touch panels and ICSLan device control boxes.
Device-type users are stored only in the local user database and are able to be modified even when a remote directory service is
enabled.
4. From the
Roles
options menu, choose from a list of roles and associate the rights of the role to the new user. You can assign up
to 5 roles to a user.
5. Enter a user password in both the
Password
and
Password Confirm
fields. The password must conform to the rules set by the
Password Complexity level set on the User account. See the
section on page 64 for more information.
6. Select
Force Password Change
if you want the user to change its password on its next login. This option is not available for
Device users.
7. Click the
Accept
button to save your changes to the Master.
NOTE:
Any security changes made to the Master from within the web browser are instantly reflected within a Terminal session
without the need to reboot, unless otherwise notified.
Instruction Manual - Incite Digital Video Presentation Systems


