


Upgrading Panel Firmware
14
Battery Replacement & Firmware Upgrade - 5.2” Modero ViewPoint Touch Panels
Upgrading the Firmware on the Panels (NetLinx Studio)
Use the
Firmware Transfers
function in NetLinx Studio to send the new Firmware files to the panels:
MVP-5100 and MVP-5150
1.
In NetLinx Studio, select
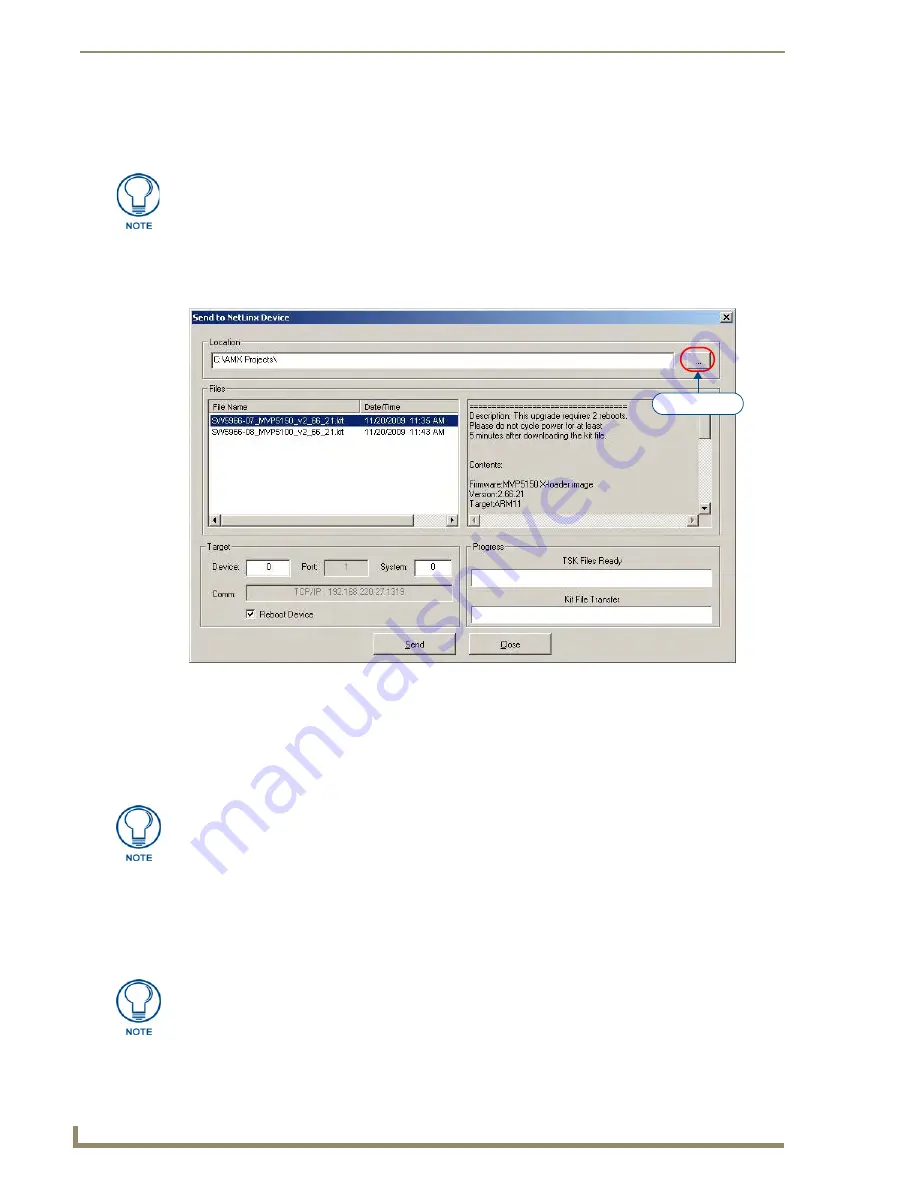
Tools > Firmware Transfers > Send to NetLinx Device
to open the
Send To
NetLinx Device
dialog (FIG. 8):
2.
Click the Browse (
...)
button in the upper-right corner of this dialog to locate and select the directory that
contains the KIT file that you will send to the Touch Panel (in the
Browse For Folder
dialog).
When you select
OK
in the
Browse For Folders
dialog, all KIT files that are present in the selected
directory are listed in the
Files
list, as shown in FIG. 8.
3.
Select the appropriate KIT file from the File list, and set the
Target
information:
a.
Enter the Device, Port and System numbers for the target Touch Panel in the text fields.
b.
Review the communications settings indicated in the
Comm
(read-only) field. If these are not correct,
set the
Master Communication Settings
(see the
Connecting to a NetLinx Master Via TCP/
IP
section on page 3).
c.
Leave the
Reboot Device
checkbox selected (enabled).
4.
Click
Send
to begin the file transfer. Transfer progress is indicated in the
Kit File Transfer
progress bar.
Ensure the Touch Panel is on wall power during the Firmware Upgrade
process.
FIG. 8
Send To NetLinx Device dialog
Browse button
If you do not already know the Device Number assignment for the Touch Panel, you
can get it from the panel’s online Protected Setup page. See the Determining the
Current Panel Firmware Version
section on page 11
for details.
The text window in the right-side of the dialog provides details specific to the selected
KIT file. Review this information carefully before initiating the Firmware File transfer.
Summary of Contents for Modero Viewpoint MVP-5200i
Page 4: ......


