Installation
20
4" Color Touch Panels with Audio
4.
Remove all screws from the rear of the unit (
B
in FIG. 18 on page 19).
5.
Firmly grab the front and rear of the panel and flip it back to where the entire unit is lying flat
on a level surface.
6.
Carefully pull the faceplate (
A
in FIG. 18 on page 19) outwards until it comes away from the
rest of the main AXT unit (
B
in
FIG. 18 on page 19).
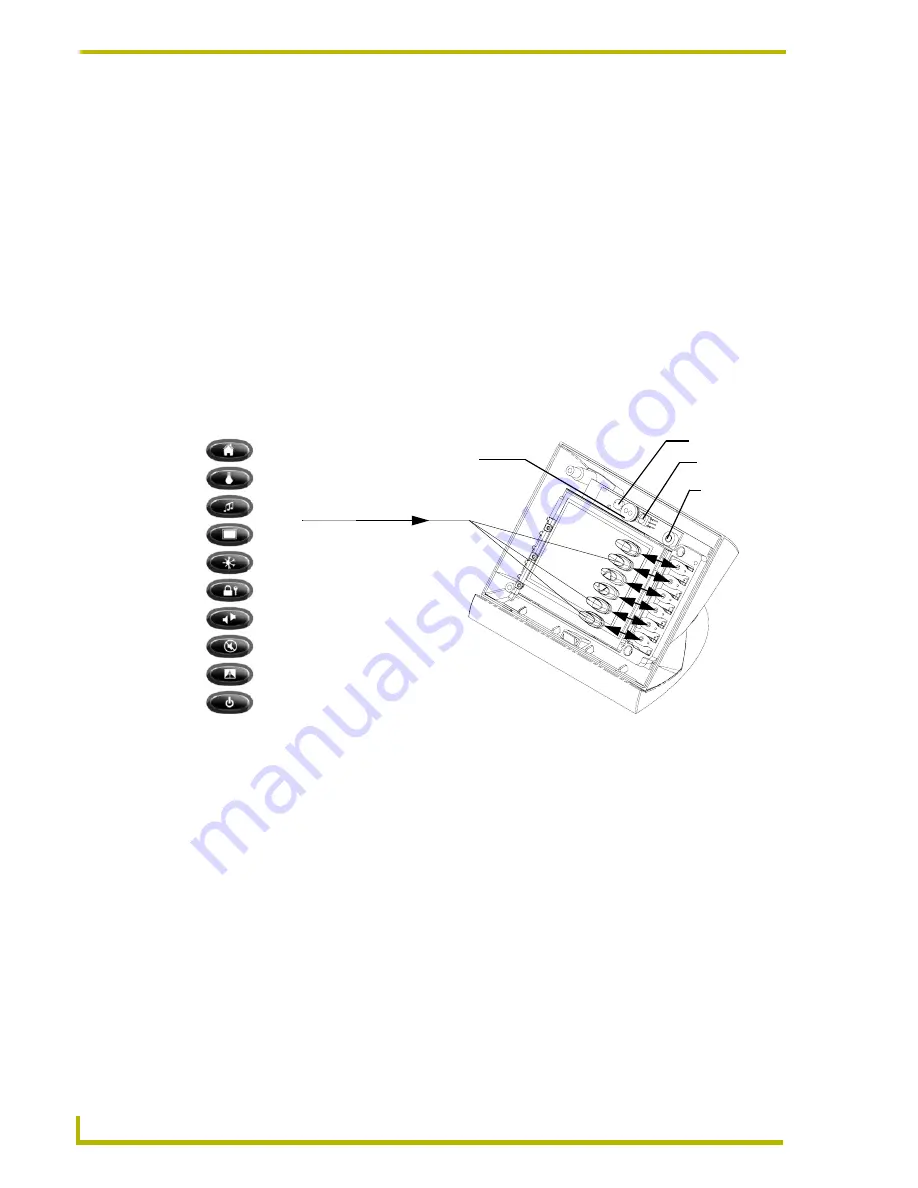
Refer to the following section for more information on removing/replacing the pushbuttons and
reconnecting the faceplate/bezel to the main AXT unit
Removing and replacing AXT pushbuttons
1.
Carefully remove any of the blank pre-installed plastic pushbuttons by pushing the top rim of
the button towards the LCD panel and applying a small amount of force.
2.
Carefully insert the desired replacement pushbutton (up to 12 other pre-labeled buttons come
in the accessory button kit) by grabbing the button at either sides, inserting the attachment pegs
into their respective connector holes, and pressing down firmly (FIG. 19).
3.
Carefully place the faceplate (
A
in FIG. 18) back onto the Main AXT unit (
B
in
FIG. 18).
Make sure to align the Light, IR receiver, and PIR Motion sensor locations to their respective
openings on the front bezel/faceplate.
4.
Firmly grab the front and rear of the panel and flip the AXT panel over.
5.
Place the LCD back onto a soft cloth to prevent scratching during the removal process.
6.
Insert all screws back into the screw holes on the rear of the unit (
B
in FIG. 18).
7.
Secure the screws by inserting a grounded Phillips screwdriver into the screw holes and turn
the screws clockwise.
8.
Firmly grab the front and rear of the panel and flip it back to where the entire unit is lying flat
on a level surface.
FIG. 19
Plastic pushbutton replacement locations on AXT
PIR (Passive
Infrared Sensor
IR Receiver
Light Sensor
Microphone
Standard pushbutton
icons (come in 3 colors
Menu
Lights
Audio
Video
Environment
Security
Intercom
Mute
Drapes
Power
Black, Beige, and White)


