


www.amulethotkey.com |
17
5. Setting up the DXZC-AM zero client
5
This section describes how to set up your DXZC-AM zero client.
For port descriptions, see
Important!
Always connect the power supply last, after
connecting the peripherals!
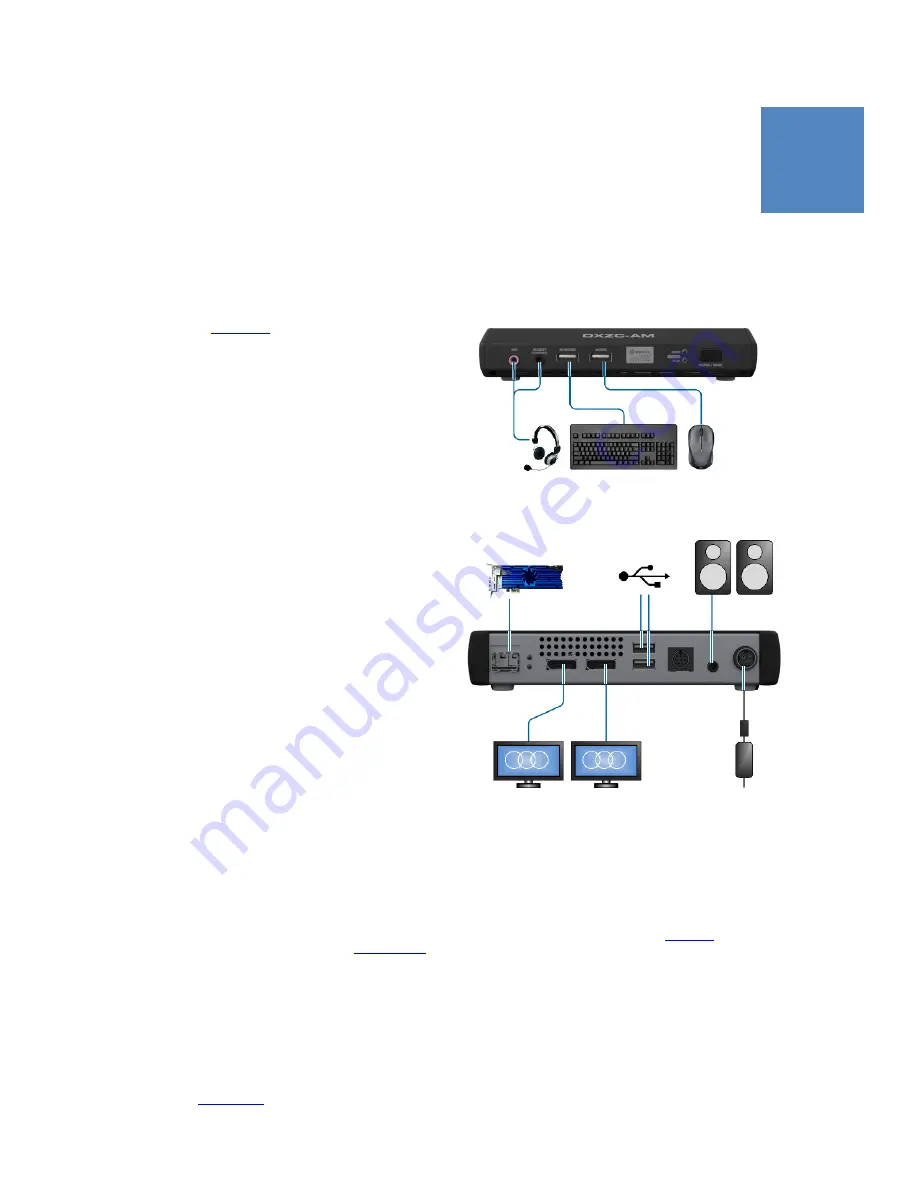
5.1 Connect the keyboard, mouse and monitors
A zero client is always located near to the keyboard, mouse and
monitors.
■
Keyboard and mouse:
You can use any USB sockets, on the
front or rear panel, for the keyboard and mouse. (Although
the front panel USB sockets are labelled ‘keyboard’ and
‘mouse’, they can accept any USB device.)
■
Monitors:
You can use any rear panel video ports for the
monitors. The DXZC-AM supports one or two monitors.
■
Audio:
Use the front panel audio sockets to connect a
headset or headphones and microphone. You can also
connect speakers to the rear panel audio output socket.
Alternatively, you can connect USB audio devices to any
USB socket on the front or rear panel.
5.2 Connect to a PCoIP host
The DXZC-AM connects to a remote PCoIP host via the network
port.
DXZC-AM zero clients support the following types of PCoIP host:
■
Compatible TERA2 PCoIP host in hardware.
■
Compatible TERA1 PCoIP host in hardware,
■
Compatible PCoIP host in software
(VMware® View™ 4 and above)
Note:
For details about the available connection methods
between the DXZC-AM and a PCoIP host, see
5.3 Connect the power supply
Always connect the power supply last, after connecting the
peripherals. Likewise, always disconnect the power supply first,
before disconnecting any peripherals.
After powering up the zero client, you are ready to establish a
new PCoIP session. See
DXZC-AM front
1
2
7
4
3
DXZC-AM rear
5
6
DXZC-AMC connections
1
Headset.
2
USB keyboard and mouse.
3
Network connection to
remote PCoIP host.
4
USB device(s).
5
Speakers.
6
DisplayPort
connections to monitors.
7
PSU.
For DXZC-AMC connections, see
.